If you choose the right one, you can elevate your home with a beautiful garden gate that adds charm, privacy, and personality. It becomes one of the first things people notice, and it can make your outdoor space feel more complete.
The best part is that there is no single “right” style. Some gates feel classic and warm. Others look modern and clean. Some are simple, while others are detailed and decorative. In this article, you will learn about the most popular garden gate materials and styles, plus how to choose one that fits your home and garden.
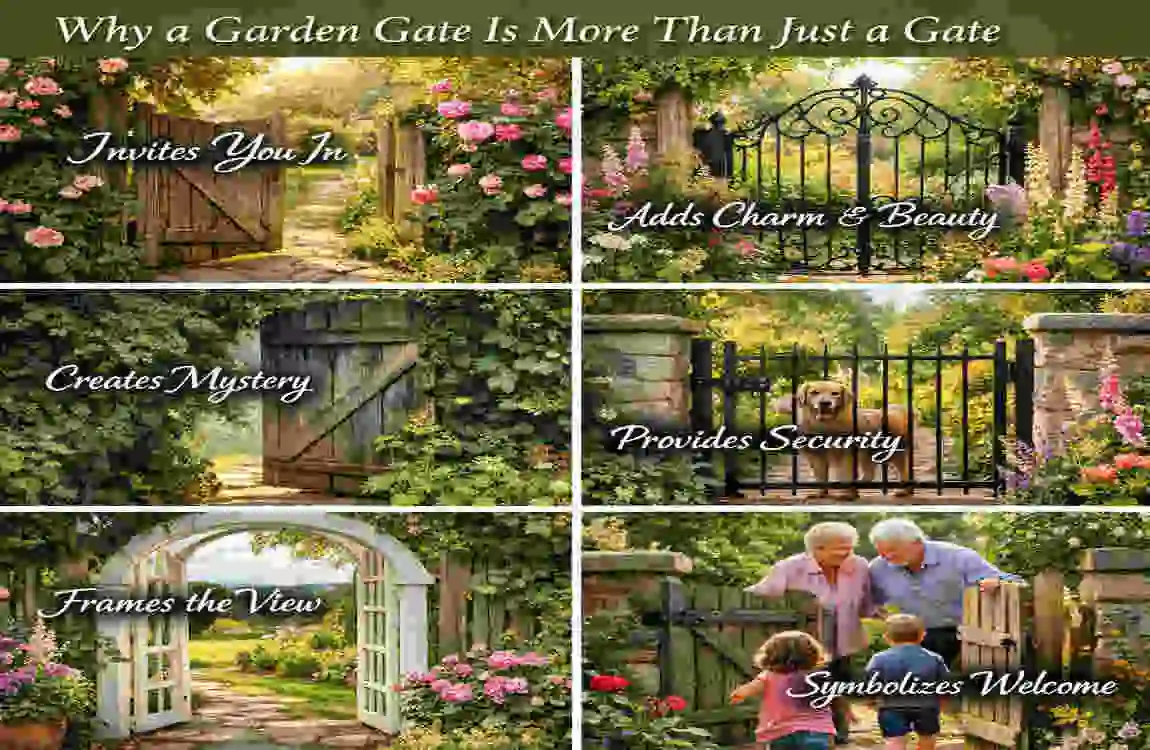
Why a Garden Gate Is More Than Just a Gate
It Creates the First Impression
Your garden gate is often the first feature people see before they even reach your front door. That means it helps set the tone for your whole property.
A worn-out gate can make a home feel less cared for. A well-chosen gate can do the opposite. It can make your home look inviting, polished, and thoughtfully designed.
It Adds Privacy and security
A garden gate is not only about style. It also has a job to do.
It helps mark the edge of your space, keeps unwanted visitors out, and gives you a little more privacy. If you have children or pets, it can also help create a safer outdoor area.
It Supports the Look of Your Garden
The right gate can pull everything together. It can match your fence, your plants, your walkway, and even the style of your house.
That is why people often say you can elevate your home with a beautiful garden gate. It is a small feature, but it can make a big visual difference.
It Fits Different Home Styles
A traditional home may look best with a wooden or wrought iron gate. A modern home may need something sleek and simple. A cottage or farmhouse may suit a rustic gate with a more natural look.
The point is simple: the gate should feel like it belongs.
Popular Garden Gate Materials and Their Appeal
Wooden Garden Gates
Wood is a favorite because it feels warm, natural, and timeless.
It works well in gardens with lots of plants, stone paths, or classic landscaping. You can paint it, stain it, or leave it natural. That makes it very flexible.
The main thing to remember is that wood needs care. It can weather over time, so sealing and regular upkeep are important.
Metal Garden Gates
Metal gates, including steel and aluminum, often look sleek and strong.
They are a great choice if you want a gate that feels secure and low-maintenance. Many metal gates also include decorative patterns, so they can still look elegant.
They suit modern homes especially well, but they can also work with older properties if the design is right.
Vinyl and Composite Gates
These are good choices if you want something easy to care for.
They stand up well to weather and require less maintenance than wood. They are often used in homes that need a clean, simple look.
They may not have the same natural charm as wood, but they are practical and long-lasting.
Wrought Iron Gates
Wrought iron is known for its timeless beauty.
It often features curves, scrolls, and intricate patterns that set it apart. If you want your gate to feel elegant or dramatic, this is a strong option.
It is especially nice for formal gardens, old-style homes, and properties that need a more classic look.
Material Comparison Table
Material Best For Main Benefit Maintenance
Wood Traditional and natural gardens Warm, classic look Medium to high
Metal Modern or secure spaces Strong and stylish Low to medium
Vinyl Simple and practical homes Weather-resistant Low
Composite Busy homeowners Durable and clean-looking Low
Wrought Iron , elegant or formal gardens , decorative and timeless , medium
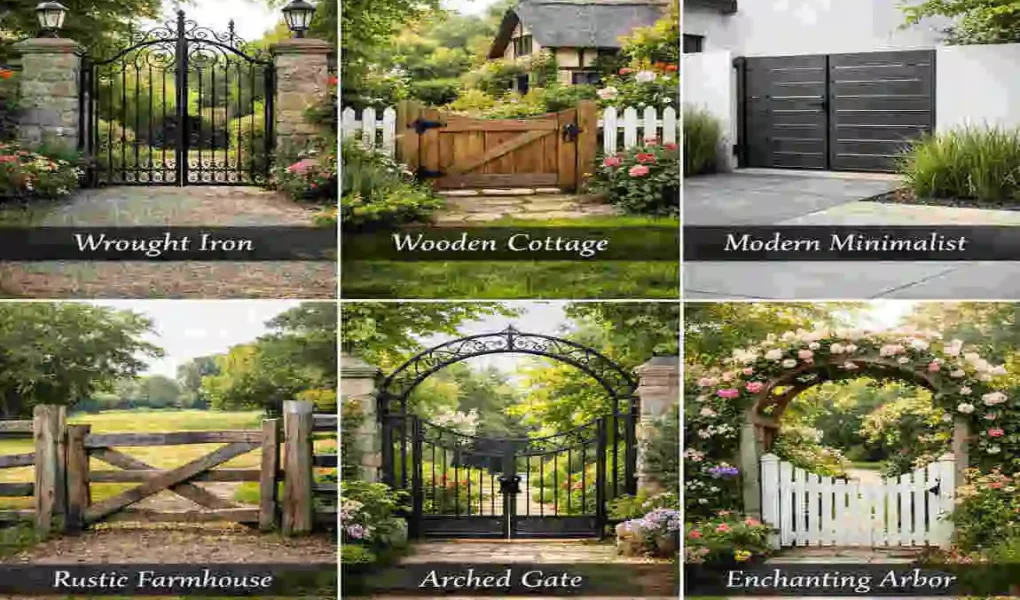
Exploring Garden Gate Styles
Traditional Garden Gates
Traditional gates often use arched tops, wood frames, and decorative details.
They feel familiar and graceful. If your home has a classic design, this style can blend in beautifully. It can also work well for Victorian, country, and older properties with charm.
These gates usually feel soft and welcoming rather than sharp or industrial.
Modern and Contemporary Gates
Modern gates are all about clean lines and simple shapes.
They often use flat panels, smooth surfaces, and minimal decoration. This makes them perfect for homes with modern architecture or gardens with geometric designs.
If you like a neat and uncluttered look, this style may be the best match.
Rustic and Farmhouse-Style Gates
Rustic gates bring in a sense of comfort and countryside charm.
They may use weathered wood, barn-style shapes, or iron accents. These gates feel relaxed and lived-in, which makes them ideal for cottage homes, rural properties, and farmhouse settings.
They do not need to look perfect. In fact, a little character often makes them better.
Artistic and Custom-Designed Gates
If you want something truly personal, a custom gate can be a great choice.
These gates may feature carved details, unique shapes, or special materials. Some people even add creative patterns or artistic finishes to make the gate stand out.
This style is ideal if you want your gate to feel like a statement piece.
Japanese-Inspired Zen Gates
Zen gates are simple, calm, and balanced.
They often use natural materials like bamboo or wood and avoid heavy decoration. The result is a peaceful look that works well in quiet gardens and meditation spaces.
If your goal is to create a relaxing outdoor atmosphere, this style can be a beautiful fit.
Ornate and Decorative Gates
Ornate gates are made to impress.
They usually include detailed ironwork, carved features, or elegant curves. These gates feel formal and luxurious, so they are often used in large homes or formal garden spaces.
If you want your entrance to feel grand, this style can help you do that.
How to Match the Style to Your Home
A good garden gate should feel like part of the home, not an afterthought.
Here are a few simple tips:
- Match the gate to your home’s architecture
- Keep the design in line with your fence and garden
- Think about the mood you want to create
- Choose a style that supports both beauty and function
When the style fits, the whole outdoor space feels more complete. That is one of the easiest ways to elevate your home with a beautiful garden gate.
Choosing the Right Garden Gate for Your Needs
Think About Size and Space
A gate should fit the opening properly and feel balanced. A very large gate can overwhelm a small yard. A tiny gate may look out of place on a bigger property.
Measure carefully and think about how the gate will look from the street and from inside the garden.
Balance Looks and Purpose
Some gates are mostly decorative. Others are meant to improve privacy or security. Many gates need to do both.
Before choosing, ask yourself what matters most. Do you want style, safety, privacy, or easy maintenance? Once you know that, the decision becomes much easier.
Consider Your Climate
Weather matters more than many people realize.
If your area gets heavy rain, strong sun, snow, or humidity, choose a material that can withstand it. Wood may need more care in wet climates. Metal may need rust protection. Vinyl can be a smart choice in harsher conditions.
Keep Your Budget in Mind
Some gates cost more because of the material, the design, or custom work.
It helps to think beyond the first price. A cheaper gate may need more repairs later. A better-quality gate may save time and money over the long run.
Tips for Maintaining Your Garden Gate
Care Depends on the Material
Different gates need different care.
- Wood: stain, seal, and check for rot
- Metal: watch for rust and touch up paint
- Vinyl: clean with mild soap and water
Check It Seasonally
Look at your gate at least a few times a year.
Make sure hinges work well, latches stay secure, and no parts are loosening. After winter or heavy rain, take a closer look for damage.
Keep It Clean and Protected
Dirt, moisture, and sun can wear a gate down over time. A little care helps it stay attractive and useful.
When you maintain it well, you continue to elevate your home with a beautiful garden gate for years to come.
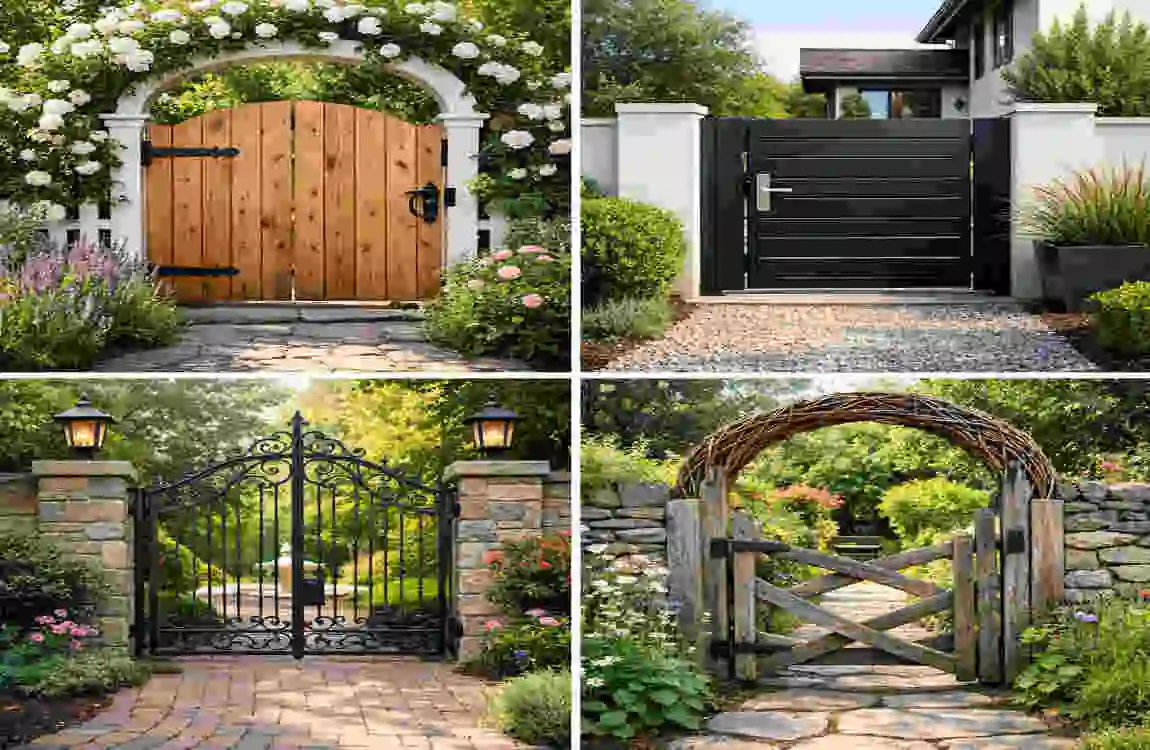
Inspiration from Real-Life Garden Gate Ideas
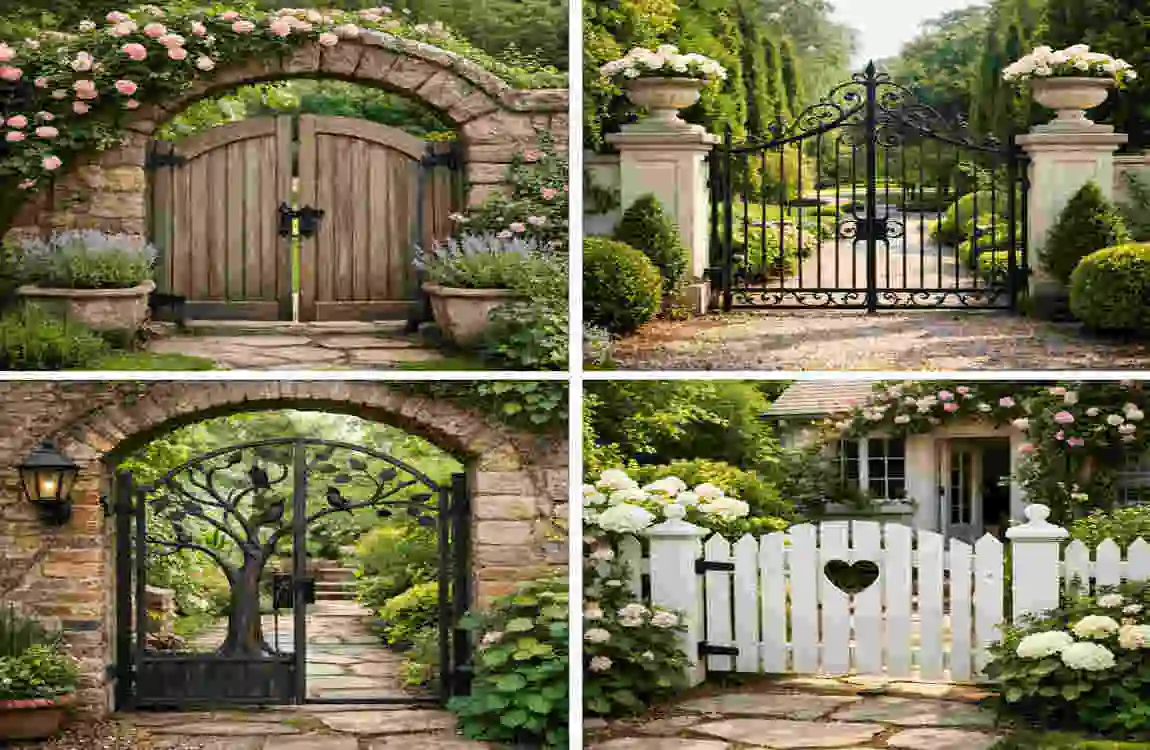
A Classic Wooden Entry
A simple wooden gate with a soft arch can give a front garden a warm and welcoming feel. It is a nice fit for homes with flower beds, climbing plants, and traditional fences.
A Sleek Modern Design
A black metal gate with straight lines can look sharp and elegant. It works especially well with concrete paths, trimmed hedges, and modern houses.
A Rustic Farmhouse Look
A weathered wood gate with iron hinges can bring a cozy, country feel. It pairs well with natural gardens and cottage-style homes.
These real-life styles show how you can elevate your home with a beautiful garden gate that matches your space.
FAQ: Elevate Your Home with a Beautiful Garden Gate
How can a garden gate elevate my home’s appearance?
A: A well-chosen garden gate adds curb appeal, defines your outdoor space, and creates a welcoming entrance that enhances your home’s overall beauty.
What styles of garden gates are best for modern homes?
A: Sleek, minimalist designs with clean lines—often made from metal or composite materials—are ideal for modern homes.
Which materials require the least maintenance?
A: Metal gates like aluminum or vinyl gates are low-maintenance options that resist rust and weather damage.
Can a garden gate improve my home’s security?
A: Yes, a sturdy garden gate can provide an added layer of security and privacy while still elevating your home’s aesthetic.
How do I choose the right garden gate style?
A: Consider your home’s architectural style, your budget, and how much maintenance you’re willing to perform to find the perfect gate.
| Garden Gate Style | Key Features | Best For | Benefits |
|---|---|---|---|
| Traditional | Arched tops, decorative woodwork | Classic, Victorian-style homes | Timeless charm, warm and welcoming |
| Modern & Contemporary | Clean lines, minimalist design | Modern architecture | Sleek look, low maintenance |
| Rustic & Farmhouse | Weathered wood, barn-style, wrought iron accents | Cottage or rural homes | Cozy, natural aesthetic, blends with nature |
| Artistic & Custom | Unique patterns, engravings, stained glass | Personalized, statement pieces | One-of-a-kind, highly decorative |
| Japanese-Inspired Zen | Simple bamboo or shoji-style gates | Zen gardens, tranquil spaces | Creates peaceful, meditative atmosphere |
| Ornate & Decorative | Intricate ironwork, elaborate carvings | Luxurious estates, formal gardens | Elegant, grand, enhances curb appeal |
| Elevate your home with a beautiful garden gate by choosing a style that complements your architecture and outdoor space! |