A garage is more than just a place to park your car. It protects your vehicle, stores tools, and often becomes an integral part of your home. But everything starts from the ground up—literally.
A strong concrete base is the foundation of a durable garage. If the base is weak or poorly installed, problems will show up quickly. You might notice cracks in the floor, sinking areas, or even water seeping inside during rain. These issues not only damage the garage but can also affect the structure built on top of it.
That’s why proper planning and execution matter so much. Whether you do it yourself or hire professionals, the process must be done correctly from the beginning.
Understanding the Importance of a Concrete Garage Base
Before you start digging or pouring concrete, it’s important to understand why the base matters so much.
A concrete garage base acts as the support system for your entire structure. It carries the weight of your vehicle, tools, and even the garage walls. Without a solid base, the structure becomes unstable over time.
What the concrete base actually does
- Provides a flat and stable surface
- Distributes weight evenly across the ground
- Prevents movement caused by soil changes
- Keeps moisture from entering the garage
Why it matters for long-term durability
Concrete is strong, but only when properly installed. A good base resists cracking and shifting. It also protects against weather changes, especially in areas where the soil expands and contracts.
Compared to other materials such as gravel or asphalt, concrete offers greater strength, stability, and longevity. That’s why most residential garages rely on it.
Simply put, a strong base means a strong garage.
Planning Before You Start
Good planning saves time, money, and effort. Rushing into construction without preparation often leads to mistakes.
Site Selection
Start by choosing the right location. Look for:
- Stable soil (not soft or sandy)
- Good drainage to avoid water pooling
- Easy access for vehicles
Avoid low-lying areas where rainwater collects.
Measuring the Garage Area
Most single garages are around:
- 3m x 6m (standard size)
- 6m x 6m (double garage)
Mark the area using wooden stakes and string. Make sure the corners are straight, and the measurements are accurate.
Legal Permissions
In many places, building a garage requires permission. Always check local rules before starting. This helps you avoid legal issues later.
Materials and Tools Checklist
You will need:
- Cement, sand, gravel
- Steel reinforcement mesh or bars
- Wooden boards for formwork
- Shovels, level tools, and compactors
- Concrete mixer or ready-mix delivery
Having everything ready makes the process smoother.
Preparing the Ground for the Concrete Base
This is one of the most important stages. If the ground is not prepared properly, the entire structure may fail later.
Clearing and Excavation
Start by removing:
- Grass
- Rocks
- Roots
- Topsoil
Dig to a depth of around 150–250mm, depending on load requirements.
Ground Leveling and Compaction
Once dug, the soil must be leveled and compacted. This prevents future sinking.
A mechanical compactor is ideal, but manual tools can also work for small areas.
Installing a Sub-Base Layer
Add a layer of gravel or hardcore material. This helps with drainage and stability.
Recommended thickness:
- 100–150mm compacted layer
Compact it firmly so it becomes solid and stable.
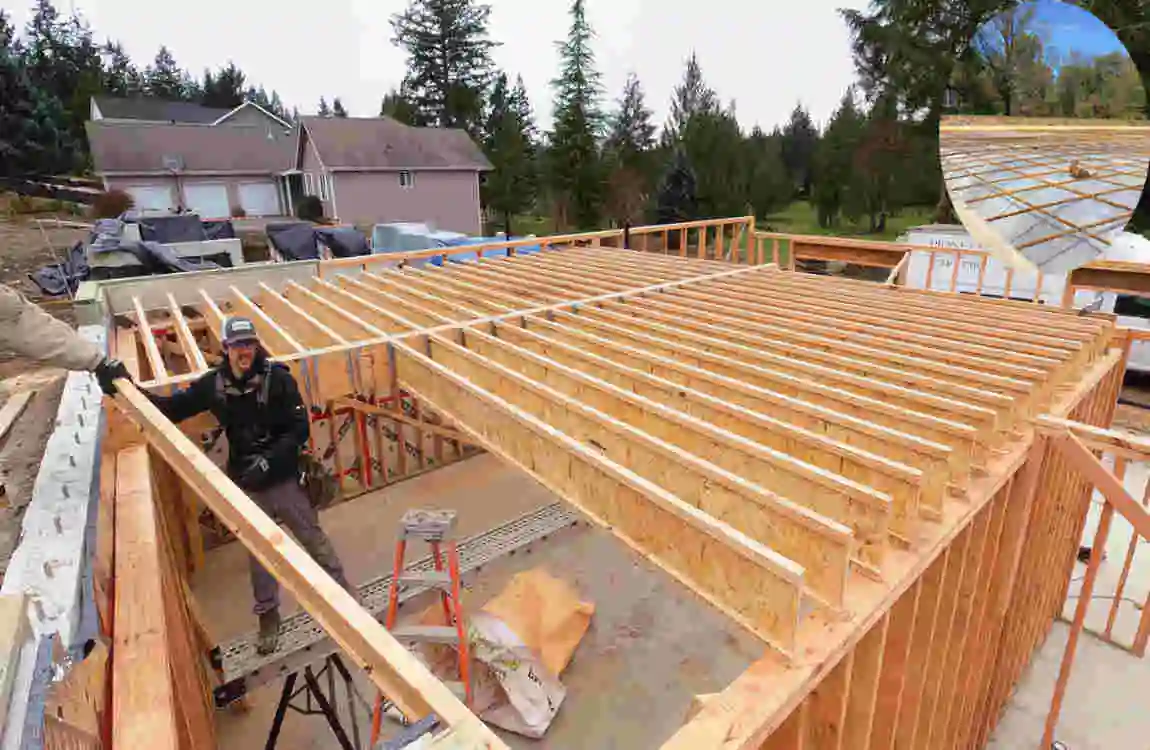
Building the Formwork
Formwork is the frame that holds concrete in place while it sets.
Why formwork matters
It ensures your concrete slab has clean edges and correct dimensions.
Steps to build it:
- Use wooden boards or metal panels
- Fix them along marked boundaries
- Ensure they are perfectly level
- Secure them with stakes to prevent movement
Double-check measurements before moving forward.
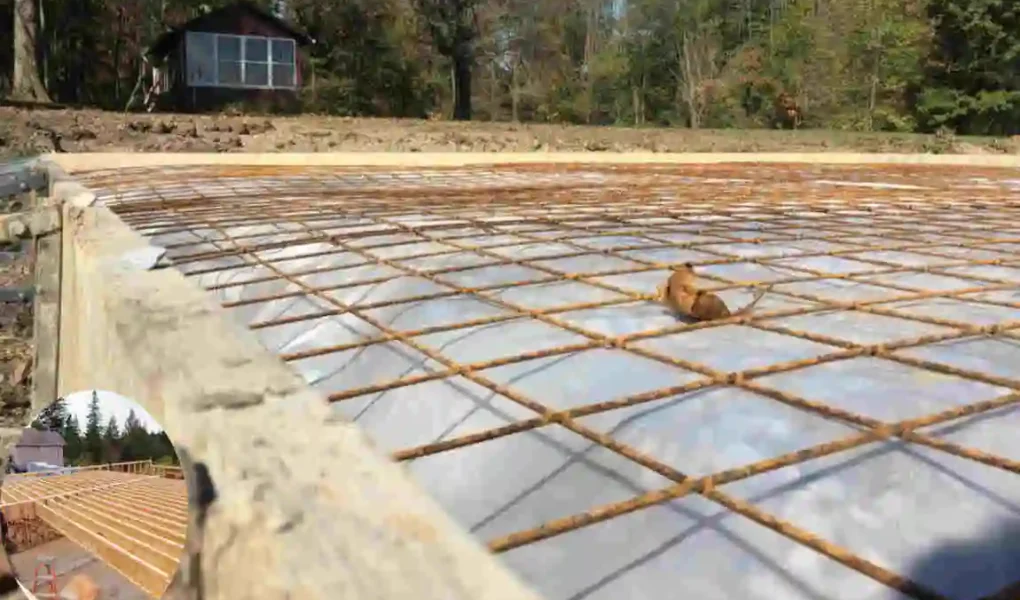
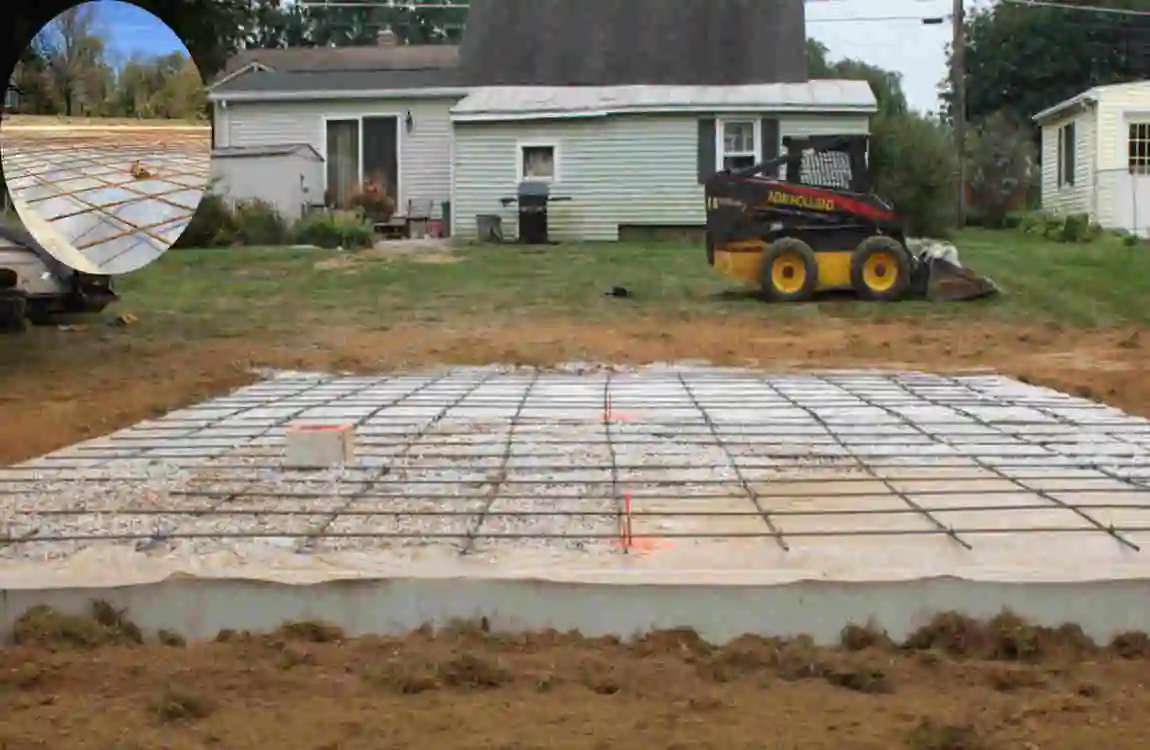
Adding Reinforcement for Strength
Concrete is strong under compression but weak under tension. That’s why reinforcement is essential.
Types of reinforcement:
- Steel mesh (most common)
- Steel rebar (for heavy loads)
Placement tips:
- Keep reinforcement slightly above ground level
- Use spacers to hold it in position
- Ensure even spacing across the slab
This step prevents cracks and significantly increases lifespan.
Mixing and Preparing Concrete
Concrete quality depends on the mix.
Standard mix ratio:
- 1 part cement
- 2 parts sand
- 4 parts gravel
- Water (as needed for consistency)
You can either:
- Mix on-site manually
- Or use ready-mix concrete for better consistency
Avoid adding too much water—it weakens the structure.
Pouring the Concrete Base
Now comes the most important step—pouring concrete.
Pouring Process
Start pouring from one corner and move evenly across the area. If the garage is large, divide it into sections.
Spreading and Leveling
Use tools like:
- Screed boards
- Shovels
- Straight edges
Make sure the surface is smooth and even.
Removing Air Pockets
Air pockets weaken concrete. Tap or vibrate the surface lightly to remove trapped air.
A properly poured slab should look even and compact.
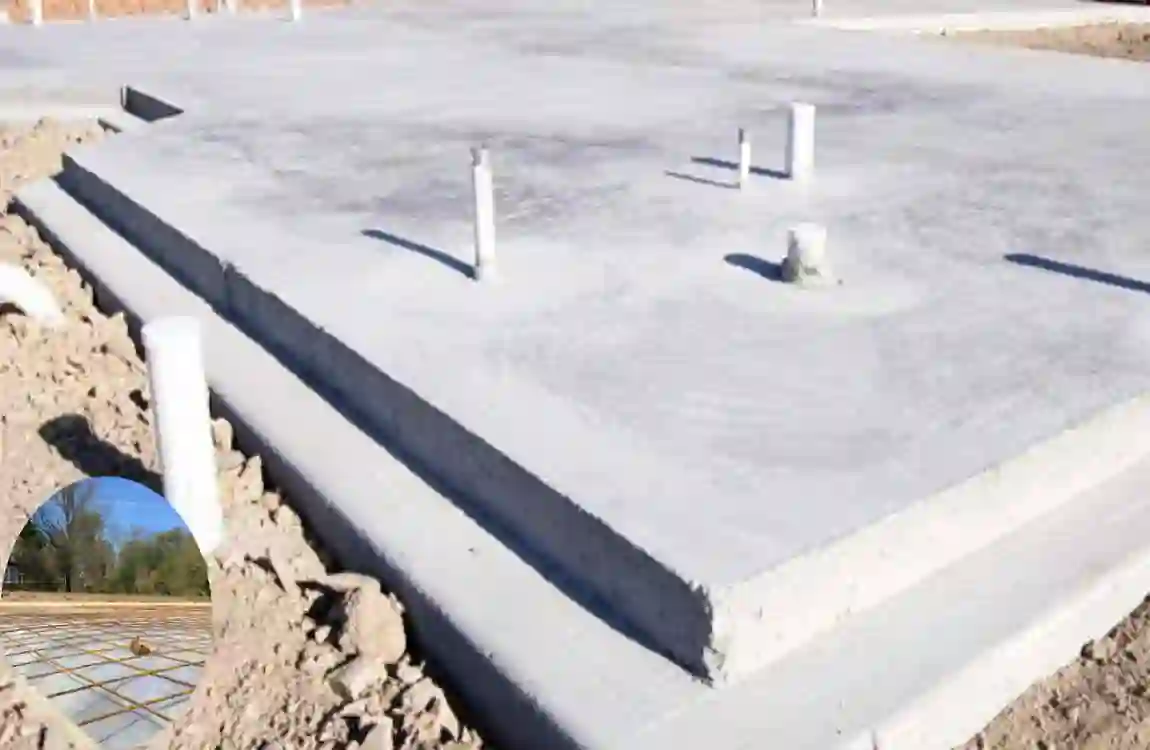
Finishing the Surface
After pouring, the surface must be finished properly.
Finishing steps:
- Smooth using a trowel
- Add a light texture to prevent slipping
- Create a slight slope for water drainage
- Add expansion joints to prevent cracking
A well-finished surface improves both appearance and durability.
Curing the Concrete Properly
Curing is often ignored, but it is extremely important.
Why curing matters
It helps concrete gain strength slowly and evenly.
How to cure:
- Keep the surface moist with water
- Cover with plastic sheets if needed
- Avoid heavy loads for at least 7–28 days
Proper curing ensures long-lasting strength.
Common Mistakes to Avoid
Many people make simple mistakes that later lead to big problems.
Avoid these:
- Poor ground preparation
- Weak concrete mix
- Skipping reinforcement
- Rushing the curing process
- Uneven leveling
A little care at the start saves a lot of trouble later.
Cost Breakdown of a Concrete Garage Base
Here’s a simple breakdown:
Item Estimated Cost Factor
Cement, sand, gravel Medium to High
Reinforcement steel Medium
Labor (if hired) High
Tools and equipment : Low to Medium
Total cost depends on size, location, and material quality.
DIY vs Professional Installation
You can either do it yourself or hire experts.
DIY Advantages:
- Lower cost
- Full control
DIY Disadvantages:
- Requires skill and effort
- Risk of mistakes
Professional Installation:
- Higher cost
- Better quality
- Faster completion
For large garages, professionals are usually a safer choice.
Maintenance Tips
Once your garage base is ready, maintenance keeps it strong.
- Clean regularly
- Seal cracks early
- Avoid water pooling
- Inspect for damage yearly
Small repairs now prevent big problems later.
FAQ: How to Lay a Concrete Base for a House Garage
What is the first step in preparing a garage concrete base?
Clear and level the ground, then mark the area and remove topsoil.
Do I need a sub-base?
Yes, a compacted gravel or hardcore sub-base is essential for strength and drainage.
How thick should the concrete slab be?
Typically 100–150 mm (4–6 inches), depending on vehicle load.
Is reinforcement necessary?
Yes, steel mesh or rebar helps prevent cracking and increases durability.
How is the concrete finished?
It is poured, leveled, and smoothed with a float or trowel for a flat surface.
How long before it can be used?
Light use after 7 days, full strength after about 28 days.
| Step | What to Do | Why It Matters |
|---|---|---|
| Site preparation | Clear vegetation, debris, and topsoil | Ensures a stable foundation |
| Marking area | Set boundaries using string and pegs | Keeps slab accurate and aligned |
| Excavation | Dig to required depth | Creates space for sub-base and concrete |
| Sub-base installation | Add and compact gravel or hardcore | Improves drainage and strength |
| Formwork setup | Install wooden or metal edges | Holds concrete in shape |
| Reinforcement | Place steel mesh or rebar | Prevents cracking and adds durability |
| Concrete pouring | Pour and spread evenly | Forms the solid base structure |
| Leveling & finishing | Smooth surface with screed/trowel | Ensures flat, usable surface |
| Curing | Keep moist for several days | Increases long-term strength |