Imagine you’re a busy homeowner, juggling work, family, and a to-do list that never seems to get shorter. Amid all this, you decide to freshen up your bathroom with a new coat of paint. Naturally, the question pops up: how long does it take to paint a bathroom? You want to know how much time to set aside, so you don’t disrupt your daily routine more than necessary.
On average, painting a bathroom takes 4 to 12 hours of active work plus drying time. But this can vary widely depending on your bathroom’s size, prep work, and paint type. Stick around, and you’ll even find a customizable calculator to plan your own bathroom painting timeline!
Factors Affecting Bathroom Painting Time
Painting a bathroom isn’t just about slapping paint on the walls. Several important factors influence how long the job will take. Understanding these can help you plan better and avoid surprises.
Factor Impact on Time Example
Bathroom Size Small (50 sq ft): 2-4 hrs; Large (150 sq ft): 6-10 hrs. Powder room vs. master bath
Painter Experience DIY: +2-4 hrs; Pro: Faster prep/application Novice taping vs. pro
Prep Work Needed Heavy: +4-6 hrs; Minimal: 1 hr Mold removal vs. fresh paint.
Paint Type/Drying Latex: 2-4 hrs dry; Oil-based: 8+ hrs High-humidity bathroom slowdown
Number of Coats 1 coat: Base time; 2-3 coats: +50% Coverage on dark walls
Bathroom Size
The larger your bathroom, the longer it takes to cover all surfaces. A small powder room might only need a couple of hours, while a sprawling master bath with multiple walls and ceilings could take double or more.
- Small bathrooms (~50 sq ft): Usually 2-4 hours.
- Medium to large bathrooms (100-150 sq ft): 6-10 hours.
Painter Experience
If you’re a DIY beginner, expect to spend extra time on prep, taping, and fixing mistakes. Professionals have the right tools and skills to move faster and work more efficiently.
- DIY painters often add 2-4 hours due to slower prep and painting.
- Pros typically cut time by 30-50%.
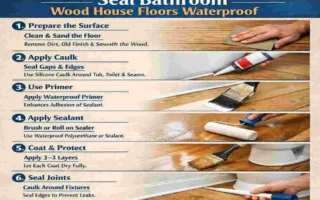
Prep Work Needed
Prep is often the most time-consuming part. If your bathroom has mold, peeling paint, or rough surfaces, you’ll need extra hours for cleaning, sanding, and priming.
- Heavy prep (mold removal, patching): +4-6 hours.
- Minimal prep (fresh paint over good walls): ~1 hour.
Paint Type and Drying Time
Latex paints dry faster, usually within 2-4 hours, making them ideal for bathrooms. Oil-based paints take much longer to dry — 8 hours or more — which extends the total project time.
- Latex paints: Quick drying, easier to work with in humid spaces.
- Oil-based paints: longer drying time, better durability,, but slower.
Number of Coats
Most bathrooms need 2-3 coats for a smooth, even finish. Each additional coat adds 50% more time because of painting and drying.
Step-by-Step Bathroom Painting Timeline
Let’s walk through a typical bathroom painting job, assuming a medium-sized 100 sq ft bathroom. Here’s what you can expect at each stage:
Planning and Gathering Supplies (30-60 minutes)
Before you start, measure your bathroom accurately. Choose a moisture-resistant paint, such as semi-gloss, which is perfect for bathrooms. Gather your tools: drop cloths, painter’s tape, brushes, rollers, and primer if needed.
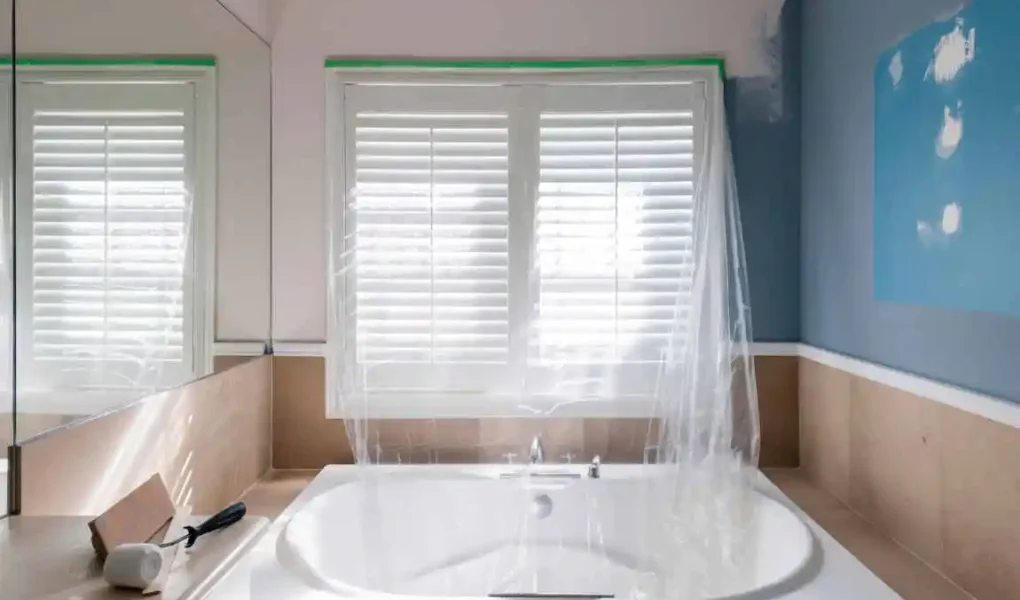
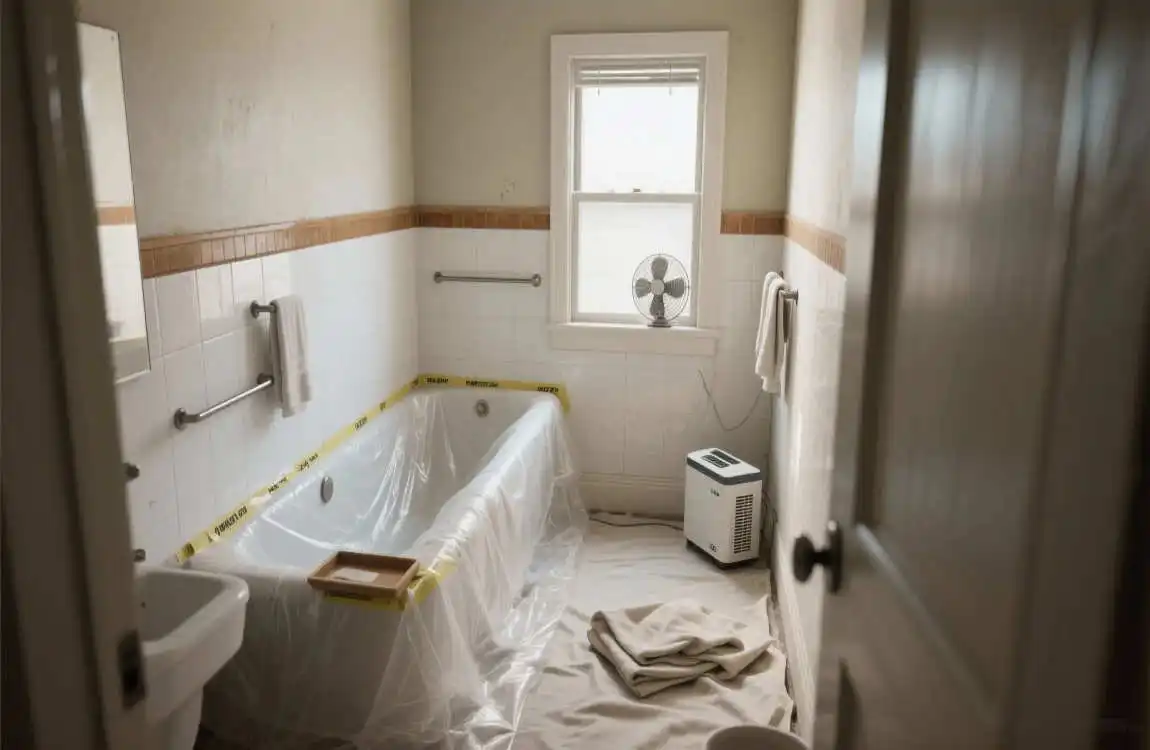
Prep Work (1-3 hours)
Clear out the bathroom and cover fixtures with plastic sheets or drop cloths. Clean walls thoroughly to remove dirt and mildew. Sand any rough spots. If you spot mold or water damage, treat it now — this step can add time but prevents headaches later.
Taping and Masking (30-45 minutes)
Careful taping around edges, trim, outlets, and light switches is key for a neat finish. Take your time here to avoid paint bleeding and messy lines.
Ceiling Painting (45-90 minutes)
Start with the ceiling to prevent drips on freshly painted walls. Use an extendable roller for easy reach.
Wall Painting – First Coat (1-2 hours)
Cut in around edges with a brush, then roll the walls with smooth, even strokes. Many ask, “How long does it take to paint a bathroom?” This step is usually the most time-intensive.
Drying Time Between Coats (2-4 hours per coat)
Bathrooms can trap moisture, so keep fans or dehumidifiers running to speed drying. The paint must be dry before applying the next coat.
Second Coat and Trim (1-2 hours)
Apply the second coat for full coverage. Paint the trim carefully with a small brush for a crisp look.
Cleanup and Curing (30 minutes + 24-48 hours full cure)
Remove tape, clean brushes, and tidy the workspace. While active work might take 4-8 hours total, the paint needs 1-2 days to cure before heavy use fully.
Pro vs. DIY: Time and Cost Comparison

Do you want to hire a pro or roll up your sleeves? Here’s a quick comparison:
Aspect DIY Time Pro Time Cost Savings
Small Bathroom 6-12 hrs 4-6 hrs $200-500
Large Bathroom 10-20 hrs 6-10 hrs $400-800
Mistakes/Fixes +2-4 hrs Minimal N/A
Pros of Hiring a Pro
- Faster completion thanks to experience.
- Higher quality and fewer mistakes.
- Includes thorough prep and cleanup.
Pros of DIY
- Big savings on labor costs.
- Satisfaction from doing it yourself.
- Flexibility to work on your schedule.
If you enjoy hands-on projects, DIY can be rewarding. Just plan for extra time and patience.
Common Mistakes That Extend Painting Time
Painting a bathroom can drag on if you fall into these common traps:
- Skipping prep work leads to peeling or uneven paint and adds 2+ hours of fixing.
- Poor ventilation: Slows drying, doubling wait times.
- Using the wrong type of paint causes peeling and requires a redo.
- Overloading the roller: Drips and uneven coverage require touch-ups.
Tips to avoid these:
- Always prep surfaces properly.
- Use fans or open windows to improve airflow.
- Choose bathroom-specific paints.
- Load rollers lightly and evenly.
Tips to Speed Up Your Bathroom Painting Project
Want to finish faster without cutting corners? Try these tips:
- Use quick-dry paints like Behr Marquee.
- Paint in sections so you can start drying one area while finishing another.
- Hire help for prep work only — it’s the slowest part.
- Pick a low-humidity day or use a dehumidifier indoors.
- Use extendable rollers to reach ceilings without ladders.
FAQ: How Long Does It Take to Paint a Bathroom?
Q: How long does it take to paint a small bathroom?
A: Typically 2-5 hours of active work, plus drying time.
Q: Does humidity affect bathroom paint drying time?
A: Yes. High humidity can add 1-2 days to drying and curing.
Q: What’s the time difference between a pro and DIY?
A: Pros work 30-50% faster due to experience and tools.
Q: How many coats are needed for bathroom walls?
A: Usually 2-3 coats for even coverage and durability.
Q: How long before you can use the bathroom after painting?
A: Paint usually needs 7 days to cure fully.