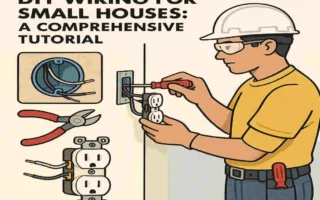
Wiring an outdoor socket is one of the most practical upgrades you can make to your home. Whether you’re powering garden tools, outdoor lighting, or entertainment systems, having an outdoor socket eliminates the need for tangled extension cords and brings convenience to your outdoor activities. However, installing an outdoor socket isn’t just about convenience—it’s about doing it safely and securely to ensure weatherproof protection and long-term functionality.
Understanding Outdoor Sockets
Before diving into the installation process, let’s first understand what an outdoor socket is and why it’s essential to approach the task with care.
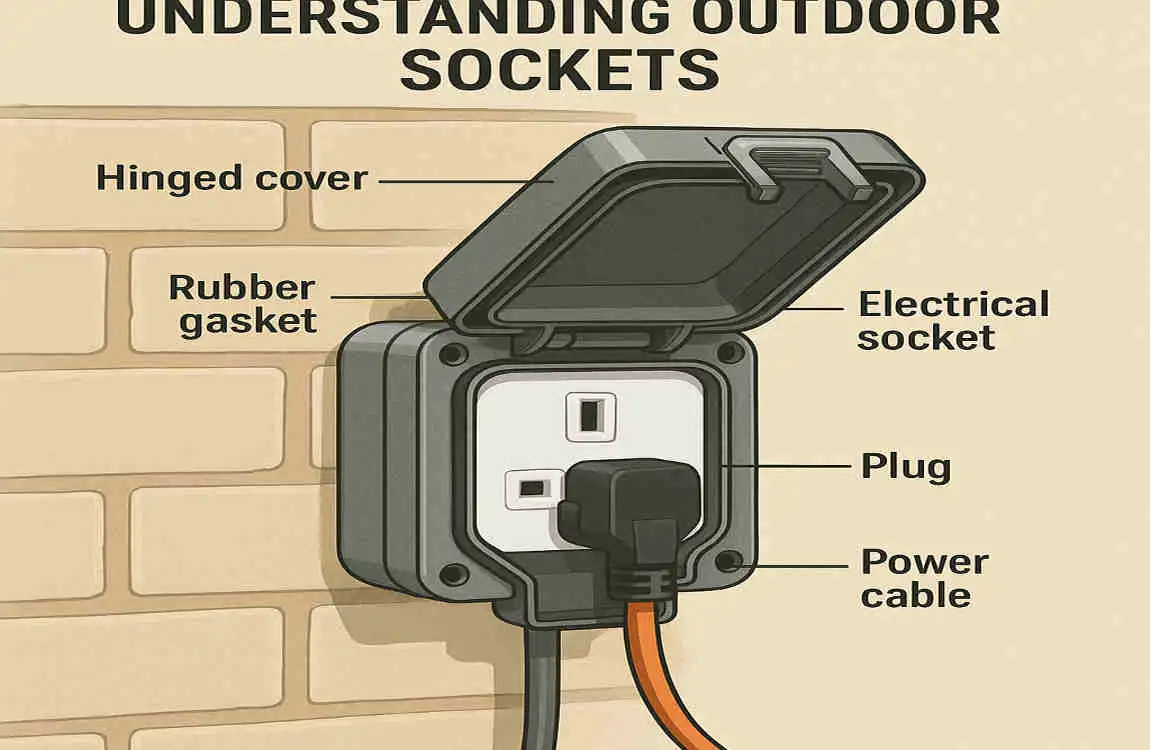
What is an Outdoor Socket?
An outdoor socket is a specialized electrical outlet designed to function safely in external environments. Unlike indoor sockets, outdoor sockets are built to withstand exposure to moisture, dirt, and temperature variations. They are often used for:
- Powering garden tools like lawnmowers, hedge trimmers, or pressure washers.
- Outdoor lighting for patios, pathways, or decorative purposes.
- Entertainment systems such as speakers, projectors, or grills.
Types of Outdoor Sockets
When choosing an outdoor socket, it’s essential to understand the different types available:
- Weatherproof Sockets: These come with protective covers or seals to prevent water ingress.
- RCD-Protected Sockets: Built with a Residual Current Device (RCD) that provides added safety by cutting off power in case of a fault.
- Single vs. Double Sockets: Depending on your needs, you can opt for a single outlet or a double socket for multiple devices.
Electrical Standards and Safety Codes
To ensure a safe installation, always follow local electrical codes and regulations. In many places, outdoor socket installations require:
- RCD protection for safety.
- Proper IP ratings (Ingress Protection) to ensure the socket is weatherproof.
- Compliance with local building regulations, which may recommend hiring a licensed electrician.
Tools and Materials Needed for Wiring an Outdoor Socket
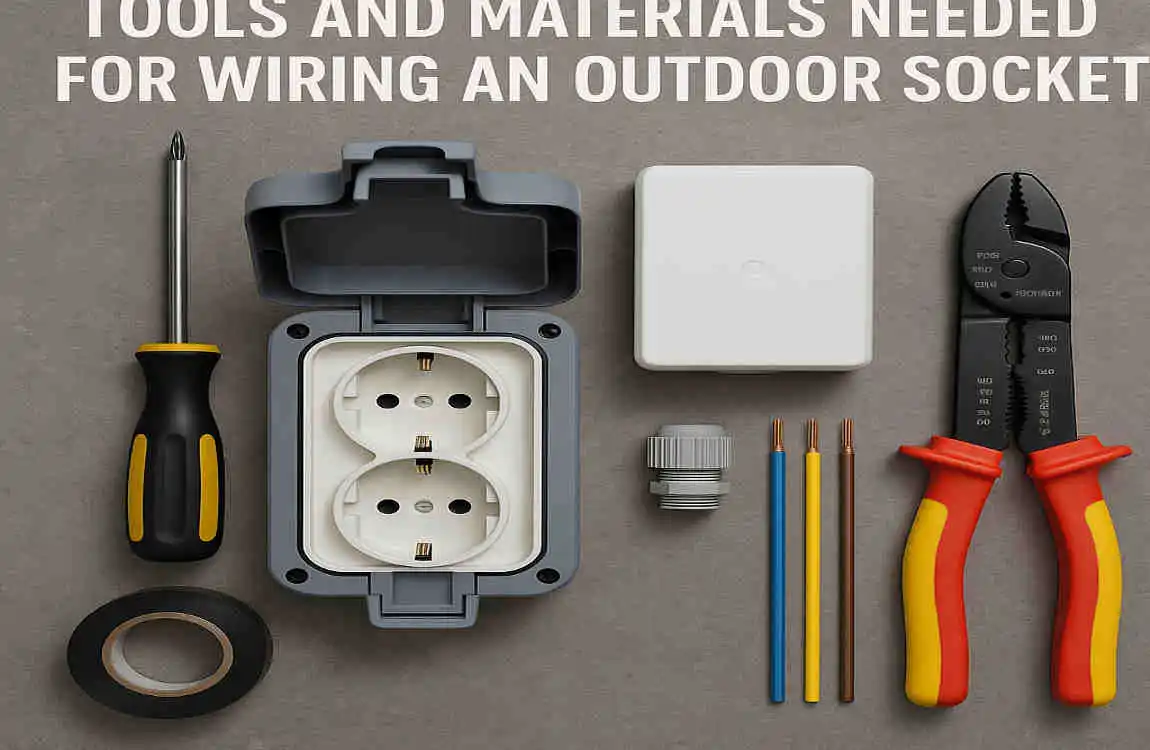
Preparation is key when taking on this project. Having the right tools and materials will make the process smoother and safer.
Essential Tools
Here’s a list of tools you’ll need:
- Voltage Tester: To check if the power is off before working.
- Wire Strippers: For removing insulation from wires.
- Electric Drill: To make holes for mounting and cable entry.
- Screwdrivers: Both flathead and Phillips types.
- Level: To ensure the socket is installed straight.
- Pliers: For holding and manipulating wires.
- Measuring Tape: For accurate placement.
- Safety Gear: Insulated gloves and safety goggles.
Materials Required
You’ll also need the following materials:
Material Purpose
Weatherproof Socket Box Protects the socket from rain, dirt, and other environmental factors.
Outdoor-Rated Cables: Ensure durability and safety in outdoor conditions.
Conduit or Trunking protects cables from physical damage and weather exposure.
Silicone Sealant provides a waterproof seal around the socket and conduit.
Grommets/Backnuts for waterproof cable entry into the socket box.
Necessary: Always use materials rated for outdoor use to ensure safety and longevity.
Planning and Preparation
Proper planning is the foundation of a successful outdoor socket installation. Rushing into the process without preparation can lead to mistakes or safety risks.
Choosing the Right Location
Pick a location for the outdoor socket that is:
- Accessible: Place it where it’s easy to reach and use.
- Elevated: install the socket at least 12-16 inches above the ground to prevent water damage.
- Close to a Power Source: This reduces the length of cabling required.
Checking Existing Wiring
Before starting, inspect your existing wiring to ensure it can handle the additional load. If in doubt, consult an electrician.
Safety Precautions
- Turn Off Power: Switch off the power supply from the circuit breaker.
- Test Circuits: Use a voltage tester to confirm there’s no electricity in the wires you’ll be working on.
- Wear Safety Gear: Gloves and goggles can protect you from accidental shocks or debris.
Running the Cable and Installing Conduit
Now that you’ve prepared the location, it’s time to run the cables and install the conduit.
Running the Cable
- Drill a Hole: Drill a hole through the wall to run the cable from inside to outside.
- Feed the Cable: Carefully feed the outdoor-rated cable through the hole.
- Secure the Cable: Use conduit clips or clamps to secure the cable along the wall.
Installing Conduit
A conduit is essential for protecting the cable outdoors. Follow these steps:
- Measure and Cut: Cut the conduit to the required length.
- Fit Around the Cable: Slide the conduit over the cable.
- Seal the Ends: Use silicone sealant around the conduit entry points to prevent water ingress.
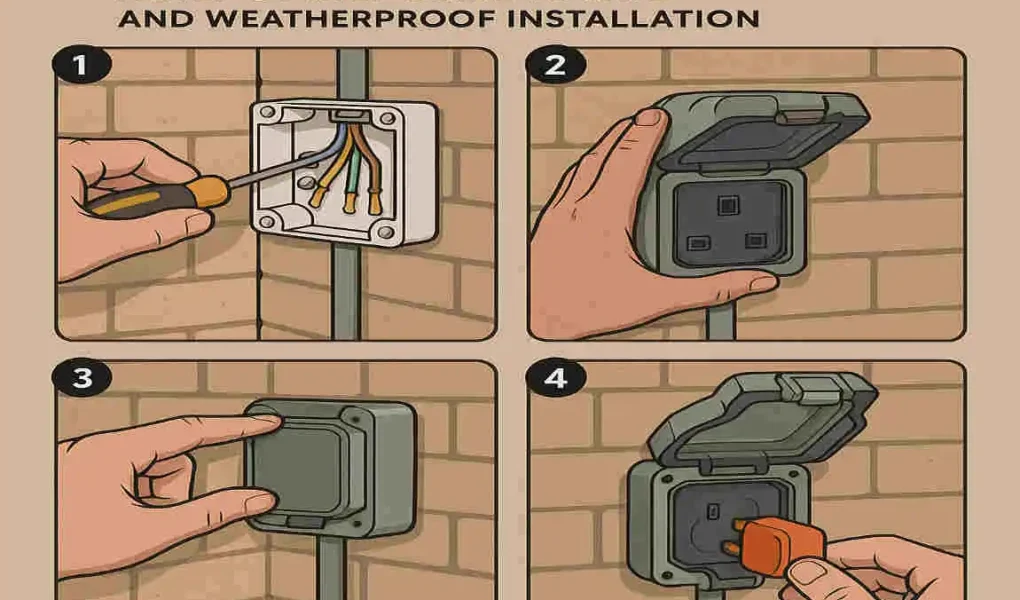
Wiring the Outdoor Socket
The wiring process can seem intimidating, but breaking it into small steps makes it manageable.
Connecting the Wires
- Open the outdoor socket box and identify the Live (L), Neutral (N), and Earth (E) terminals.
- Strip about 10mm of insulation from each wire.
- Connect the wires:
- Live (Brown/Red): Connect to the “L” terminal.
- Neutral (Blue/Black): Connect to the “N” terminal.
- Earth (Green/Yellow): Connect to the terminal marked with the Earth symbol.
Installing Weatherproofing Features
Outdoor environments can be unforgiving. Proper weatherproofing ensures your socket remains safe and functional.
Sealing the Socket Box
- Attach the socket box to the wall using screws and wall plugs.
- Apply silicone sealant around the edges of the box to prevent water ingress.
Testing and Final Safety Checks
Once the installation is complete, it’s time to test the socket.
Testing the Connection
- Use a voltage tester or socket tester to ensure the socket is working correctly.
- Verify that the RCD trips when tested (if applicable).
Safety Inspection
- Ensure all seals are intact and the socket is securely attached to the wall.
- Confirm there are no exposed wires or loose connections.
Common Mistakes to Avoid
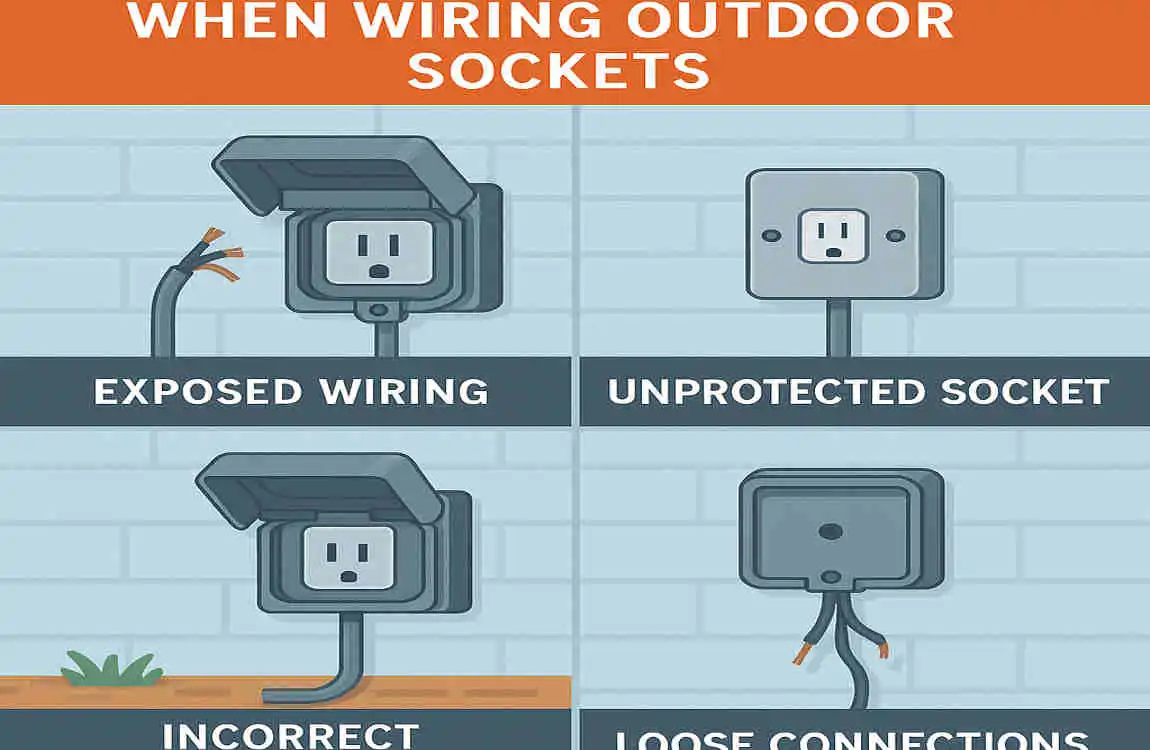
- Skipping Safety Steps: Always turn off the power and test circuits before beginning work.
- Using Improper Materials: Indoor-rated components are not suitable for outdoor installations.
- Ignoring Waterproofing: Failing to seal the socket box can lead to water damage and electrical faults.
Maintenance Tips for Outdoor Sockets

To keep your outdoor socket in good condition:
- Inspect Regularly: Look for signs of wear, corrosion, or damage.
- Clean Periodically: Wipe the socket box to remove dirt and debris.
- Check Seals: Reapply silicone sealant if it shows signs of deterioration.
How to Wire Outdoor Socket: FAQ
What is the minimum safety requirement for an outdoor socket?
Outdoor sockets must meet specific safety standards to ensure they are safe for external use. The most important requirements include:
- IP Rating: Outdoor sockets should have a minimum IP66 rating, which ensures they are water and dust-resistant .
- RCD Protection: All outdoor sockets must be protected by a 30mA Residual Current Device (RCD). This device cuts off power in case of a fault, preventing electric shocks .
Can I wire an outdoor socket myself, or do I need an electrician?
In many cases, you can wire an outdoor socket yourself if you have basic electrical knowledge and follow safety guidelines. However, there are situations where hiring a professional electrician is recommended:
- If you’re unfamiliar with electrical work or local regulations.
- If the installation requires running cables over long distances or through complex routes.
- If the socket needs to be connected to a fused spur or a dedicated circuit.
What tools and materials do I need to wire an outdoor socket?
To wire an outdoor socket, you’ll need the following tools and materials:
Tools:
- Voltage tester
- Wire strippers
- Screwdrivers
- Electric drill
- Pliers
- Measuring tape
Materials:
- Weatherproof socket box (IP66 rated)
- Outdoor-rated cables (e.g., armoured cable for long distances)
- Conduit or trunking for cable protection
- Silicone sealant for waterproofing
- Grommets or glands for cable entry .
Where is the best location to install an outdoor socket?
The ideal location for an outdoor socket depends on accessibility and safety. Here are some tips:
- Proximity to Power Source: Install the socket close to an internal power source to minimize cable length .
- Height: Place the socket at least 12-16 inches above the ground to protect it from water and dirt.
- Sheltered Areas: If possible, install the socket in a location that is partially sheltered from direct rain or sunlight.
How do I run cables for an outdoor socket?
Running cables for an outdoor socket involves several steps:
- Drill a Hole: Drill through the wall to pass the cable from the inside to the outside.
- Use Conduit: Protect the cable by running it through a conduit or trunking. This prevents physical damage and exposure to weather .
- Seal Entry Points: Use silicone sealant or grommets to seal the cable entry points and prevent water ingress .
What type of cable should I use for outdoor sockets?
For outdoor installations, you must use cables that are rated for external use. Common options include:
- Armoured Cable: Ideal for long distances or buried installations, as it provides extra protection against physical damage .
- 3-Core Outdoor Cable: Suitable for shorter runs and simpler installations.