Imagine a garden where every plant thrives, and the landscape is a sight to behold. Leveling your garden is the key to achieving this dream. A level garden not only looks aesthetically pleasing but also makes gardening and landscaping tasks much easier. It ensures proper drainage, prevents soil erosion, and creates a stable foundation for your plants and structures.
Sleepers are heavy-duty materials, typically made of timber, concrete, or recycled materials, that are used for various landscaping purposes. They are the perfect choice for leveling your garden because of their durability, versatility, and ease of installation. Sleepers can withstand the test of time and weather, making them a long-lasting solution for your garden leveling needs.
What Are Sleepers and Their Benefits in Garden Landscaping?

Types of Sleepers
When it comes to sleepers, you have several options to choose from:
- Timber Sleepers: Made from hardwood or softwood, these are the most common type of sleepers. They are affordable, easy to work with, and have a natural, rustic look.
- Concrete Sleepers: These are more durable and low-maintenance than timber sleepers. They are ideal for areas with high moisture or heavy foot traffic.
- Recycled Sleepers: Made from recycled materials such as plastic or rubber, these sleepers are eco-friendly and often available in a variety of colors and textures.
Benefits of Using Sleepers for Garden Leveling
Using sleepers to level your garden offers numerous benefits:
- Durability: Sleepers are built to last, withstanding the elements and the test of time.
- Aesthetic Appeal: Sleepers add a touch of rustic charm to your garden, enhancing its overall look and feel.
- Ease of Installation: Sleepers are relatively easy to work with, making the leveling process more manageable for DIY enthusiasts.
- Soil Erosion Control: Sleepers help prevent soil erosion by creating stable borders and retaining walls.
- Clean Garden Borders: Sleepers provide a clean, defined edge to your garden beds, making them look neat and well-maintained.
Tools and Materials Needed for Leveling a Garden with Sleepers
Before you embark on your garden leveling journey, make sure you have the following tools and materials at hand:
Essential Tools
- Tape Measure: For accurate measurements and marking.
- Timber Saw: To cut sleepers to the desired length.
- Spirit Level: To ensure your sleepers are perfectly level.
- Hammer: For driving stakes and nails.
- Drill and Screws: To secure sleepers together.
- Shovel: For digging trenches and moving soil.
- String Line: To mark the garden boundaries and ensure straight lines.
- Builder’s Square: To check for right angles and ensure accurate corners.
Materials
- Sleepers: Choose the type that best suits your needs and budget.
- Soil: For backfilling and leveling the garden area.
- Gravel or Hardcore: For creating a stable base and ensuring proper drainage.
- Concrete (Optional): For securing sleepers in place, if desired.
Safety Equipment
When working with tools and heavy materials, always prioritize safety. Wear appropriate protective gear, such as gloves, safety glasses, and sturdy footwear.
Planning and Preparing Your Garden Area
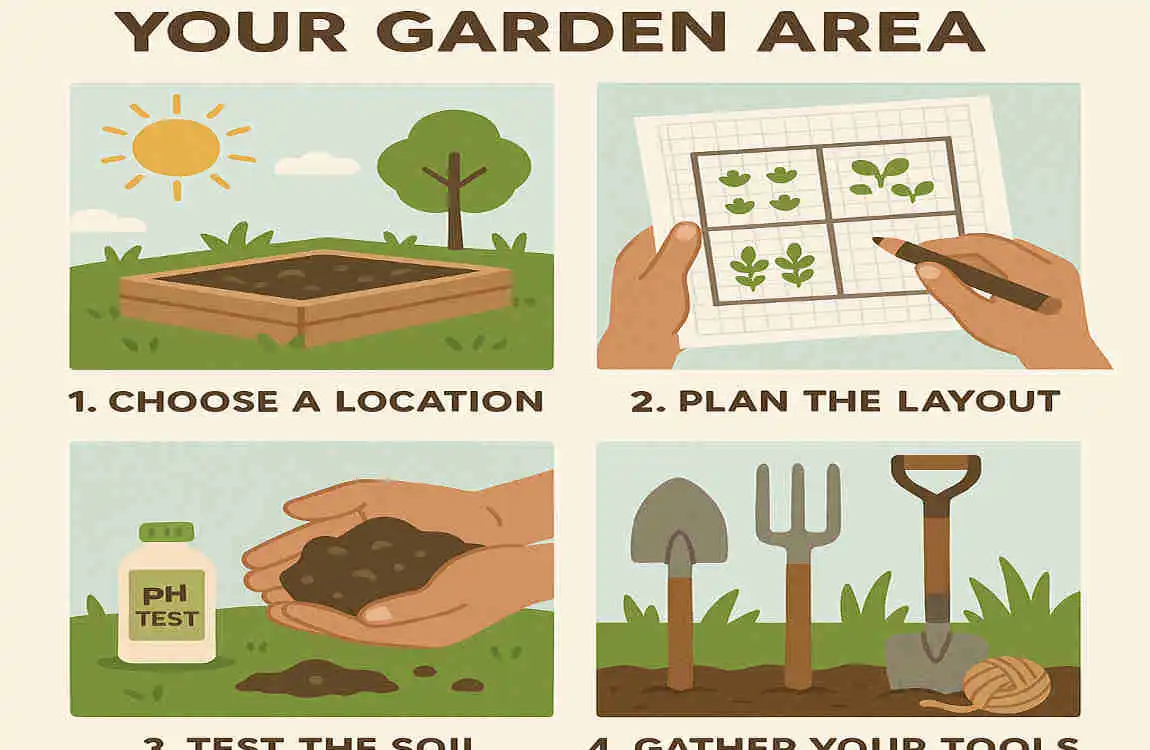
Choosing the Area to Level
The first step in leveling your garden is to choose the area you want to work on. Consider factors such as sunlight exposure, drainage, and your garden’s overall layout. Decide on the size and shape of the leveled area, keeping your landscaping goals and available space in mind.
Clearing the Area
Once you’ve chosen your leveling area, it’s time to clear it of any vegetation, debris, or existing uneven soil. Use a shovel or a garden hoe to remove any unwanted plants, roots, or rocks. This will give you a clean slate to work with and ensure a more accurate leveling process.
Measuring and Marking
To ensure accuracy and precision, take the time to measure and mark the garden boundaries. Use a tape measure and string line to create a clear outline of the area you’ll be leveling. You can also use garden marking paint to make the boundaries more visible.
Sunlight and Drainage Considerations
When planning your leveled garden area, don’t forget to consider sunlight and drainage. Observe the area at different times of day to determine how much sunlight it receives. Also, take note of any potential drainage issues, such as low-lying areas that may collect water. These factors will help you choose the best location for your leveled garden and ensure its long-term success.
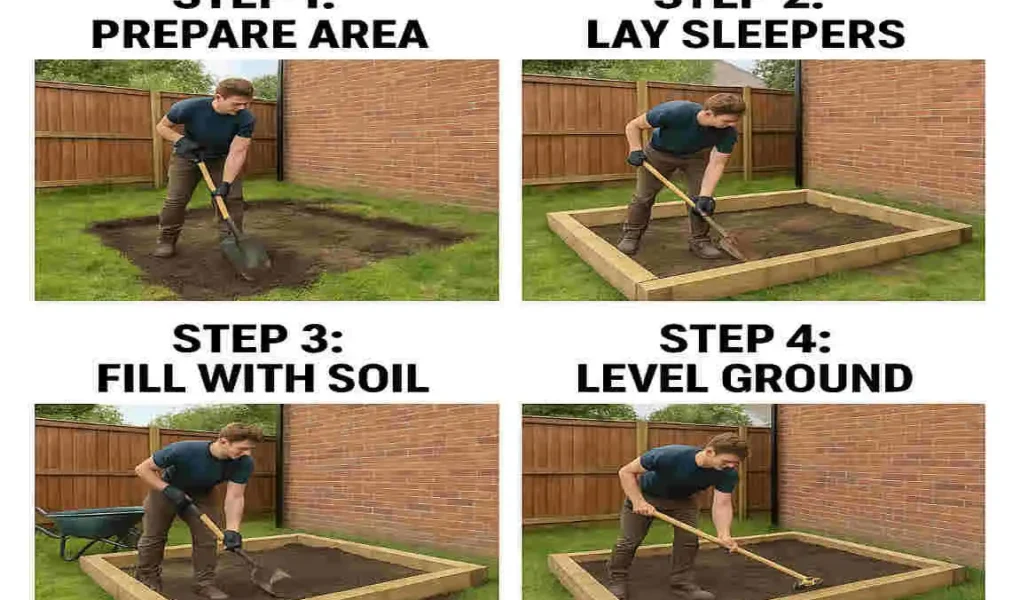
Digging and Creating a Base for the Sleepers
Digging Trenches or Holes
With your garden area prepared, it’s time to start digging. Depending on the size and layout of your leveled area, you’ll need to dig trenches or holes to accommodate the sleepers. The depth of the trenches should be approximately half the height of the sleepers, allowing them to sit securely in the ground.
Compacting the Soil
Once you’ve dug the trenches or holes, it’s crucial to compact the soil to create a stable base for the sleepers. Use a tamper or a sledgehammer to firmly pack down the soil, eliminating any air pockets and ensuring a solid foundation.
Adding a Layer of Hardcore or Gravel
To further enhance the stability and drainage of your leveled area, add a layer of hardcore or gravel to the bottom of the trenches or holes. This will help prevent the sleepers from settling unevenly and ensure proper water flow away from the leveled area.
Positioning and Placing the Sleepers
Arranging Sleepers Along the Marked Layout
With your trenches or holes prepared, it’s time to start positioning the sleepers. Begin by arranging them along the marked garden layout, ensuring they are evenly spaced and aligned with the string lines or garden marking paint.
Cutting Sleepers to Size
If necessary, use a timber saw to cut the sleepers to the desired length. Take your time and make precise cuts to ensure a perfect fit and a seamless finish.
Positioning Sleepers in Trenches
Carefully place the sleepers into the trenches or holes, making sure they are level and securely seated. Use a spirit level or laser level to check the alignment and make any necessary adjustments.
Ensuring the First Sleeper Row is Perfectly Level
The first row of sleepers is crucial for the overall success of your leveled garden. Take extra care to ensure this row is perfectly level, as it will serve as the foundation for the remaining sleepers. Use a spirit level or laser level to check the alignment and make any necessary adjustments.
Fixing the Sleepers and Ensuring Stability
Methods to Fix Sleepers Together
To ensure the stability and longevity of your leveled garden, it’s essential to fasten the sleepers together securely. There are several methods you can use:
- Screws: Drill pilot holes and use screws to fasten the sleepers together.
- Nails: Use heavy-duty nails to secure the sleepers in place.
- Corner Brackets: For added stability, use corner brackets to reinforce the corners of your leveled area.
Using a Builder’s Square
To ensure your leveled area has perfect right angles, use a builder’s square to check the corners. Adjust the sleepers as needed to achieve a precise 90-degree angle.
Securing Sleepers Vertically
If necessary, secure the sleepers vertically using stakes or supports. This will help prevent them from shifting or becoming dislodged over time.
Optional: Pouring Concrete
For extra strength and stability, you can choose to pour concrete around the sleepers. This will create a solid, long-lasting foundation for your leveled garden. However, keep in mind that this step is optional and may not be necessary for all projects.
Backfilling and Final Leveling

Filling the Leveled Area
With the sleepers securely in place, it’s time to start backfilling the leveled area. Use a shovel to fill the area inside and around the sleepers with soil or substrate. Take care to distribute the soil evenly and avoid creating any air pockets.
Adjusting Soil Levels
To achieve perfect flatness, use a rake and a spirit level to adjust the soil levels within the leveled area. Work slowly and methodically, making minor adjustments as needed to ensure a smooth, even surface.
Compacting the Soil
Once you’ve achieved the desired soil level, gently compact the soil using a tamper or a sledgehammer. This will help remove any remaining air pockets and create a stable, long-lasting surface.
Watering and Settling the Soil
To help the soil settle and the leveled area become stable, water it thoroughly. Use a hose or a watering can to evenly distribute water across the surface, allowing it to penetrate the soil and settle the particles.
Additional Tips for a Perfect Garden Landscape
Choosing Sleeper Finishes and Treatments
To protect your sleepers from the elements and extend their lifespan, consider applying a finish or treatment. Options include:
- Wood Preservative: For timber sleepers, a wood preservative can help prevent rot and insect damage.
- Paint or Stain: Adding a coat of paint or stain can enhance the aesthetic appeal of your sleepers and provide additional weather protection.
- Sealant: A sealant can help protect concrete or recycled sleepers from moisture and UV damage.
Considerations for Garden Bed Plants and Irrigation
When planning your leveled garden, don’t forget to consider the plants you’ll grow and the irrigation system you’ll use. Choose plants that are well-suited to the sunlight and soil conditions in your leveled area, and plan your irrigation system accordingly. Drip irrigation or soaker hoses are often ideal for leveled garden beds, as they deliver water directly to the roots of the plants.
Maintaining Sleeper Borders and Garden Levels
To keep your leveled garden looking its best, it’s essential to maintain the sleeper borders and the area’s overall levelness. Regularly check the sleepers for any signs of damage or wear, and make repairs as needed. Also, keep an eye on soil levels in the leveled area and make adjustments as necessary to maintain a flat, even surface.
FAQ: How to Level a Home Garden with Sleepers
What Are Sleepers and Why Use Them for Garden Leveling?
Sleepers are heavy-duty materials, typically made from timber, that are used in landscaping projects. They are ideal for leveling a garden because they help stop soil erosion and create flat areas for planting . Their durability and aesthetic appeal make them a popular choice for garden projects.
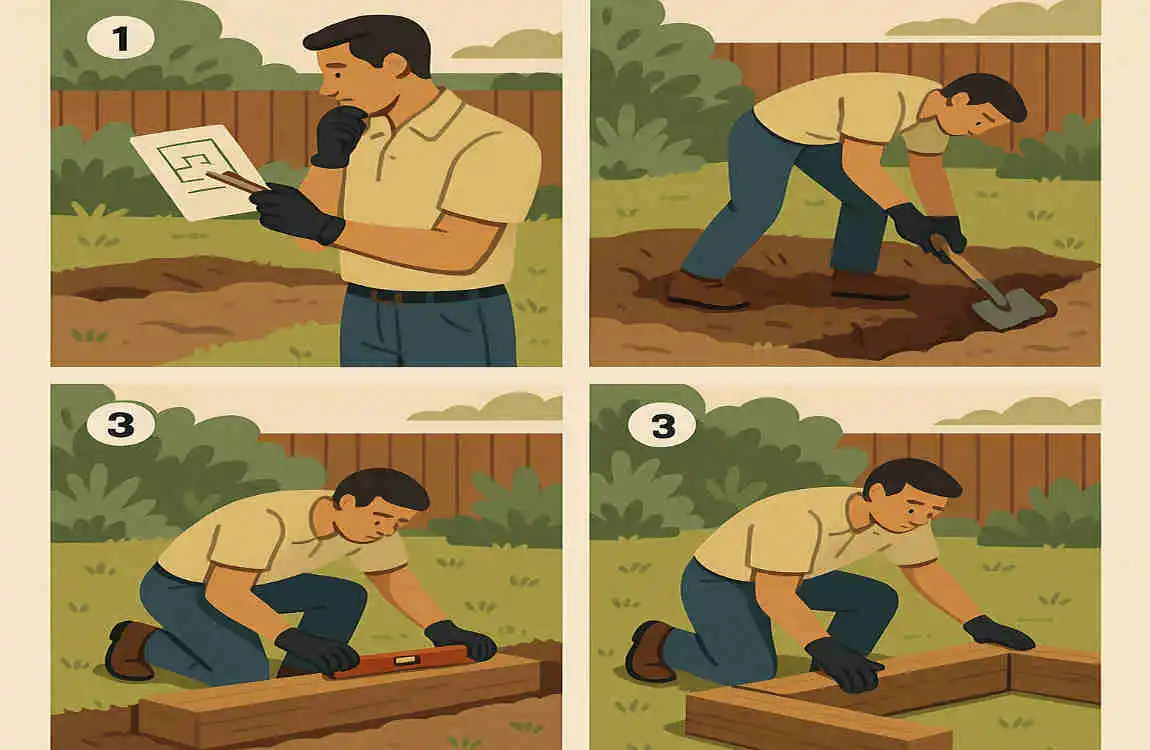
How Do I Start Leveling My Garden with Sleepers?
To begin leveling your garden with sleepers, start by planning your layout. Decide where you want to place the sleepers and what shape you want your leveled area to be. Once you have your plan, you can start by digging a shallow trench for the first sleeper to lie in, ensuring it’s level using a spirit level . Many landscapers follow the rule of “one-third in the ground, and two-thirds out” when placing sleepers .
What Tools Do I Need to Level a Garden with Sleepers?
To level your garden with sleepers, you’ll need a few essential tools:
- A hand saw or power saw, such as a mitre saw, for cutting sleepers to size
- A spirit level to ensure the sleepers are level
- A heavy-duty fence post spade for digging trenches
- Fixing foam or concrete to secure the sleepers in place
How Do I Ensure the Sleepers Are Level?
Ensuring the sleepers are level is crucial for a successful garden leveling project. Use a spirit level to check the levelness of each sleeper as you place it . If necessary, adjust the soil beneath the sleeper to achieve the desired level. For multi-level structures, make sure to check the levelness of each layer as you build.
Can I Use Sleepers to Create a Retaining Wall?
Yes, sleepers can be used to create a retaining wall. To do so, stack the sleepers securely and use metal rods or brackets for extra support . You can also plant hanging flowers or shrubs on the higher levels to enhance the aesthetic appeal of your retaining wall . However, keep in mind that a retaining wall made of sleepers may not have much retaining strength, especially if it’s more than one sleeper high.