
H clips are not always required for 5/8 inch roof sheathing, but they are often recommended. Their primary purpose is to provide additional stiffness and support to the unsupported edges of the sheathing panels, helping reduce flex and potential buckling over time. While some building codes and guides specify H clips for specific wood panel thicknesses and span ratings, 5/8-inch sheathing over trusses spaced 24 inches on center may not always require them. However, using H clips can enhance the strength and stability of the roof deck, especially when subjected to heavy house roofing materials or longer spans.
Understanding the Purpose of H Clips in Roof Construction
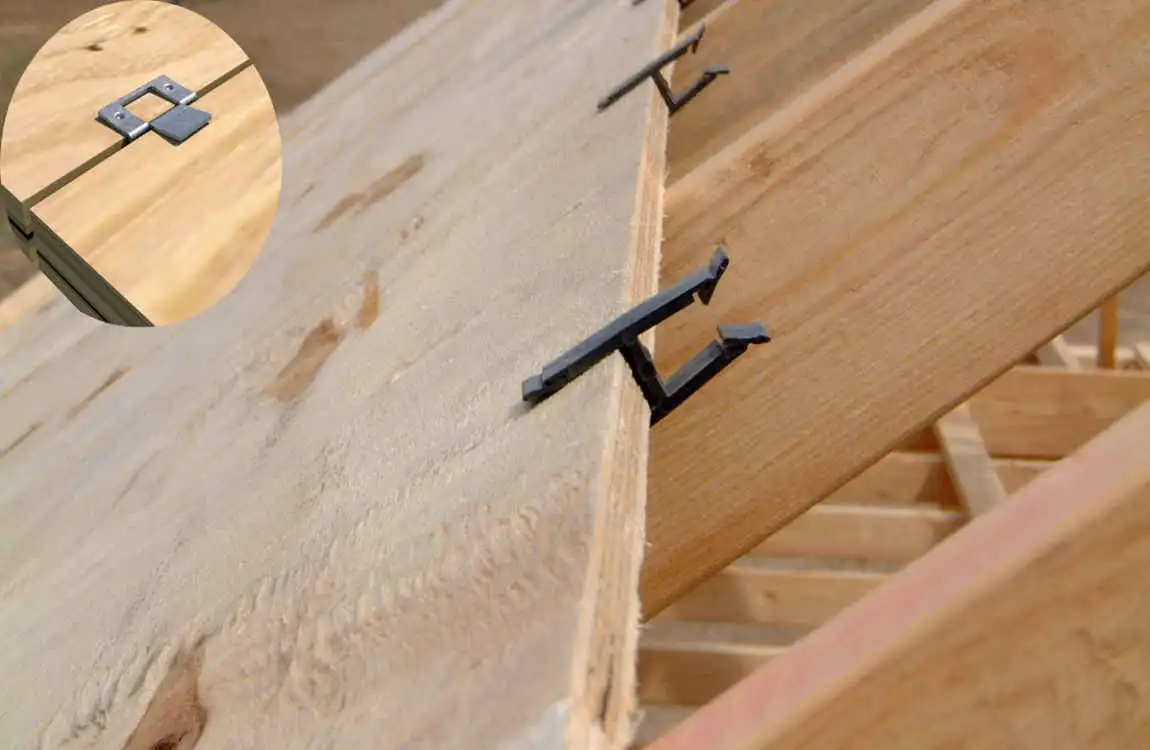
H clips play a crucial role in roof construction, particularly when it comes to sheathing. Their primary function is to ensure proper spacing between panels of roof sheathing, such as plywood or OSB (oriented strand board).
By maintaining this gap, H clips allow for thermal expansion and contraction of the materials. This flexibility helps prevent warping and buckling over time, which can lead to costly repairs.
Using H clips can enhance the overall durability of your roofing system. By minimizing stress on joints and seams, they contribute to a longer lifespan for your roof while also improving energy efficiency within your home.
Types of H Clips Available
When it comes to H clips, variety is key. These small but mighty components come in several types to suit different needs in roofing projects.
Standard H clips are the most common choice. They provide basic support for roof sheathing by maintaining panel spacing and preventing sagging.
For those looking for extra durability, heavy-duty options exist. These thicker versions can withstand greater loads and extreme weather conditions.
There are also adjustable H clips available. Their design allows them to accommodate varying thicknesses of sheathing materials, offering flexibility during installation.
Some manufacturers even offer specialty H clips explicitly designed for engineered wood products or specific roofing systems.
Choosing the right type ensures your roof remains structurally sound while maximizing energy efficiency and longevity.
When are H Clips Required for 5/8 Roof Sheathing?
H clips are typically required when using 5/8-inch roof sheathing in specific situations. These clips play a crucial role in providing additional support and stability, especially for larger spans.
If your rafters are spaced more than 24 inches apart, H clips become essential. They help distribute the load evenly across the sheathing panels. Without them, you may face issues like sagging or warping over time.
In areas prone to high winds or heavy snow loads, installing H clips is not just recommended but can be vital for structural integrity. Always prioritize safety and durability when making decisions about roof construction materials and methods.
Benefits of Using H Clips in Your Roofing Project
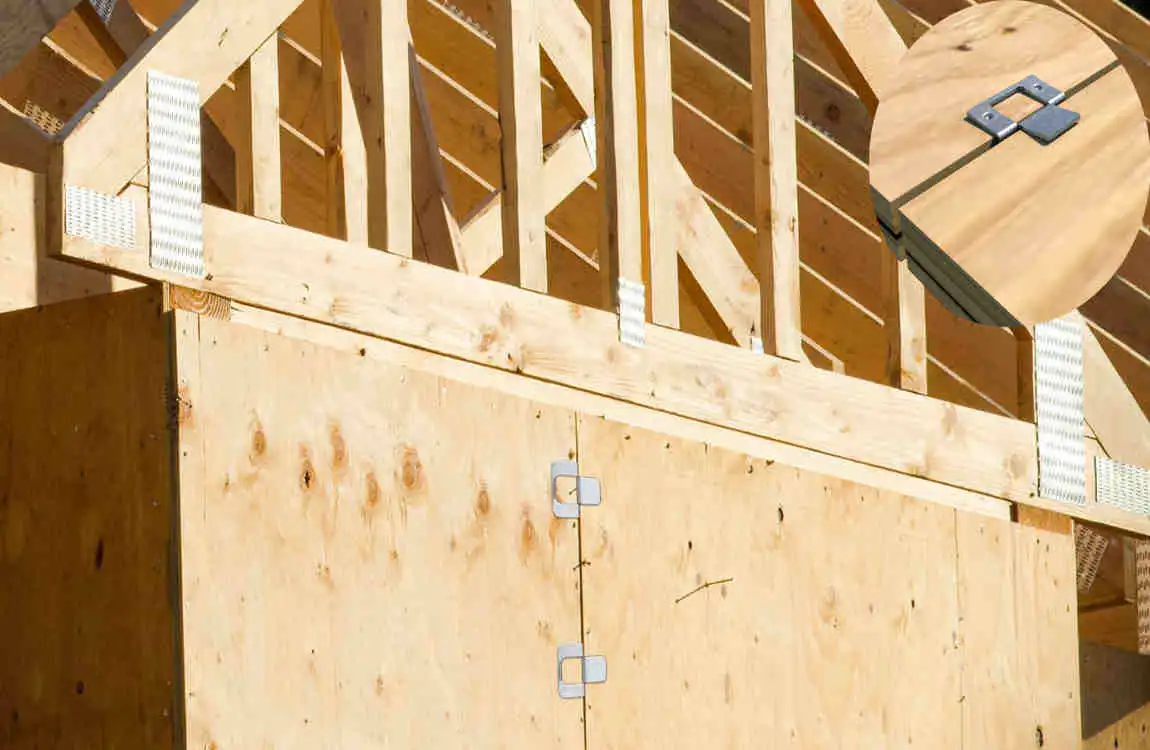
Using H clips in your roofing project offers several advantages that enhance both performance and longevity. They create a secure connection between the house roof sheathing panels, ensuring they stay aligned during temperature changes.
This alignment helps prevent gaps from forming, which can lead to potential leaks. By maintaining tight seams, H clips contribute to better energy efficiency by reducing air infiltration.
Installation is straightforward and doesn’t require specialized tools. The time saved during installation translates into cost savings for homeowners as well.
Using H clips can also improve resale value. A well-constructed roof can be a significant selling point for prospective buyers.
Step-by-Step Guide on Installing H Clips
Installing H clips is a straightforward process that can enhance the stability of your roof sheathing. Begin by gathering your materials: the H clips, roof sheathing panels, and fasteners.
Start by laying out your first row of 5/8-inch plywood or OSB sheets across the rafters. Leave a small gap between each panel for expansion.
Next, insert an H clip over the joint where two sheets meet. Make sure it sits flush against both panels. This positioning helps distribute loads evenly.
Secure the H clip using appropriate nails or screws as outlined in the manufacturer’s guidelines. Repeat this step for all joints along the length of your roofing project.
Once installed, check that everything is snug and even before moving on to additional rows of sheathing. Keeping everything aligned ensures optimal performance when you install shingles later on.
You may also read (how much does a roll of rolled roofing cost for your home).
Cost Comparison: With and Without H Clips
When considering H clips for your roofing project, cost is a significant factor. Installing H clips adds an upfront expense to your materials budget. However, the long-term benefits can outweigh these initial costs.
Without H clips, you may save money at the outset. But this could lead to structural issues down the line, such as sagging or warping of roof sheathing. These problems might require costly repairs and replacements later on.
On the flip side, incorporating H clips can enhance overall stability. They help distribute weight evenly across trusses or rafters. This reinforcement can prevent potential damage that would incur additional expenses in maintenance and repair.
In essence, weighing immediate savings against future risks and costs is crucial when making your decision about using H clips in your roof sheathing project.
Potential Risks of Not Using H Clips
Neglecting to use H clips during roof sheathing can lead to significant structural issues. Without these small but essential components, the plywood or OSB sheets may sag between rafters. This can create uneven surfaces and potentially lead to water pooling.
Moisture retention is another concern. Without proper support from H clips, moisture can accumulate in areas where sheathing dips or bows. This promotes mold growth and accelerates wood rot.
Inadequate ventilation might arise as well. When sheathing isn’t securely fastened with H clips, airflow may be restricted, leading to temperature imbalances in your attic space and further exacerbating damage over time.
You may also read (how many satchels for a stone roof on your home).