Building a home dormer roof is a rewarding project that can significantly enhance your living space, natural light, and the overall aesthetic of your house. This step-by-step guide will walk you through the essential phases of constructing a dormer—from planning and framing the walls to installing the pitched roof—helping you understand the tools, materials, and techniques needed to achieve a strong, airtight, and visually appealing dormer. Whether you’re a seasoned DIYer or tackling this ambitious project with a friend, this guide aims to simplify the complex process and provide practical tips to build dormers efficiently and effectively.
Benefits of Building a Dormer Roof
Your home’s aesthetics can be significantly enhanced by adding a dormer roof. These structures add character and charm, making your house stand out in the neighborhood.
Increasing usable space is another noteworthy advantage. Dormers create additional headroom in attics, transforming them into functional rooms like offices or guest bedrooms.
Benefits of Building a Dormer Roof

Natural light house becomes more abundant too. With strategically placed windows, you can brighten up dark corners of your home, improving overall ambiance.
Energy efficiency may also see an uptick. By properly insulating the new space created by a dormer, you help maintain comfortable temperatures year-round while potentially lowering energy bills.
Prospective buyers often appreciate extra living space and improved house design features when looking for their next home.
Factors to Consider Before Building a Dormer Roof
Before diving into your dormer roof project, there are several critical factors to consider. First, assess the existing structure of your home. Dormers can add weight and require proper support.
Next, think about design. The style of the dormer should complement your home’s architecture for a seamless look.
Local building codes and zoning regulations are essential too. Different areas have specific guidelines regarding height limits and aesthetics.
Budget is another important aspect. From materials to house labor costs, calculate everything carefully to avoid surprises later on.
Consider how the dormer will affect natural light and ventilation in your space. A well-placed dormer can brighten up an attic or upper room significantly yet might overshadow other parts if not house designed thoughtfully.
Step-by-Step Guide to Building a Home Dormer Roof

Building a home dormer roof can elevate your space and add charm to your house. Start by planning the design to match your home’s style. Sketching out dimensions helps visualize the final look.
Next, check local regulations for necessary permits. This ensures compliance with safety standards.
Gather all required materials and tools beforehand. You’ll need house framing lumber, roofing materials, nails, and safety gear.
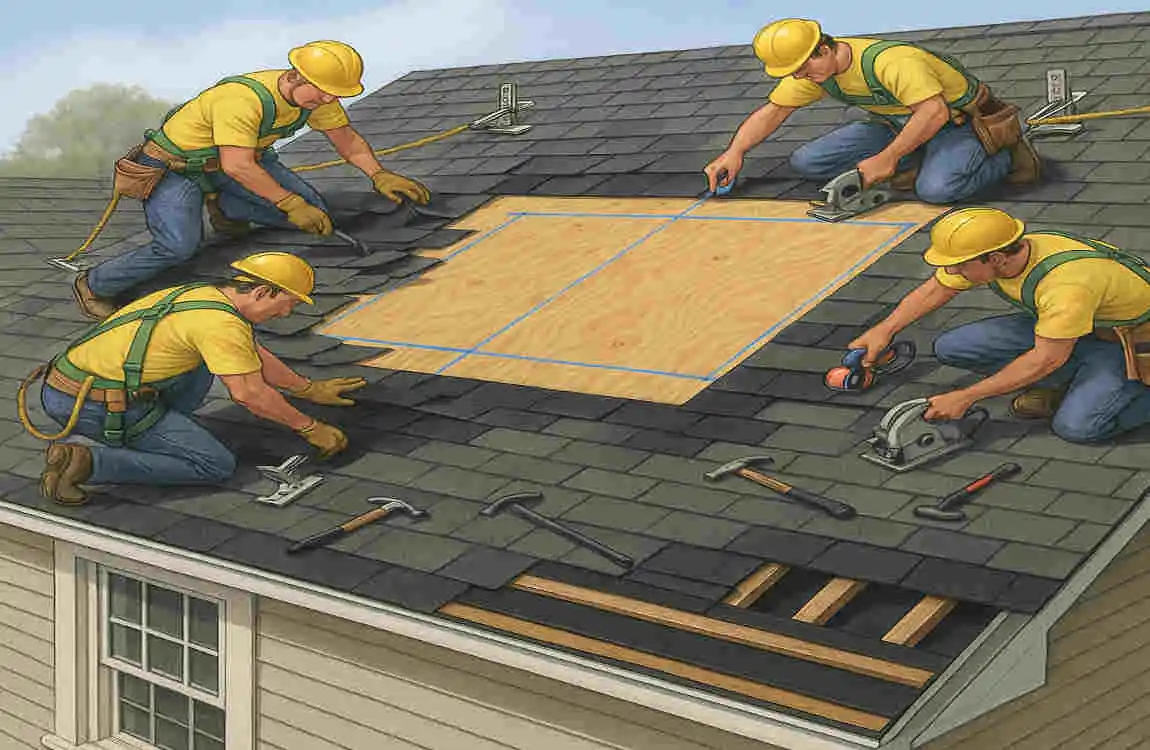
Preparing the existing roof is crucial. Remove any shingles in the area where you’ll install the dormer to create a clean workspace.
Now comes the fun part—constructing the frame! Begin with building headers for support before adding vertical studs and beams. Secure everything tightly as you go along; stability is key during this phase of construction.
Planning and Designing the Dormer
Planning and house designing your dormer is an exciting first step. Start by envisioning the purpose of the space. Will it serve as a cozy reading nook, or perhaps a guest room?
Next, consider the style that complements your modern home. Choosing between a classic gable or a modern shed roof will impact both aesthetics and functionality.
Sketch out your ideas on paper or use digital tools for precision. Dimensions matter; ensure to measure existing spaces accurately before finalizing roof designs.
Don’t forget about natural light! Position windows thoughtfully to maximize sunlight while maintaining privacy.
Keep local architectural guidelines in mind. Your project should blend seamlessly with neighborhood vibes while adhering to regulations for aesthetic consistency and safety standards. This foundational work will pave the way for a successful build.
Gathering Materials and Tools

Gathering the right materials and tools is essential for a successful dormer roof project. Start by creating a detailed list based on your design plans. This ensures you have everything at hand before diving in.
Common materials include house plywood, shingles, framing lumber, insulation, and flashing. Don’t forget about nails or screws; they’re crucial for securing your structure.
Check local hardware stores or online retailers for competitive pricing on quality supplies. Remember that investing in good materials will pay off in durability and aesthetics down the line. Being well-prepared will enhance both your efficiency and confidence as you embark on this exciting project!
Preparing the Existing Roof
Before you start constructing your dormer, it’s crucial to prepare the existing roof. This step ensures stability and safety for the new structure.
Begin by clearing the area around your roof. Remove any debris, branches, or old roofing materials that might get in the way. A clean workspace helps prevent accidents and keeps your tools handy.
Next, assess the current state of your roof. Check for damaged shingles or leaks that need attention before moving forward with construction. Addressing these issues now can save you headaches later on.
Preparing the Existing Roof
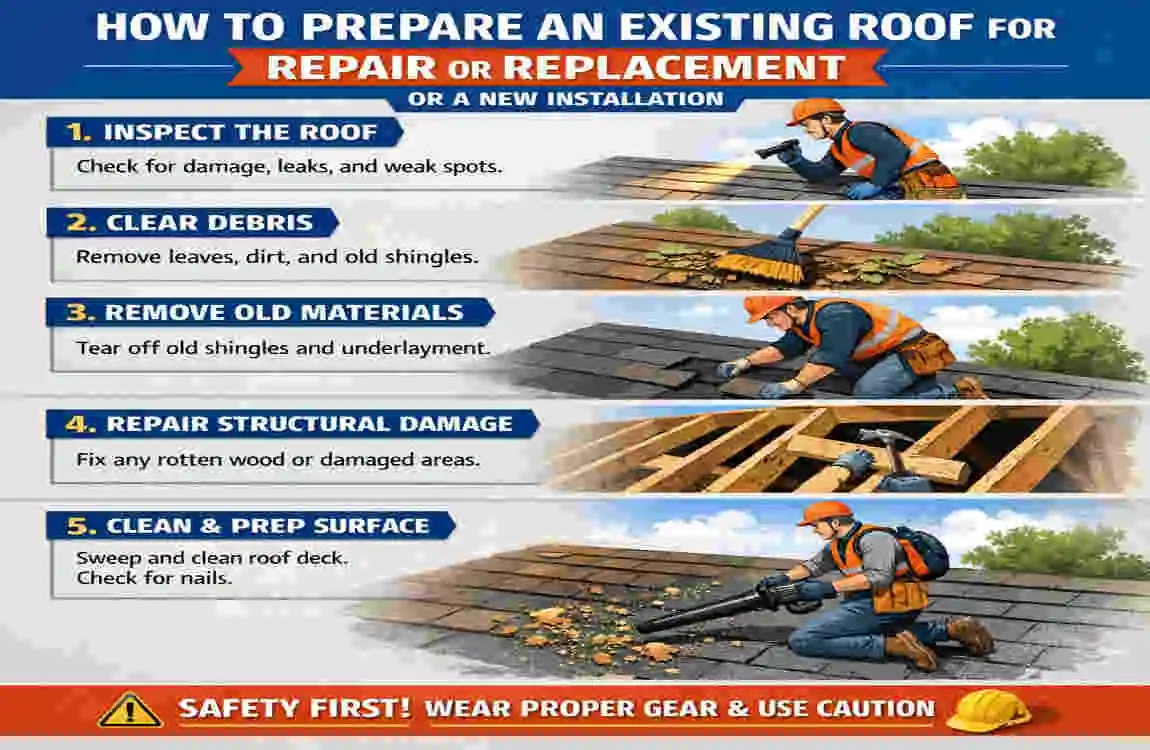
Once everything is cleared and inspected, consider reinforcing areas where you’ll attach the dormer frame. Adding extra support will enhance durability and ensure a solid foundation.
Protect yourself from falling debris during house construction by wearing appropriate safety gear like goggles and hard hats while working above ground level.
Constructing the Dormer Frame

Once your plans are in place and all necessary permits are secured, it’s time to start constructing the dormer frame. This step is critical as it forms the backbone of your new space.
First, begin by measuring and marking where you will cut into your existing roof. Precision here ensures that everything aligns correctly later on. Use a chalk line for straight cuts, making sure to wear safety gear while working.
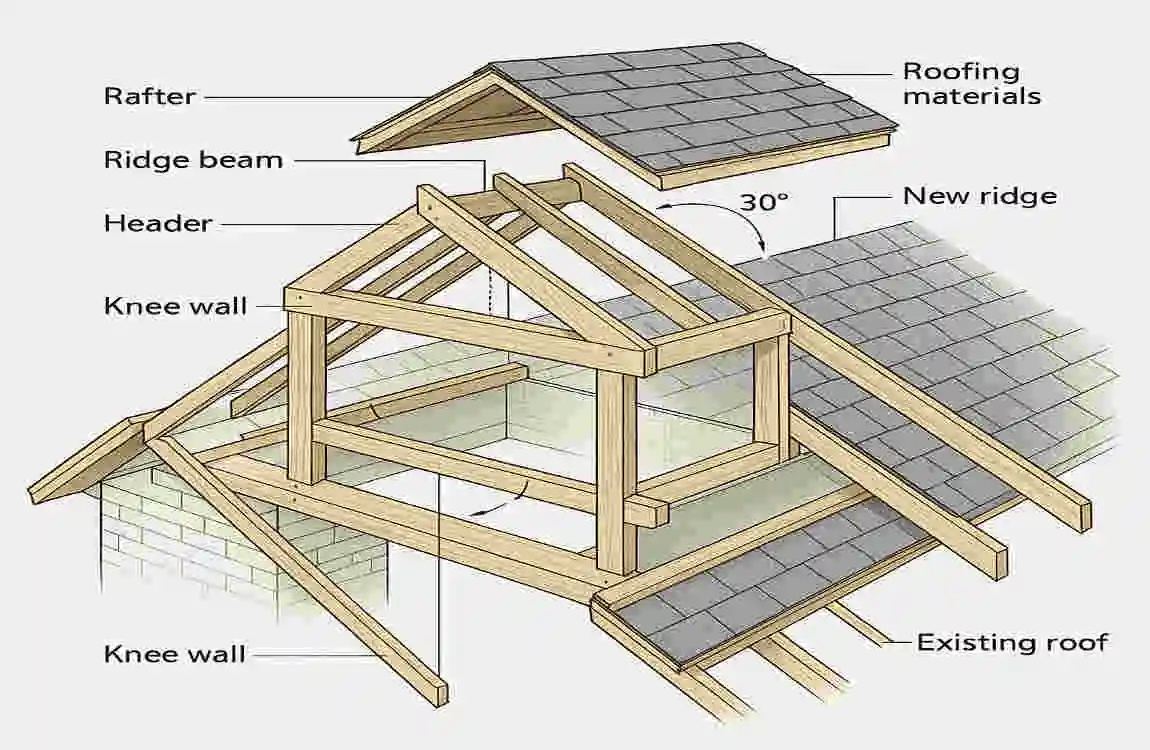
With everything prepped, it’s time to build out the frame itself using wood beams and studs according to your design specifications. Start by creating vertical sidewalls that extend upward from your initial cuts before adding horizontal top plates that connect them at their peaks.
Once framed properly and checked for sturdiness, proceed with installing any required windows as well as weather roofing materials around openings to protect against future leaks or drafts—taking care now can save significant headaches down the road!
Building a dormer roof transforms an attic space into something functional while enhancing curb appeal too—you’ll enjoy not just more room but increased value in your home! By following these steps methodically and paying attention to detail throughout construction work will lead toward success in achieving that welcoming addition you’ve envisioned!
How to Build a Dormer Roof Short FAQ Guide

What is a Dormer?
A dormer is a structural extension that projects from a sloped roof, creating additional headroom, light, and usable space in an attic or upper floor. It typically includes a window and its own mini-roof structure.
Can I Build a Dormer Myself?
While dormer construction can be a DIY project for experienced builders, it requires solid carpentry skills and knowledge of roofing. For those without experience, professional installation is recommended.
What Are the Basic Steps?
The general process involves:
- Planning and Design – Determine size, style, and location
- Cutting the Roof Opening – Carefully cut through shingles and roofing material
- Frame Construction – Build the dormer frame using 2×4 lumber for walls
- Roof Assembly – Create roof structure with rafters or trusses
- Weatherproofing – Install sheathing, roofing, and siding
- Finishing – Add windows, insulation, and interior finishes
What’s the Easiest Construction Method?
Ground assembly is often the most efficient approach – you can cut and assemble dormer components on the ground to minimize rooftop assembly time . The sides can be made as timber stud frames, with the roof constructed as a series of trusses .
What Materials Do I Need?
- 2×4 lumber for the main frame structure
- 2×4 pieces for angled rafters Roofing materials (shingles, underlayment)
- Sheathing and siding
- Windows
- Insulation and vapor barriers
| Topic | Short Answer | What You Should Know |
|---|---|---|
| What is a dormer roof? | A dormer is a roof structure that projects from the main roof. | It is commonly used to add light, space, and headroom in a loft or upper floor. |
| Main dormer styles | Gable, shed, and hip dormers are common types. | Choose the style that best fits your home and roof shape. |
| First step | Plan the design and measure the dormer carefully. | Sketch the layout, note the dimensions, and gather the right materials before you start. |
| Framing stage | Open the roof and frame the side walls, headers, and rafters. | Builders must work carefully so they do not damage the existing roof structure. |
| Roofing and weatherproofing | Add sheathing, valley protection, step flashing, and roof edge details. | A 36-inch ice-and-water barrier and proper flashing help protect the dormer from leaks. |
| Final finish | Complete the soffits, trim, and roof edge molding. | This gives the dormer a clean finish and helps it match the rest of the house. |