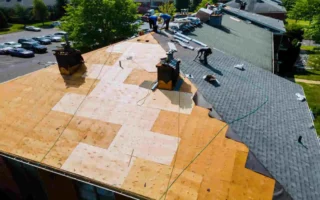
Cracked polycarbonate roof panels are leaking during the heavy monsoon season? It is incredibly frustrating to wake up to a puddle on your patio floor or find your precious greenhouse plants soaked from a sudden drip. But before you panic, do not call expensive roofers just yet. You can easily replace them yourself and save well over $1,000 in labor costs.
Over time, even the toughest materials wear out. Polycarbonate is fantastic, but after 10 to 15 years, you might notice UV degradation, yellowing, or even severe hail damage. When the material becomes brittle, cracks form, and leaks are inevitable. The good news? DIY polycarbonate roof replacement is entirely within your reach if you have the right guidance.
Why Choose Polycarbonate for Patios and Greenhouses
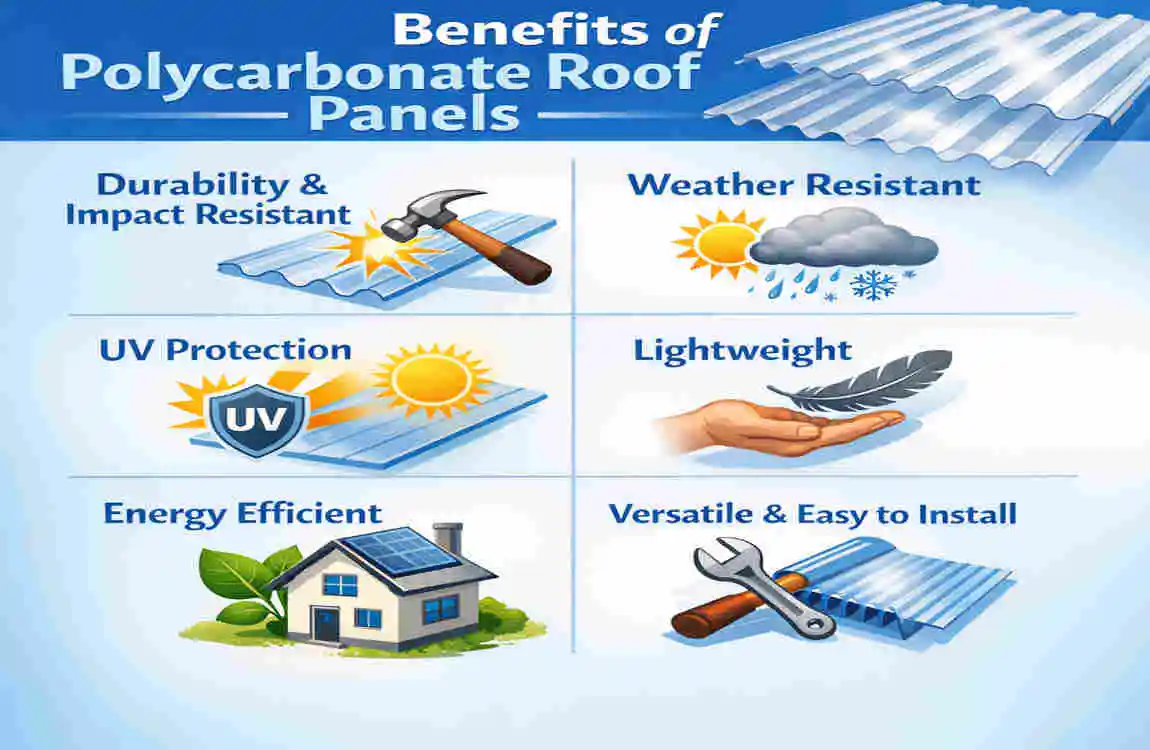
Before we dive into the replacement process, let’s take a moment to understand why you are working with such an incredible material. If you are debating whether to switch to glass or metal, stick with polycarbonate. The benefits of polycarbonate roofing panels far outweigh the alternatives, especially for structures like patios, conservatories, and greenhouses.
First and foremost, polycarbonate is incredibly lightweight. It weighs about one-sixth of the weight of traditional glass. This makes it infinitely easier for a DIYer to handle, lift, and maneuver into place without breaking their back. Despite being so lightweight, it is a powerhouse of durability. Polycarbonate is up to 200 times stronger than glass, making it highly impact-resistant. If you live in an area prone to severe weather, this material can withstand heavy impacts that would instantly shatter traditional glass panels.
Furthermore, polycarbonate offers incredible light transmission. It allows up to 80% of natural light to filter through while blocking harmful UV rays. This is absolutely perfect for Lahore homes, where the UV protection beautifully beats the harsh summer sun while keeping your spaces bright and welcoming. Finally, the thermal insulation properties of multi-wall polycarbonate mean your space stays cooler in the summer and warmer in the winter.
Here is a quick breakdown of the pros and cons of using polycarbonate:
Feature Benefit Drawback
Durability: Highly impact-resistant; easily resists hail up to 1 inch in diameter. Surface scratches easily if cleaned with abrasive brushes or the wrong chemicals.
Cost Efficiency Costs around $2 to $5 per square foot, compared to $10+ for glass. Requires specific expansion gaps to prevent warping in high heat.
Installation: Extremely DIY-friendly; you can cut it smoothly just like standard wood. The UV-protected side must face outward, which can be easily mixed up by beginners.
When considering how to replace polycarbonate roof panels, knowing these characteristics ensures you handle the material correctly.
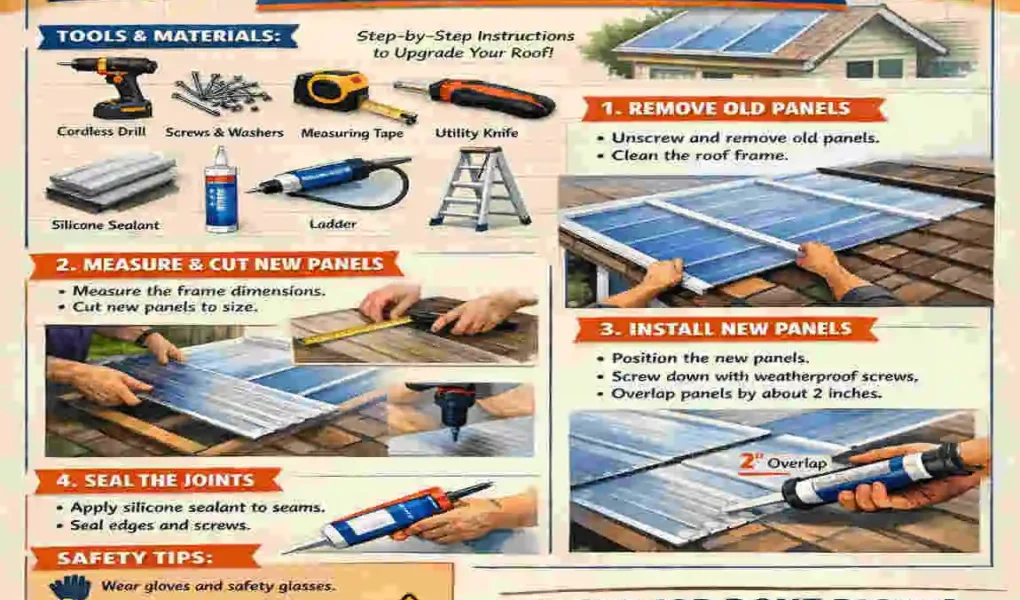
Essential Tools and Materials Needed
To figure out how to replace polycarbonate roof panels successfully, you need to prepare your workspace with the correct tools and materials. Having everything on hand before you climb up the ladder will save you time, frustration, and ensure your safety.
Here is your essential checklist to get started:
The Tools You Will Need
- Cordless Drill: Essential for removing old screws and securing the new panels without dragging dangerous extension cords onto the roof.
- Fine-Tooth Saw: A jigsaw or a circular saw with a fine-tooth blade is perfect for making smooth, clean cuts without chipping the plastic.
- Tape Measure: Accuracy is everything. Measure twice, cut once.
- Sturdy Ladder: Ensure it is tall enough to give you comfortable access to the roof edge.
- Wire Brush: Crucial for cleaning out the old, stubborn dirt and leftover sealant from the frame channels.
- Safety Gear: Never compromise on safety. You need thick work gloves, protective safety goggles, and a safety harness if working at heights.
The Materials You Will Need
- Replacement Panels: Opt for high-quality multi-wall panels (typically 8mm to 16mm thick depending on your insulation needs).
- Neoprene Washers: These specialized rubber washers create a watertight seal around your screws.
- Self-Tapping Screws: Use #10 screws, and plan to space them about 300mm apart.
- Silicone Sealant: Ensure it is polycarbonate-safe (neutral cure) to prevent chemical damage to the panels.
- Anti-Dust / Breathable Tape: Applied to the bottom edges to let condensation escape while keeping bugs and dust out.
- Glazing Bars / F-Sections: For securing the edges cleanly.
- Foam Gaskets: To cushion the panels against the frame and prevent drafts.
Estimated Budget Breakdown (PKR Estimates for Lahore Market)
If you are doing this in the local market, here is a rough estimate of what you might spend.
Item Quantity Needed Estimated Cost (PKR)
Multi-wall Panels (10×4 ft) 5 sheets 15,000
Sealants, Tapes & Washers 2 kits 2,500
Self-Tapping Screws 1 box 1,000
Miscellaneous (Blades, etc.) Varies 1,500
Total DIY Cost – ~20,000 – 25,000
Safety Precautions First
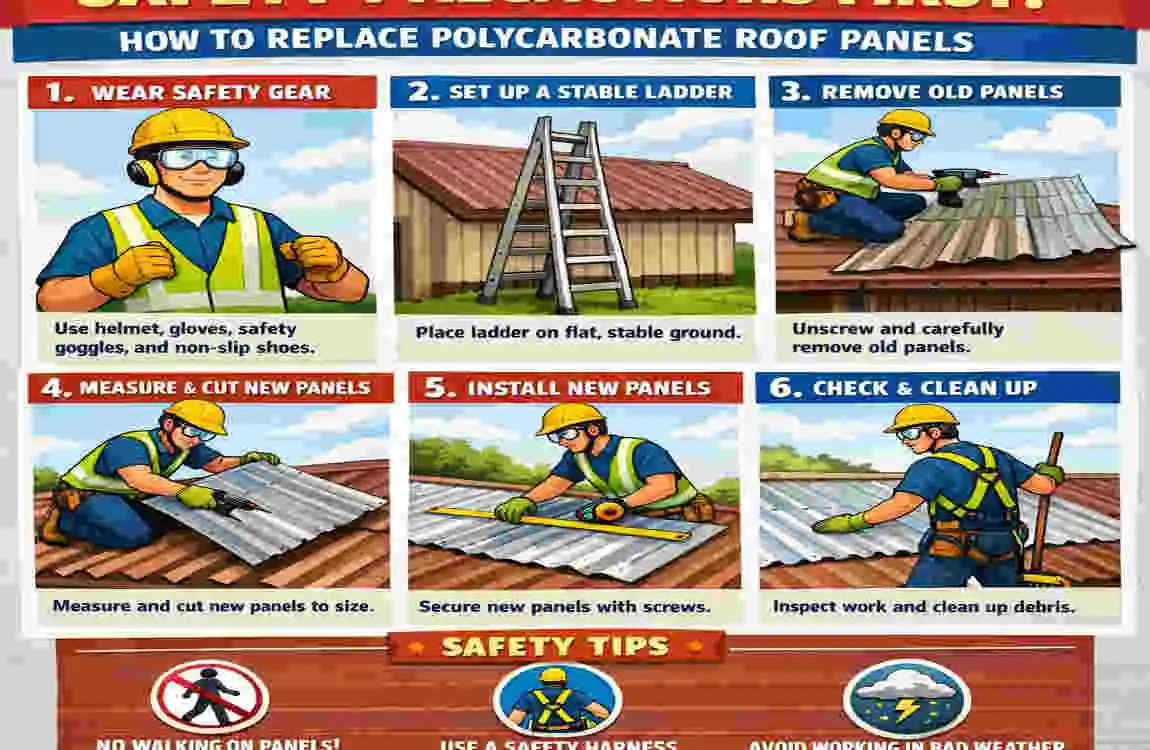
Before we dive into the exact steps of how to replace polycarbonate roof panels, we must talk about safety. Working on any roof is inherently dangerous, and skipping safety protocols is a recipe for disaster. Did you know that nearly 80% of all severe DIY roof injuries result from avoidable falls? Do not become a statistic; do not skip the harness.
Prioritize the Weather First: always choose to work on calm, dry days. Do not attempt this project during a Lahore dust storm, high winds, or right after rain when surfaces are dangerously slippery. A large polycarbonate sheet acts exactly like a sail in the wind; a sudden gust can easily knock you off your ladder.
Follow This Safety Checklist:
- Inspect Your Ladder Stability: Make sure your ladder is on firm, level ground. If the ground is soft, place a wide wooden board underneath the feet. Always maintain three points of contact when climbing.
- Wear Non-Slip Boots: Leave the worn-out sneakers at home. You need heavy-duty work boots with an excellent rubber grip.
- Use a Safety Harness: If your roof is more than 10 feet off the ground, a safety harness anchored to a solid structural point is non-negotiable.
- Implement a Two-Person Lift: Never try to haul a massive 10-foot panel up a ladder by yourself. Have a helper pass the panels up to you to avoid losing your balance.
- Ground Your Power Tools: Ensure all power tools are in good working condition, and if you must use corded tools, ensure they are properly grounded.
- Create a Child and Pet-Free Zone: Keep the area below your workspace completely clear of family members and pets to protect them from falling tools or debris.
When you respect the height and the tools, learning how to replace polycarbonate roof panels becomes a fun, stress-free weekend project rather than a trip to the emergency room.
Step-by-Step Guide: How to Replace Polycarbonate Roof Panels
Now we arrive at the core of our ultimate guide. This section will walk you through exactly how to replace polycarbonate roof panels from start to finish. Take your time, read through these steps carefully, and do not rush the process.
Assess the Damage and plan Your Layout
Before you touch a single screw, you need to assess the current state of your roof. Climb up safely and inspect the damage. Are you dealing with hairline cracks, major impact holes, or just degraded, yellowing panels that are letting water in?
Identify exactly which panels need to be replaced. Once you know the scope of the work, measure the frame carefully. Always measure twice. Measure the length and the width of the opening, not just the old panel, because the old panel might have shrunk or been cut incorrectly.
When calculating the size of the panels you need to order or cut, remember to add a 3mm overlap for expansion. Next, sketch out a quick layout on a piece of paper. Note the orientation of the panels. The internal ribs (or flutes) of the multi-wall polycarbonate must always run downwards towards the gutter. This ensures that any internal condensation naturally drains out via gravity.
Remove the Old, Damaged Panels
Removing the old panels requires patience. Do not just rip them off, as you could easily damage the delicate aluminum or wooden framework underneath.
Start by taking your cordless drill and putting it in reverse to unscrew the existing fasteners. If the screws are rusted and stripped, you might need to use a pair of locking pliers to twist them out manually. Once the screws are out, gently yank the panel free from the glazing bars.
Old sealant might hold the panel tightly in place. If it is stubborn, take a utility knife and carefully slice through the old silicone to break the seal. Watch out for sharp edges on the old, brittle plastic, as degraded polycarbonate can splinter like glass.
Once the panel is out, hand it down to your helper. Do not let old panels pile up on the roof where they become tripping hazards. Finally, take your wire brush and vigorously clean out the channels. You need a completely clean surface for the new seals to adhere properly.
Prepare the Framework for New Panels
Your new roof is only as good as the frame supporting it. With the old panels out of the way, take a closer look at your structure. Use your wire brush to remove any lingering dirt, moss, or old adhesive residue. Wipe the frame down with a damp cloth and let it dry completely.
Now, check the frame for level and plumb. If your aluminum frames are bent from a previous impact or heavy snow load, now is the time to tap them back into place using a rubber mallet gently.
Once the frame is structurally sound and spotless, apply your new foam sealing tape along the rafters and cross-supports. This tape acts as a cushion, preventing the rigid polycarbonate from creaking against the hard frame during temperature fluctuations. It also provides a vital first line of defense against drafts and water ingress.
Cut and Prep the New Panels
If you did not order pre-cut panels, you will need to cut them yourself. This is a critical step in mastering how to replace polycarbonate roof panels.
Lay your new polycarbonate sheet flat on a stable workbench. Mark your measurements clearly, remembering to cut the panel 3mm short to allow for thermal expansion. To prevent the fine plastic dust from entering the flutes (which looks terrible and causes mold), place masking tape over the line where you plan to cut.
Use your fine-tooth saw (a circular saw or jigsaw) and cut slowly and steadily. Let the blade do the work; forcing it will cause the plastic to chip or crack.
Next, you must identify the UV-protected side. Polycarbonate panels usually have a printed protective film on the UV side, while the inner side has a clear film. The UV side must face the sun. If you install it upside down, the panel will turn yellow and brittle within a few short years.
Finally, pre-drill your screw holes. Space them about 300mm apart. The most important rule here is to drill the holes 3mm oversized (larger than the diameter of the screw shaft). This oversized hole is the secret to allowing the panel to expand and contract in the heat without cracking around the screw heads.
install the New Polycarbonate Panels
Now it is time for the heavy lifting. Have your helper carefully pass the prepared panel up to you.
Always start your installation from the center of the roof and work your way outwards, or start from one side and work sequentially across. Never install the two outer panels first and try to squeeze the middle one in.
Lay the panel gently onto the foam tape you applied earlier. Ensure the flutes are running downwards. Before securing it, apply your breathable anti-dust tape to the bottom edge (the gutter end) and solid aluminum tape to the top edge (the ridge end).
Insert your self-tapping screws through the pre-drilled holes, making sure you are using your neoprene rubber washers. Drive the screws in until they are snug, but do not over-tighten them. If the rubber washer squishes out flat and distorts, you have gone too far. The panel needs room to breathe. Ensure there is a 5mm overlap at the edges for proper water drainage into the gutters.
Seal and Flash the Roof
Securing the panels is only half the battle; sealing them is what keeps your living space dry.
Run a smooth, continuous bead of polycarbonate-safe silicone sealant along the joints where the panels meet the glazing bars. Apply the F-sections (edge trims) along the outer edges of the roof to cap the exposed sides cleanly and secure them with silicone.
If you are replacing panels on a conservatory or a patio attached to a house wall, you must pay attention to the flashing. Make sure your lead flashing (or modern synthetic flashing tape) is firmly dressed down over the top edge of the newly installed panels. This prevents water from running down the brickwork and sneaking under the roof structure. Always maintain your 5mm drainage gaps so that pooling water has an easy exit route.
Final Checks and Cleanup
You are almost done! Before you pack away your ladder, do a final visual inspection. Check that all panels sit level and that every single screw has a washer that isn’t over-compressed.
Next, perform a water test. Take a garden hose and spray water over the highest point of the roof, simulating heavy rainfall. Go underneath and check closely for any drips or leaks, particularly around the glazing bars and the wall flashing.
If everything is bone dry, congratulations! Finally, peel off the protective films from the panels. If the panels got dirty during installation, clean them using a soft sponge and warm, soapy water only. Never use harsh chemicals or abrasive scrubbers.
Pro Tips Box:
- Keep panel widths under 700mm if possible. This makes them much easier to reach across and handle safely while on a ladder.
- Remember the golden rule: Flutes point down, always. This ensures gravity pulls condensation out.
Common Mistakes to Avoid
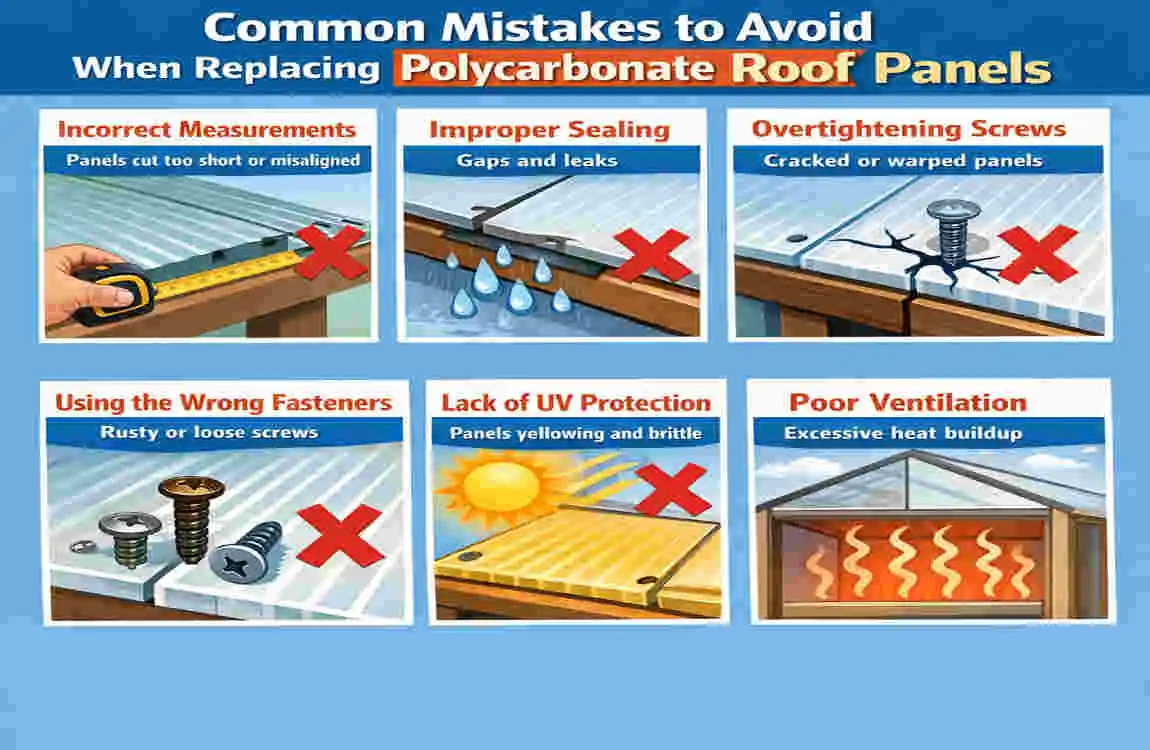
Even when you know the basic steps of how to replace polycarbonate roof panels, it is easy to make amateur mistakes that compromise the entire roof. Knowing what not to do is just as important as knowing what to do.
Here are the most common pitfalls you must avoid:
- Over-Tightening the Screws: This is the number one DIY mistake. Cranking the drill until the screw is buried tight will crack the panel immediately or cause it to spider-web crack as soon as the sun hits it and it tries to expand.
- Installing the Wrong UV Side: As mentioned, putting the non-UV side facing the sun will lead to total panel failure, yellowing, and brittleness in under 5 years. Always check the protective film.
- Leaving No Expansion Gaps: The intense heat in regions like Punjab causes significant thermal expansion. If the panels are cut flush against the frame with no breathing room, they will buckle, warp, and pop out of their glazing bars.
- Skipping the Breathable Tape: If you leave the bottom flutes completely open, bugs, dust, and algae will get inside. If you seal them totally shut with silicone, trapped condensation will pool inside and turn green. Breathable tape is essential.
Here is a quick reference table for fixing these mistakes:
Common Mistake Consequence Pro Fix / Solution
No Pre-Drilling Split edges and cracked panels. Always drill holes 3mm larger than the screw shaft.
Wrong Overlap Water bypasses the gutter and leaks. Ensure a minimum 5mm drainage gap overhang.
Using Standard Sealant, the chemical reaction melts the plastic. Use strictly neutral-cure, polycarbonate-safe silicone.
Walking on Panels: Total structural collapse and injury. Never step on panels; use a crawling board over the framing.
Cost Breakdown and Savings
One of the most rewarding aspects of learning how to replace polycarbonate roof panels is the incredible amount of money you save. Labor costs for roofing contractors have skyrocketed in recent years.
If you hire a professional contractor in the current market, you could be quoted upwards of PKR 80,000 to PKR 100,000+ just for the labor on a standard patio or conservatory roof, not including materials.
By taking the DIY route, your primary costs are purely the materials. As outlined earlier, sourcing 10mm standard multi-wall polycarbonate sheets, along with the necessary screws, tapes, and sealants, will run you approximately PKR 20,000 to PKR 30,000, depending on the exact square footage of your roof.
The factors that will influence your specific budget include the thickness of the panels (16mm panels will cost more than 10mm standard panels, but provide better insulation for Lahore’s extreme heat) and the size of your roof structure.
The return on investment (ROI) for this DIY project is massive. When installed correctly following this guide, a new polycarbonate roof will easily last 15+ years. You are trading one weekend of hard work for a decade and a half of leak-free peace of mind, saving tens of thousands of rupees in the process. You can easily find these materials at local hardware suppliers in Lahore or order them through major construction material hubs in your city.
Maintenance for Longevity
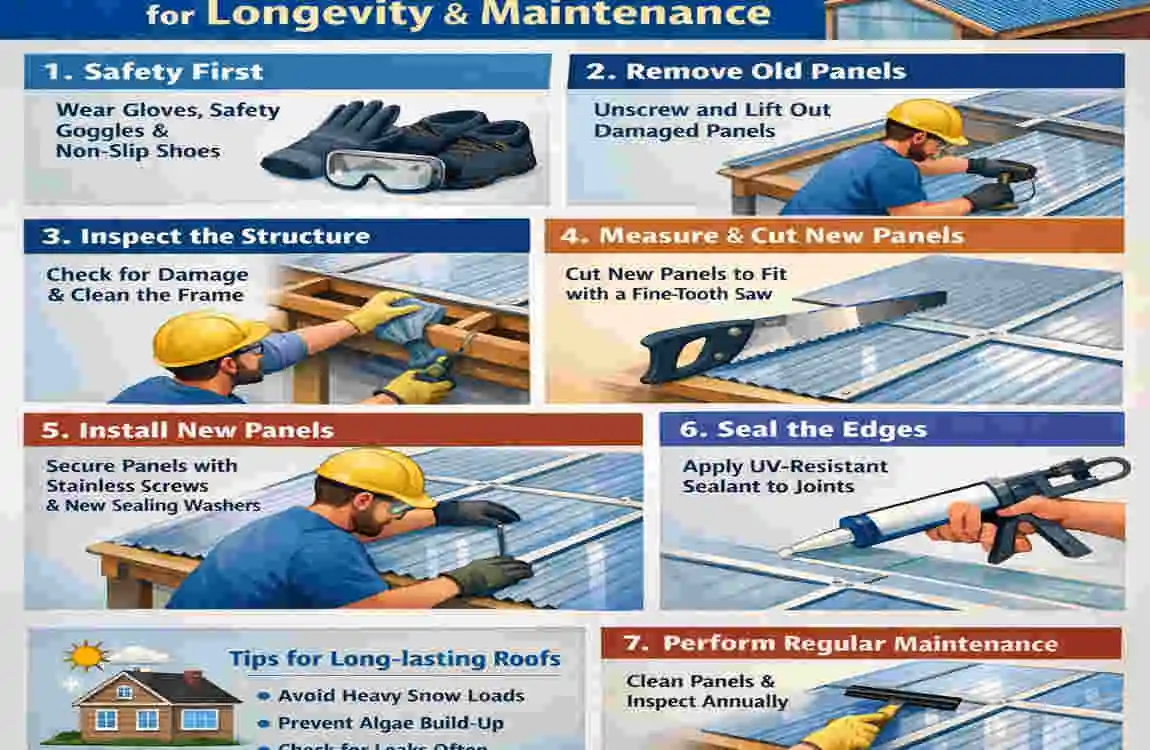
You have successfully learned how to replace polycarbonate roof panels on a conservatory or patio, but the work does not entirely stop once the tools are put away. Proper maintenance is the key to ensuring your new roof hits that 15-year lifespan mark.
Annual Cleaning Routine: At least once a year, preferably after the dusty and windy season, you need to clean the roof. Mix a bucket of lukewarm water with a few drops of mild dish soap. Use a soft, non-abrasive cloth or a very soft sponge on an extension pole to gently wipe away dirt, bird droppings, and algae. Never use power washers, stiff-bristled brooms, or harsh chemical solvents like ammonia. These will strip the UV coating right off the plastic and leave deep scratches that ruin the light transmission.
Seal and Hardware Checks. Every year, grab your ladder and inspect the neoprene washers. Over time, rubber dries out and cracks under the intense sun. If a washer looks cracked, unscrew the fastener, pop a new washer on, and secure it again. Plan to completely re-seal the flashing and F-section joints with fresh silicone every 5 years.
Signs of Impending Failure: Keep an eye out for early warning signs that the panels are aging. If you notice severe yellowing, interior fogging (which means the anti-dust tape has failed and moisture is trapped inside the flutes), or micro-cracks spreading from the screw holes, it might be time to start planning your next replacement cycle.
Frequently Asked Questions (FAQs)
Even with a detailed guide, DIYers often have specific questions about the nuances of DIY polycarbonate roof replacement. Here are the most common questions we get asked:
How much to replace polycarbonate roof panels on a 100 sq ft patio?
If you are doing it yourself, you can expect to spend around PKR 25,000 for standard 10mm materials. If you hire a professional, the cost could jump to over PKR 80,000 for materials and labor combined.
Can I walk on polycarbonate roof panels while working?
Absolutely not. Polycarbonate is strong against impact but is not designed to support concentrated human body weight. If you must reach the center of the roof, use a sturdy wooden crawling board laid strictly across the structural rafters to distribute your weight.
What are the best panels for intense Lahore heat?
For extreme heat, we highly recommend upgrading to 16mm or even 25mm multi-wall polycarbonate sheets. The extra air pockets inside the thicker sheets provide vastly superior thermal insulation, keeping your patio significantly cooler than standard 8mm or 10mm sheets.
What are the essential tools for a beginner attempting this?
You do not need a whole workshop. Start with a reliable cordless drill, a fine-tooth saw (a jigsaw is very beginner-friendly), a tape measure, a safe ladder, and a high-quality caulking gun for the silicone sealant.
Can I install new panels over the old ones?
No. Layering panels traps moisture, dirt, and heat between the layers, leading to rapid deterioration of both the old and new materials. Always strip the roof down to the bare frame before installing new sheets.
How do I stop condensation inside the panels?
Condensation is managed through proper orientation and sealing. Ensure the panel flutes run vertically, use solid aluminum tape on the top edge, and use breathable anti-dust tape on the bottom edge so the moisture can escape.