Have you ever looked at your floors, sighed deeply, and then immediately closed your browser tab after seeing a quote from a professional flooring contractor? You aren’t alone. We have all been there. You want to get rid of that stained carpet or yellowing linoleum, but the labor often costs more than the materials themselves. It feels like you are stuck between living with ugly floors and emptying your savings account.
If you are wondering how to lay vinyl flooring yourself, you have stumbled upon one of the most rewarding and budget-friendly home improvement projects. Vinyl flooring has come a long way from the shiny, plastic-looking sheets of the 1970s. Today, it is durable, water-resistant, and mimics the look of high-end hardwood or stone for a fraction of the price.
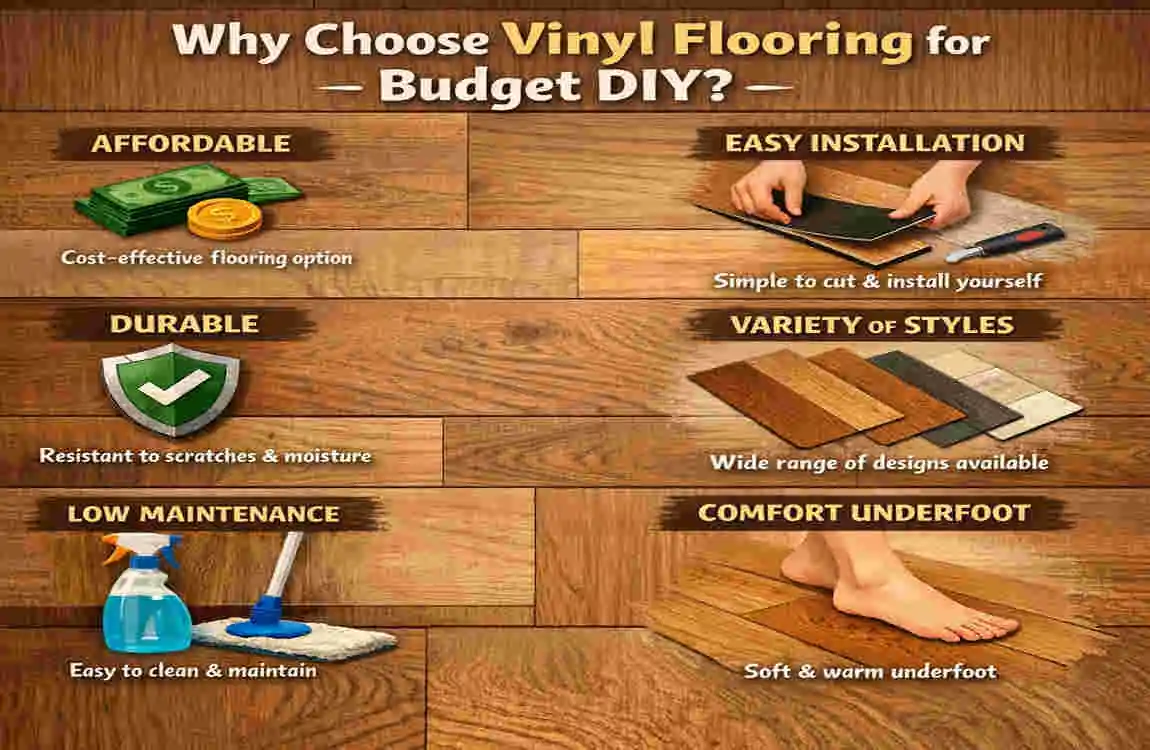
Why Choose Vinyl Flooring for Budget DIY?
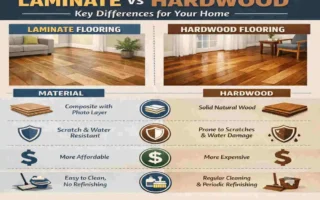
Before we get your hands dirty, let’s talk about why vinyl is the undisputed champion of budget renovations. When you compare flooring options, hardwood can cost upwards of $8 to $15 per square foot, and tile requires expensive saws and messy grout.
Vinyl, on the other hand, hits the sweet spot. It usually costs between $1 and $4 per square foot. But the savings don’t stop at the checkout line. Because vinyl is so easy to cut and install, you save money on tools and labor, too.
Here is a quick look at why savvy homeowners choose vinyl:
- Water Resistance: Unlike laminate, which swells when water is spilled on it, most modern vinyl (especially Luxury Vinyl Plank, or LVP) is 100% waterproof. This makes it perfect for kitchens, bathrooms, and basements.
- Durability: It withstands pet claws, dropped toys, and heavy foot traffic.
- Comfort: It feels softer and warmer underfoot compared to tile or stone.
Affordable Vinyl Flooring Options Under $2/Sq Ft
If you are strictly budgeting, you need to know what to look for. Not all vinyl is created equal, but there are fantastic options that look expensive but cost peanuts.
- Peel-and-Stick Tiles: These are the ultimate money-savers. They are great for rentals or low-traffic areas. You peel off the backing and stick them down.
- Sheet Vinyl: This comes in a large roll. It is incredibly cheap and has very few seams, making it great for bathrooms.
- Standard Luxury Vinyl Plank (LVP): This is what we will focus on mostly. These are individual planks that look like wood. You can find thinner “glue-down” versions or slightly thicker “click-lock” versions. For a beginner wanting a high-end look, floating click-lock planks are usually the best balance of cost and ease.
By learning how to lay vinyl flooring cheaply, you are investing in your home’s value without the massive debt.
Tools and Materials You’ll Need
One of the biggest misconceptions about flooring is that you need a garage full of power tools. With vinyl, that is not true. In fact, you can do almost the entire job with a sharp blade and a measuring tape.
To help you plan your spending, here is a budget shopping list. You likely have some of these items in your junk drawer already!
Item Budget Option Cost Estimate
Vinyl Planks Big Box Store (Bulk) $1 – $3 / sq ft
Utility Knife Basic Retractable $10
Tape Measure Standard 25ft $8
Spacers & Pull Bar Basic Installation Kit $15
Rubber Mallet Standard 16oz $8
T-Square Metal Ruler $10
Underlayment Foam Roll (If not attached) $0.20 / sq ft
Knee Pads Basic Foam $10
Total Budget Breakdown: If you are flooring a standard 200-square-foot room (like a bedroom or large kitchen), you are looking at roughly $200 to $500 for the whole project, tools included. Compare that to the $1,500+ a pro might charge!
Where to Buy Cheap
To stick to your budget, avoid boutique flooring showrooms. Instead, check out:
- Big Box Stores: Look for “in-stock” options rather than special orders.
- Remnants: Local flooring stores often sell leftover boxes or end-of-roll sheets for pennies on the dollar.
- Online Marketplaces: Sometimes people buy too much for their own renovation and sell the extra unopened boxes for cheap.
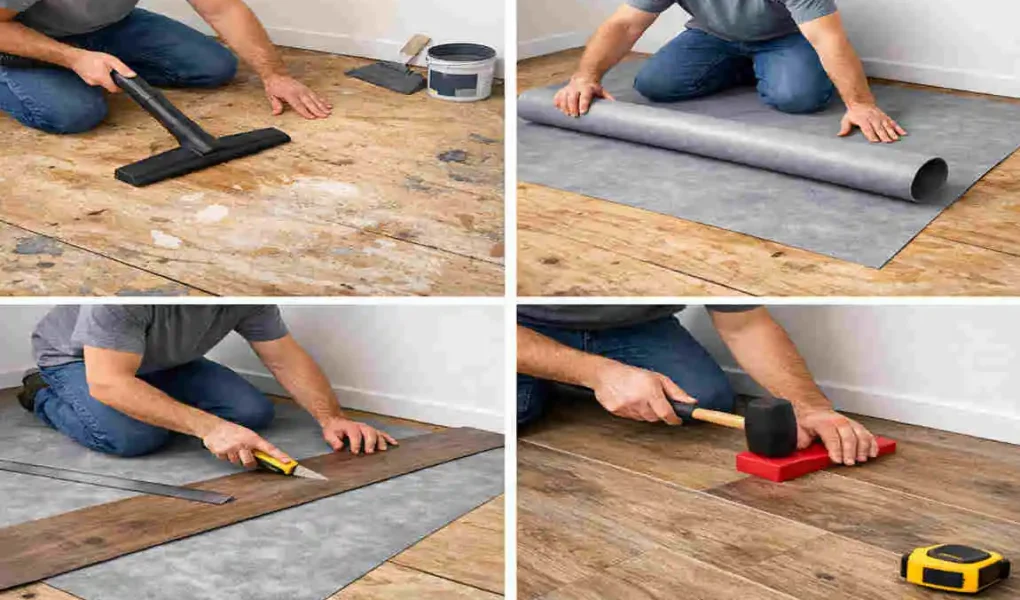
Room Preparation: The Key to Success
If you search for horror stories about how to lay vinyl flooring, they almost always stem from one thing: bad preparation.
Think of your subfloor (the floor underneath your new floor) like a canvas. If the canvas is wrinkled or bumpy, the painting will look terrible. Vinyl is flexible, which means if there is a hole or a bump underneath, eventually, your vinyl will mold to that shape, or worse, the locking mechanism will break.
Step-by-Step Prep List
- Clear the Deck: Remove all furniture. This seems obvious, but don’t try to work around a heavy sofa. It will slow you down and ruin your alignment.
- Remove Baseboards: Carefully pry them off with a pry bar. Budget Tip: If you are careful, you can number them on the back, set them aside, and reuse them later to save money on buying new trim.
- Clean, Clean, Clean: Sweep and vacuum thoroughly. Even small rocks or drywall crumbs can cause issues.
- Check for Flatness: Your floor doesn’t need to be perfectly level (flat like a table), but it must be flat (no hills or valleys). Grab a long straight edge (like a level) and slide it across the floor. If you see gaps larger than 3/16 of an inch, you need to fix them.
- For Plywood Subfloors: Sand down high spots.
- For Concrete Subfloors: Use a self-leveling compound to fill in low spots.
- Acclimation is Crucial: This is the step most people skip. Bring your boxes of vinyl into the room, open them up, and let them sit for 48 hours. Vinyl expands and contracts with temperature. If you install cold vinyl in a warm room, it might buckle later.
Taking your time here ensures that when you actually start laying vinyl flooring, it goes down smoothly and stays that way.
Step-by-Step Guide: How to Lay Vinyl Flooring

Now, for the fun part! Let’s transform that room. We are going to break this down into bite-sized pieces so you don’t feel overwhelmed.
Plan Your Layout
Do not just start laying planks at the door. If you do, you might end up with a tiny, awkward 1-inch strip of flooring on the opposite wall, which looks unprofessional and is a nightmare to cut.
- Measure the Room: Divide the room’s width by the width of a plank. This tells you how many rows you will have.
- Adjust the First Row: If the math shows you will end with a sliver of a row, cut your first row in half lengthwise. This ensures both the first and last rows are a decent size.
- The 1/3 Rule: You want a “staggered” look, like bricks in a wall. You never want the ends of the planks to line up perfectly. Plan to start rows with pieces cut to different lengths so the seams are scattered.
Cut Vinyl to Fit
You might be intimidated by cutting, but with vinyl plank, it is incredibly easy. You generally use the score-and-snap method.
- Measure where you need to make the cut.
- Use your T-square (or a speed square) to mark a straight line.
- Take your utility knife and run it firmly along the line. You don’t need to cut all the way through; score the top layer deep enough.
- Flip the plank over and snap it. It should break cleanly along the line.
- If any backing is still attached, slice it with your knife.
Install Underlayment (If Needed)
Check your box of vinyl. Does it say “Attached Pad” or “Pre-Attached Underlayment”?
- If YES: Skip this step! Adding extra padding under pre-padded vinyl makes the floor too soft and causes the locking clips to break.
- If NO: You need to roll out an underlayment. This acts as a moisture barrier and sound dampener. Roll it out across the floor and tape the seams together using the provided tape. This usually costs pennies per square foot and is essential for a quiet floor.
Lay the First Row
This is the most critical moment in learning how to lay vinyl flooring. If your first row is crooked, the whole room will be crooked.
- Spacers are Your Best Friend: Place plastic spacers (about 1/4 inch) against the wall. Vinyl floor needs room to “breathe” and expand. If you wedge it tight against the wall, it will bubble up in the summer.
- Start in the Corner: usually, you work from left to right. Lay the first plank.
- Connect the Second Plank: Take the next plank and angle it into the end of the first one. Drop it down until it clicks.
- Keep Going: Continue until you reach the wall. You will likely need to cut the last piece to fit (remember to leave a gap for the spacer!).
Continue Rows and Stagger Seams
Now you need to get into a rhythm.
- Start Row 2: Use the leftover cut piece from the previous row to start this one (as long as it is at least 6 inches long). This naturally creates that staggered “brick” pattern.
- Click and Lock: Angle the long edge of the plank into the groove of the previous row. Lower it down. Then, tap the end into the neighbor plank.
- Close the Gaps: This is where the tapping block and mallet come in. Even if it looks connected, give the long edge a gentle tap with the block and mallet to ensure the seal is tight. You shouldn’t see any gaps.
- Repeat: Work your way across the room.
If you find a plank isn’t locking, check the groove for debris. A tiny piece of sawdust can stop the lock from engaging.
Final Row and Trimming
You have made it to the other side of the room!
- The Rip Cut: You will likely need to cut these planks lengthwise to fit the remaining space. Measure the distance from the last row to the wall (minus the expansion gap!).
- Mark and Cut: Draw the line on your plank and use the score-and-snap method. If the strip is very narrow, you might need pliers to snap it.
- The Pull Bar: You won’t have room to swing your hammer between the wall and the plank. Hook the pull bar onto the end of the plank and hammer the bar to pull the plank tight into place.
Finish and Seal
You are almost done!
- Remove Spacers: Pull out all those plastic wedges around the perimeter.
- Reinstall Baseboards: Nail your baseboards back into the wall (not the floor!). The baseboard covers the expansion gap you left.
- Shoe Molding (Optional): If your baseboards don’t quite cover the gap, or if you left the baseboards on and used the “quarter round” method, install the shoe molding now.
- Transitions: Install a transition strip (T-molding) where the vinyl meets carpet or tile in the next room.
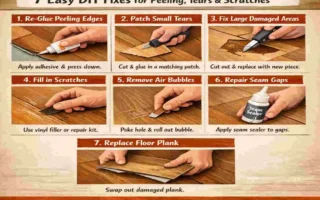
Budget-Saving Tips and Common Mistakes to Avoid
Even with a budget guide, costs can creep up if you aren’t careful. Here are some seasoned tips to keep your wallet happy.
Budget Hacks:
- Mix Boxes: Flooring prints repeat. To avoid your floor looking fake, open 3 or 4 boxes at once and grab planks randomly. This mixes up the pattern and color variation for a more authentic look.
- DIY Adhesive: If you chose glue-down planks to save money, buy a large tub of adhesive and a trowel rather than individual spray cans.
- Return Unopened Boxes: Always buy 10% more than you need for mistakes, but keep the receipt! Most stores will take back unopened boxes.
Common Mistakes to Avoid:
- Skipping the Undercut: When you get to a door casing (the trim around the door), don’t try to cut the vinyl to match the squiggly trim. Instead, use a saw to cut the bottom of the wood trim and slide the vinyl underneath it. It looks much cleaner.
- Ignoring the Pattern: Avoid “stair-stepping” your seams (where the joints look like a perfect set of stairs). It weakens the structural integrity. Keep it random.
- Hammering Too Hard: Vinyl locking systems are strong but brittle. If you smash them too hard, the lip will break, and the plank won’t lock. Tap gently.
Cost Breakdown and ROI
Let’s look at the real numbers. Why is learning how to lay vinyl flooring worth your weekend?
Scenario: You have a 200 sq ft bedroom.
- Professional Install:
- Materials: $600
- Labor ($3-$5/sq ft): $800 – $1000
- Total: $1400 – $1600
- DIY Budget Method:
- Materials (Budget Vinyl @ $1.50/sq ft): $300
- Tools & Supplies: $100
- Total: $400
You save over $1,000.
Plus, the ROI (Return on Investment) is high. New flooring is one of the top features homebuyers look for. By replacing old carpet with modern vinyl, you significantly increase your home’s resale value, more than offsetting the $400 you spent.
Frequently Asked Questions
How long does it take to lay vinyl flooring? For a standard room (like a bedroom), a beginner can finish the job in 1 to 2 days. Most of that time is spent on prep work. The actual laying of the floor goes very quickly once you get the hang of it.
Can beginners learn how to lay vinyl flooring? Absolutely. Vinyl plank (especially the click-lock variety) is widely considered the easiest flooring for beginners. It requires no glue, no nails, and no heavy saws. If you can use a utility knife and a measuring tape, you can do this.
What’s the cheapest way to lay vinyl flooring? The absolute cheapest method is using peel-and-stick vinyl tiles. However, for the best balance of value and longevity, click-lock vinyl planks are superior. They last longer and add more value to your home, making them cheaper in the long run.