You’re standing in your living room, staring at the outdated carpet or scratched hardwood floors, dreaming of a modern, sleek upgrade. But the thought of hiring professionals and spending thousands of dollars makes you hesitate. What if I told you there’s a way to transform your space affordably and easily, all by yourself? Enter Dream Home laminate flooring—a durable, water-resistant, and budget-friendly solution that’s perfect for DIY enthusiasts.
Dream Home laminate flooring from Lumber Liquidators features a click-lock system that makes installation a breeze. Whether you’re a seasoned DIYer or a first-timer, this guide will walk you through every step of the process, ensuring professional results without the hefty price tag. Did you know that installing laminate flooring can be up to three times faster than hardwood and save you $5-10 per square foot on labor costs? That’s a win-win for your wallet and your schedule.
| Step | Action | Key Tips |
|---|---|---|
| Prepare Subfloor | Clean, level, and dry the existing floor; remove baseboards if needed. | Ensure flatness within 3/16 inch over 10 feet to prevent clicks or gaps . |
| Acclimate & Measure | Let planks sit in room 48 hours; measure room length/width, add 10% waste. | Start parallel to longest wall for best appearance . |
| Trim Door Jambs | Cut under door casings with jam saw for plank clearance. | Trace plank edge for precise fit . |
| Install Underlayment | Roll out foam or vapor barrier; tape seams (skip if pre-attached). | Covers imperfections and reduces noise . |
| Lay First Row | Place tongue against wall with 3/8-inch spacers; stagger end joints. | Use pull bar for tight fits . |
| Continue Rows | Angle-lock subsequent rows; cut planks with circular saw or jigsaw. | Stagger seams 6-8 inches; check level often . |
| Finish Edges | Install reducers/transitions; replace baseboards to cover gaps. | Allow expansion space; vacuum debris during install . |
Why Choose Dream Home Laminate Flooring?

When it comes to flooring options, Dream Home laminate stands out for several reasons. Here’s why it’s a top choice for homeowners:
Affordability
Dream Home laminate flooring is incredibly budget-friendly, with prices starting at under $2 per square foot. This makes it an excellent option for those looking to upgrade their floors without breaking the bank.
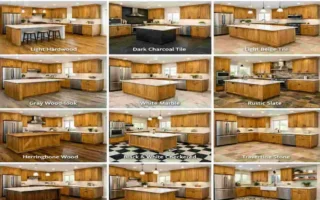
Realistic Wood Look
Thanks to advanced printing technology, Dream Home laminate mimics the appearance of real hardwood, offering a variety of styles and finishes to suit any décor. From rustic oak to sleek maple, there’s a design for everyone.
Durability and Warranty
With scratch-resistant surfaces and warranties ranging from 10 to 25 years, this flooring is built to withstand daily wear and tear. It’s perfect for high-traffic areas like living rooms, kitchens, and hallways.
Easy Installation
The floating installation system means no glue or nails are required. The planks click together, making it a beginner-friendly project.
Comparison to Other Flooring Types
Compared to vinyl plank or engineered wood, Dream Home laminate offers superior scratch resistance and a simpler installation process. It’s also more affordable than hardwood, making it a practical choice for families and pet owners.
Tools and Materials Needed
Before you begin, gather all the necessary tools and materials. Having everything on hand will make the process smoother and more efficient.
Category Items Purpose
Cutting: circular saw, jigsaw, and flooring cutter for precise cuts around obstacles and edges.
Measuring/Leveling: Tape measure, 4-ft level, spacers (3/8-inch). To ensure straight rows and proper expansion gaps.
Installation: Pull bar, tapping block, rubber mallet. To lock planks securely without damaging them.
Preparation: Utility knife, broom, and underlayment for subfloor cleaning and creating a moisture barrier.
Safety: Dust mask, knee pads, safety glasses. To protect yourself when cutting and kneeling.
Materials Dream Home planks (10% extra), transition strips, Core flooring materials, and extras for finishing touches.
Budget Tip: Expect to spend around $100-200 on tools and materials for a 200-square-foot room.
Preparation Steps Before Installation
Proper preparation is the key to a successful installation. Skipping these steps can lead to issues like buckling or uneven floors down the line.
Acclimate the Planks
Unpack your Dream Home laminate planks and let them sit in the installation room for 48-72 hours. This allows the material to adjust to the room’s temperature and humidity, preventing expansion or contraction after installation.
Assess the Room
Measure the room carefully and purchase 10% extra flooring to account for cuts and waste. This ensures you won’t run out of planks mid-project.
Check the Subfloor
Your subfloor must be flat, dry, and clean. Use a level to check for any dips or bumps. If there are dips, fill them with leveling compound. Sand down any high spots to create a smooth surface.
Remove Baseboards and Trim
Carefully remove baseboards and trim around the room. This will allow the flooring to fit snugly against the walls.
Install a Vapor Barrier
If you’re installing over a concrete subfloor, lay down a vapor barrier to protect against moisture. This step is crucial for preventing damage to your laminate.
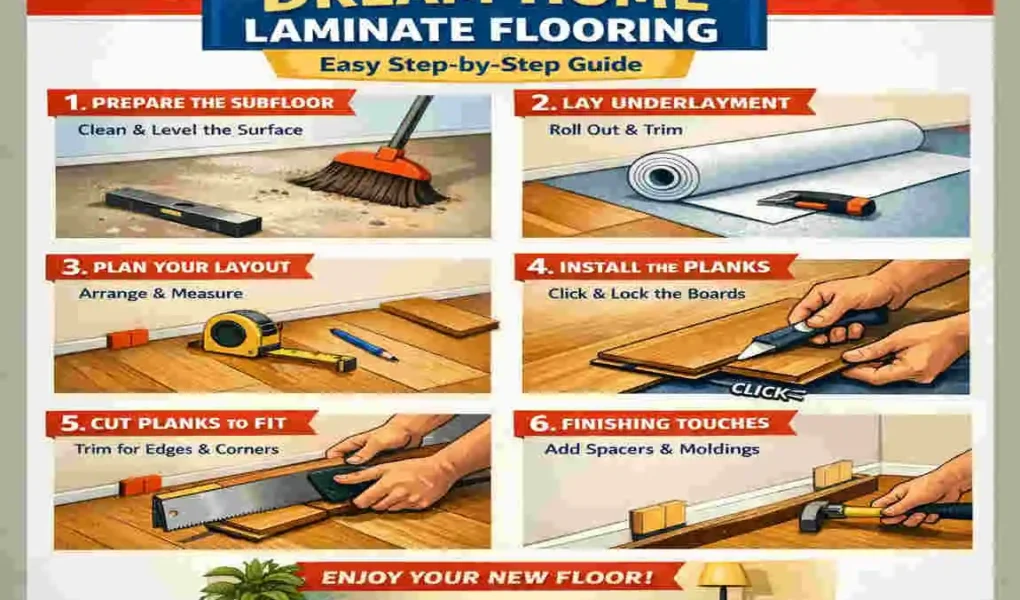
Step-by-Step Installation Guide
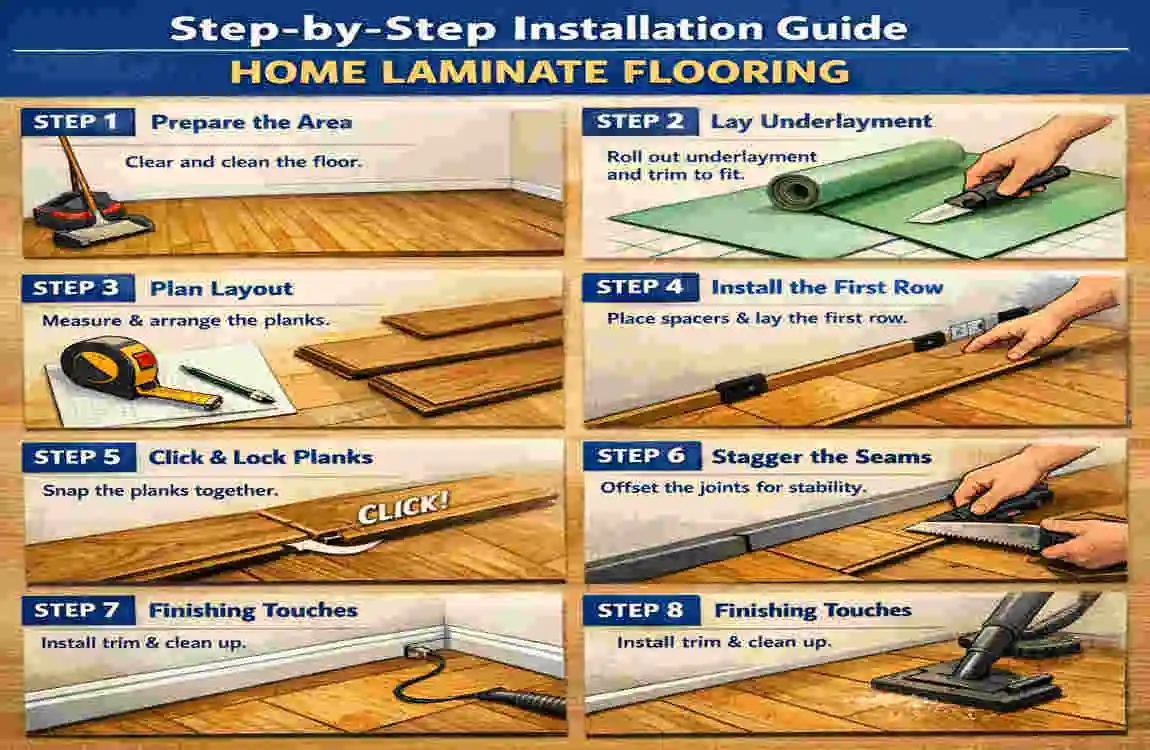
Now that your room is prepped, it’s time to start installing your Dream Home laminate flooring. Follow these steps for a flawless finish.
Plan Your Layout
- Start by planning your layout. Lay the planks parallel to the longest wall in the room for a visually appealing look.
- Dry-lay the first row to ensure proper alignment and stagger the seams by at least 12 inches for stability.
Install Underlayment
- Roll out the underlayment (if not pre-attached to the planks) and tape the seams together. This creates a smooth surface and acts as a moisture barrier.
Lay the First Row
- Place the first plank with the tongue side facing the wall. Use spacers to maintain a 3/8-inch expansion gap.
- Connect the second plank at a slight angle, then gently tap it into place with a tapping block.
Install Subsequent Rows
- Continue laying planks row by row. Insert each plank at a 45-degree angle, then drop and lock it into place.
- Use a pull bar to ensure tight fits, especially near walls.
Handle Obstacles and Cuts
- For obstacles like pipes or vents, measure carefully and use a jigsaw to make precise cuts.
- For the final row, measure the remaining space and cut the planks lengthwise to fit.
Finish Edges and Transitions
- Reinstall baseboards to cover the expansion gaps. Use transition strips between rooms for a seamless look.
Common Mistakes to Avoid
Avoid these common pitfalls to ensure a smooth installation process:
- Skipping Acclimation: This can cause the planks to expand or contract after installation.
- Neglecting Expansion Gaps: Without proper gaps, the flooring may warp over time.
- Over-Tapping: Excessive force can damage the edges of the planks.
Maintenance and Care Tips

To keep your Dream Home laminate flooring looking its best:
- Sweep or vacuum regularly to remove dirt and debris.
- Avoid using steam mops; instead, use a damp mop.
- Repair minor scratches with a color-matched repair kit.
FAQs
Q: How long does it take to install 200 sq ft of laminate flooring?
A: It typically takes 1-2 days for a DIYer to complete.
Q: Can I install laminate over tile?
A: Yes, as long as the tile is level and in good condition.