Tiling a bathroom floor is one of the most rewarding home improvement projects anyone can take on. A properly tiled bathroom floor not only enhances your bathroom’s overall look but also adds durability and value to your home. Whether you’re a DIY enthusiast or just starting your home renovation journey, this guide will walk you through how to tile a bathroom floor step by step.
Why Tiling a Bathroom Floor is a Smart Choice

When it comes to bathroom floors, tiles are the ultimate choice for homeowners—and for good reason. Let’s explore why tiling stands out among other flooring options.
Water Resistance and Durability
Bathrooms are high-moisture areas, and not all flooring materials can withstand constant exposure to water and humidity. Tiles, especially porcelain and ceramic, are water-resistant, durable, and less prone to damage over time. They are designed to handle splashes, spills, and even heavy foot traffic without wearing out.
Variety in Design and Aesthetics
Tiles offer an incredible array of styles, textures, colors, and sizes. From sleek modern designs to timeless patterns, you can find tiles to match any aesthetic. Whether you prefer a classic look or a bold statement, tiling gives you the flexibility to bring your vision to life.
Value Addition to Your Home
A well-tiled bathroom not only looks fantastic but also increases your home’s resale value. Buyers love bathrooms with stylish and durable finishes. A tiled floor is a wise investment that pays off in both functionality and appeal.
Common Mistakes to Avoid
Before diving into the project, it’s crucial to know what not to do. Here are common mistakes to steer clear of:
- Skipping the preparation phase: Uneven or dirty floors can lead to tile issues later on.
- Using the wrong adhesive: Not all adhesives work in high-moisture environments.
- Ignoring grout sealing: This can lead to water damage and stains over time.
Planning Your Bathroom Flooring Project
Proper planning is the foundation of any successful tiling project. Here’s how to set yourself up for success.
Assessing the Existing Floor Condition
Start by examining your current floor. Is it level, clean, and in good condition? Any cracks, uneven surfaces, or water damage must be addressed before tiling. A solid base is key to ensuring your tiles stay in place for years to come.
Choosing the Right Tile Type
Not all tiles are created equal, and picking the right one for your bathroom floor is crucial. Let’s compare some popular options:
Tile Type Pros Cons
Ceramic: Affordable, easy to install, versatile. Less durable than porcelain
Porcelain is highly durable and water-resistant. Slightly more expensive, harder to cut
Natural Stone: Unique, luxurious appearance. Requires sealing, prone to scratches
Vinyl: Budget-friendly, easy maintenance. Not as durable, limited aesthetics
Tip: Porcelain tiles are often the best choice for bathroom floors due to their water resistance and durability. However, if you’re working on a budget, ceramic tiles are a great alternative.
Calculating the Amount of Tile Needed
Measure your bathroom floor carefully to determine the total square footage. Add an extra 10-15% to account for cuts, waste, and mistakes. Buying slightly more than needed ensures you won’t run short midway through the project.
Essential Tools and Materials Checklist
Here’s a quick checklist of what you’ll need:
- Tiles and spacers
- Tile adhesive/mortar
- Grout and grout sealer
- Tile cutter or wet saw
- Measuring tape, level, and chalk line
- Notched trowel
- Sponge and bucket for cleaning
- Safety gear (gloves, goggles, knee pads)
Step-by-Step Guide: How to Tile a Bathroom Floor
Now let’s dive into the nitty-gritty of tiling your bathroom floor. Follow these steps for a professional-quality finish.
Preparing the Surface
- Clean the floor: Remove any dirt, debris, or old adhesive. A clean surface ensures better adhesion.
- Level the floor: Use a self-leveling compound if the floor is uneven. This will prevent tiles from cracking over time.
- Repair any damage: Fill in cracks or holes with a suitable filler. Allow it to dry completely before proceeding.
Measuring and Marking Tile Layout
- Find the center point: Use a chalk line to divide the floor into four quadrants. Start tiling from the center to ensure a balanced layout.
- Plan your tile placement: Lay tiles without adhesive to visualize the layout. Adjust as needed to minimize minor edge cuts.
Applying Adhesive/Mortar
- Choose the right adhesive: For bathrooms, use a waterproof adhesive or mortar specifically designed for wet areas.
- Spread evenly: Use a notched trowel to spread the adhesive in small sections. Work in manageable areas to prevent it from drying out.
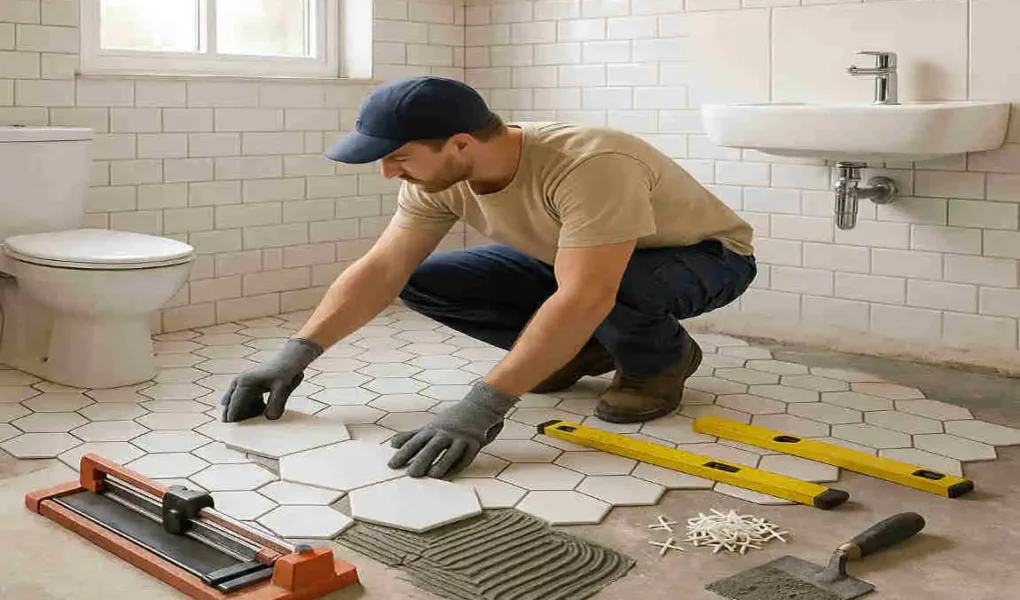
Laying the Tiles
- Place tiles carefully: Press each tile firmly into the adhesive, using spacers to maintain even gaps.
- Check alignment: Use a level to ensure tiles are straight and even. Make adjustments as you go.
Cutting Tiles to Fit
- Measure accurately: Use a pencil to mark tiles that need cutting for edges or obstacles.
- Use the right tools: A tile cutter or wet saw will give precise cuts. Always wear safety gear when cutting tiles.
Allow Adhesive to Set
Let the adhesive cure for at least 24 hours before moving on to grouting. Avoid stepping on the tiles during this time.
Grouting and Finishing Touches
Grouting is what gives your tiled floor a polished, finished look. Here’s how to do it right.
Choosing the Right Grout
Pick a grout color that complements your tiles. For a seamless look, match the grout to the tile color. For contrast, choose a darker or lighter shade.
Applying Grout
- Spread grout evenly: Use a rubber float to work grout into the gaps between tiles. Hold the float at a 45-degree angle for best results.
- Wipe excess grout: Use a damp sponge to wipe away excess grout from the tile surface before it dries.
Sealing the Grout
Once the grout has dried, apply a grout sealer to protect it from moisture and stains. This step is crucial in a bathroom setting.
Final Cleaning and Polishing
Wipe down the tiles with a clean, damp cloth to remove any haze left by the grout. Your floor should now look clean and shiny.
Essential Tips for a Durable Bathroom Floor
To ensure your tiled floor lasts for years, follow these maintenance tips:
- Use waterproof sealants: Apply a sealant to both the tiles and grout to prevent moisture damage.
- Clean regularly: Sweep and mop the floor weekly to prevent dirt buildup.
- Repair promptly: Address any cracks or loose tiles immediately to avoid further damage.
Styling Your Bathroom Floor with Tiles
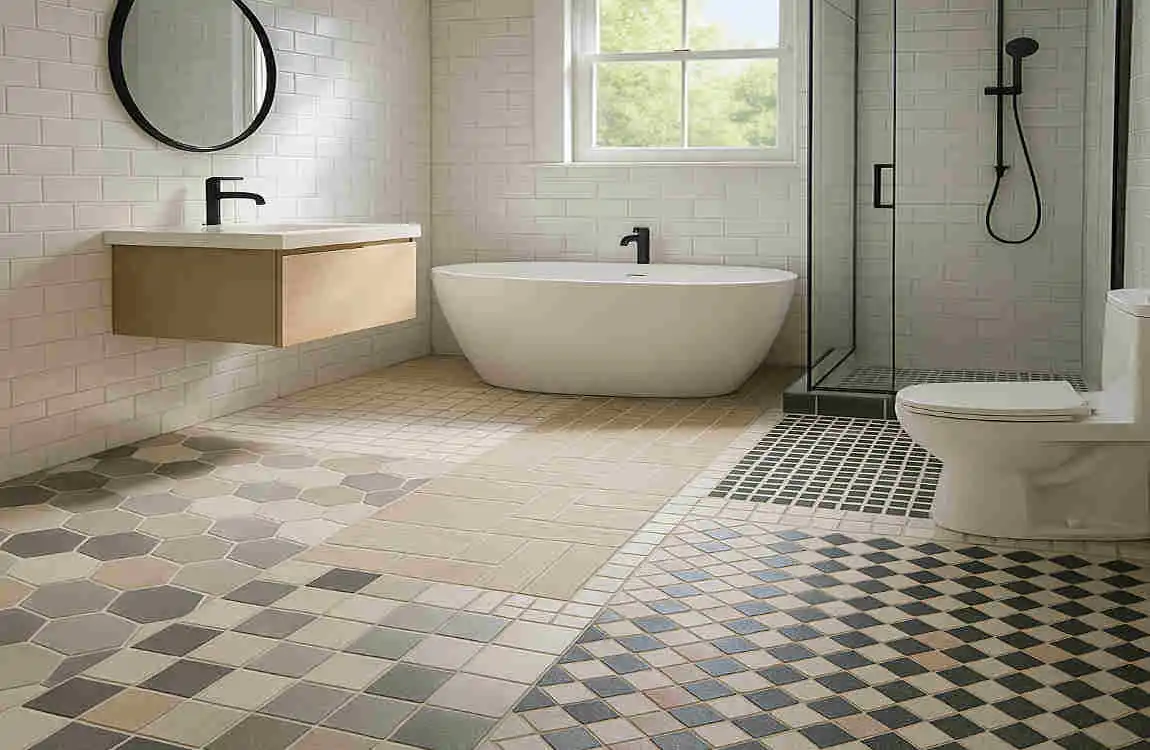
Tiles aren’t just practical—they’re an opportunity to showcase your personal style. Here are some ideas to inspire you:
- Popular patterns: Herringbone, chevron, and diagonal layouts add visual interest.
- Mix and match: Combine different tile colors or textures for a unique look.
- Add borders: Use decorative tiles as borders to frame your floor design.
Common Challenges and How to Overcome Them
Every project has its hurdles, but with the right approach, you can tackle them like a pro:
- Uneven floors: Use a leveling compound to create a smooth base.
- Cracked tiles: Always keep extra tiles on hand for replacements.
- Tricky corners: Use smaller tiles or a wet saw for precise cuts.
When to Call a Professional
Sometimes, it’s best to leave the job to an expert. Here’s when to consider professional help:
- Extensive damage: If the subfloor is severely damaged, a professional can repair it properly.
- Complex layouts: Intricate patterns or designs may require expert precision.
- Time constraints: If you’re short on time, hiring a pro ensures the job is done quickly and correctly.