Outdoor power access has become a must-have feature for modern homes. Whether you want to power garden tools, run outdoor lighting, use a pressure washer, or enjoy outdoor entertainment, having a reliable outdoor socket makes life much easier. Instead of dragging extension leads through windows or across the garden, you can safely access electricity exactly where you need it.
Many homeowners now install outdoor sockets for lawn mowers, electric grills, patio heaters, and even smart garden systems. As outdoor living spaces continue to grow in popularity, demand for safe, weatherproof electrical access has increased, too.
However, installing an outdoor socket is not just about drilling a hole and connecting wires. Outdoor electrical work requires careful planning, proper waterproof protection, and strict attention to safety. Moisture, rain, and incorrect wiring can create serious hazards if the installation is not done properly.
What Is an Outdoor Socket?
An outdoor socket is a specially designed electrical outlet made for exterior use. Unlike standard indoor sockets, outdoor sockets feature weatherproof protection to keep water, dust, and moisture from reaching electrical components.
These sockets are built with protective covers and durable materials that can withstand changing weather conditions. Most modern outdoor sockets include waterproof seals and locking covers to improve safety.
The main difference between indoor and outdoor sockets is the level of environmental protection. Indoor sockets are not designed to handle rain, damp air, or direct sunlight. Using a standard indoor outlet outside creates a serious electrical risk.
Outdoor sockets are usually rated according to the IP system. IP stands for “Ingress Protection.” A higher rating means better protection against water and dust. For example, an IP66-rated waterproof outdoor socket offers excellent resistance to heavy rain and outdoor conditions.
There are several common types of outdoor electrical sockets:
- Single outdoor socket
- Double outdoor socket
- Switched the outdoor socket
- Smart outdoor sockets with timers and app control
A weatherproof electrical outlet is ideal for gardens, patios, garages, driveways, and outdoor kitchens. These sockets provide convenient access to power while helping maintain electrical safety outdoors.
Benefits of Installing an Outdoor Socket
Installing an outdoor electrical socket offers several practical advantages for homeowners. It improves convenience, safety, and functionality around the property.
Convenience for Outdoor Appliances
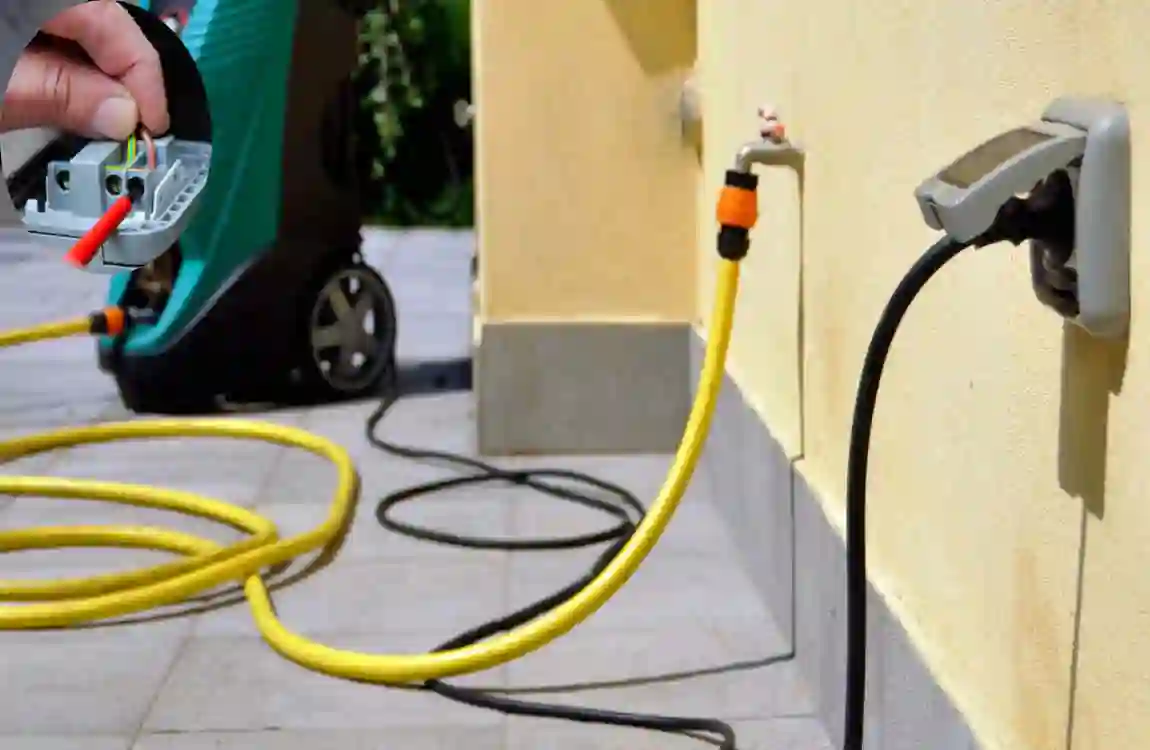
One of the biggest benefits is easy access to electricity outdoors. Instead of relying on long extension leads, you can plug appliances directly into a garden power socket.
Outdoor sockets are useful for:
- Lawn mowers
- Hedge trimmers
- Pressure washers
- Garden lighting
- Electric BBQs
- Water features
You can work more comfortably in your garden without worrying about cable length or tangled wires.
Improved Safety
Extension cables running through doors or across wet surfaces can become dangerous. An outdoor socket installation reduces trailing cables and helps lower the risk of trips and electrical accidents.
A weatherproof outdoor socket also offers better protection against rain and moisture. Many models include built-in RCD protection that quickly disconnects power in the event of a fault.
Adds Property Value
Modern buyers often appreciate practical outdoor upgrades. An external electrical socket can make patios, gardens, and outdoor entertainment spaces more functional.
Outdoor power access is especially useful for homes with:
- Garden offices
- Outdoor kitchens
- Hot tubs
- Security lighting
- Entertainment systems
Even a simple outdoor plug socket guide project can improve the overall usability of your property.
Energy Efficiency
Smart outdoor sockets can help reduce energy waste. Some models allow scheduling, timers, and remote control through mobile apps.
This feature works well for outdoor lighting systems and seasonal decorations. You can automate power usage and avoid leaving devices running unnecessarily.
Tools and Materials Needed to Fit an Outdoor Socket
Before starting your DIY outdoor socket installation, gather all necessary tools and materials. Proper preparation helps make the job safer and easier.
Safety Precautions Before Installing an Outdoor Socket
Safety should always be your top priority when working with electricity. Even a simple outdoor socket wiring project can become dangerous if proper precautions are ignored.
Turn Off the Main Power Supply
Before touching any electrical wiring, switch off the power at the consumer unit or fuse board. Isolate the correct circuit breaker connected to the area where you will work.
Never assume a circuit is dead without testing it first.
Use a voltage tester to confirm that no electricity is present before handling cables or terminals.
Use RCD Protection
RCD protection is essential for outdoor electrical safety. An RCD, also known as a Residual Current Device, cuts off electricity immediately if it detects a fault or electric leakage.
Outdoor environments increase the risk of moisture-related electrical issues. RCD protection can significantly reduce the chance of electric shock.
Many modern outdoor sockets include built-in RCDs, but additional protection at the consumer unit may also be recommended.
Check Local Electrical Regulations
Electrical regulations vary by location. Some installations may legally require inspection or certification by a qualified electrician.
If you are unsure about local rules, consult a licensed professional before beginning work.
This is especially important if:
- You are adding a new circuit
- You are modifying consumer unit connections
- Your home has older wiring
Avoid Wet Conditions During Installation
Never install a waterproof electrical socket during rain or damp weather. Wet conditions increase electrical risk and can affect installation quality.
Work only in dry conditions, and keep all surfaces dry throughout the process.
Test Existing Circuits Before Connection
Before connecting the outdoor socket, test the indoor power source to confirm it has sufficient capacity to support the additional load.
Overloading an existing circuit can create overheating and fire hazards.
Good electrical installation tips always start with proper testing and planning.
How to Fit an Outdoor Socket Step by Step
This section explains exactly how to fit an outdoor socket safely using a simple step-by-step process. Choose the Best Location
Start by selecting the right position for your outdoor electrical socket. A good location improves convenience, safety, and weather protection.
Choose a spot close to an indoor power source whenever possible. Shorter cable runs are easier to install and reduce material costs.
Good installation areas include:
- Patio walls
- Garage exteriors
- Garden walls
- Outdoor kitchens
The socket should sit high enough above ground level to avoid standing water or dirt buildup. A common height is around 450-1200mm above the ground.
Avoid placing the socket in direct rain if possible. Installing under a small overhang or sheltered wall can improve protection.
Also, think about future usage. Position the socket where it will be practical for garden tools, lighting, or outdoor appliances.
Plan the Cable Route
Careful planning makes outdoor socket installation safer and neater.
You will usually run the cable from an indoor socket or fused spur through the wall to the outdoor socket location.
Choose the shortest and safest cable path possible.
Before drilling, check carefully for:
- Water pipes
- Gas lines
- Existing electrical cables
Cable detectors can help identify hidden obstacles inside walls.
If the cable will remain exposed outdoors, install protective conduit. Conduit protects wiring from weather damage, impact, and UV exposure.
Neat cable routing also improves the appearance of the installation.
Turn Off Electricity
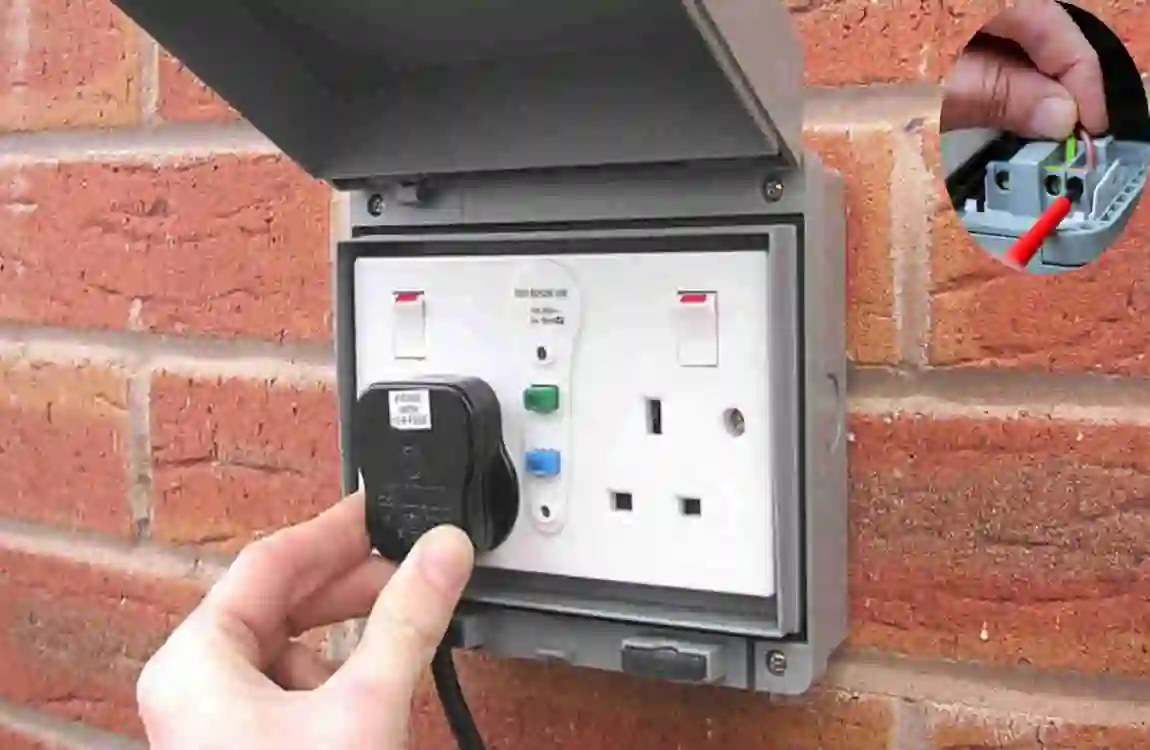
Now isolate the electrical supply.
Switch off the correct breaker at the consumer unit and label it if necessary to prevent accidental reactivation.
Use a voltage tester on the indoor socket or connection point to verify that the power is completely off.
Never skip this step.
Even experienced electricians double-check circuits before working.
Outdoor electrical safety depends on proper isolation procedures.
Drill Access Hole
Next, drill a hole through the wall for the cable.
Use a masonry drill bit suitable for the wall material. Drill at a slight downward angle toward the outside. This helps prevent water from entering the building through the cable opening.
Make the hole large enough for:
- Cable
- Grommet
- Protective sleeve if required
Install waterproof grommets to protect the cable from sharp edges.
Take your time during drilling to avoid damaging brickwork or interior plaster.
Install the Back Box
Most outdoor sockets require a back box mounted to the wall.
Hold the box in position and use a spirit level to ensure it sits straight.
Mark screw holes clearly with a pencil.
Drill mounting holes and insert wall plugs if attaching to masonry.
Secure the box firmly using suitable screws. A stable mounting prevents movement and helps maintain waterproof seals.
Check that the cable entry points align properly before fully tightening everything.
Run the Electrical Cable
Feed the cable through the wall and into the outdoor back box.
Use cable clips to secure wiring along walls or skirting boards indoors neatly.
Outdoors, protect exposed cable using conduit whenever possible. This adds durability and improves appearance.
Avoid leaving loose or hanging cable sections.
Keep cable bends smooth and avoid excessive tension.
Good cable management is an important part of safe outdoor wiring.
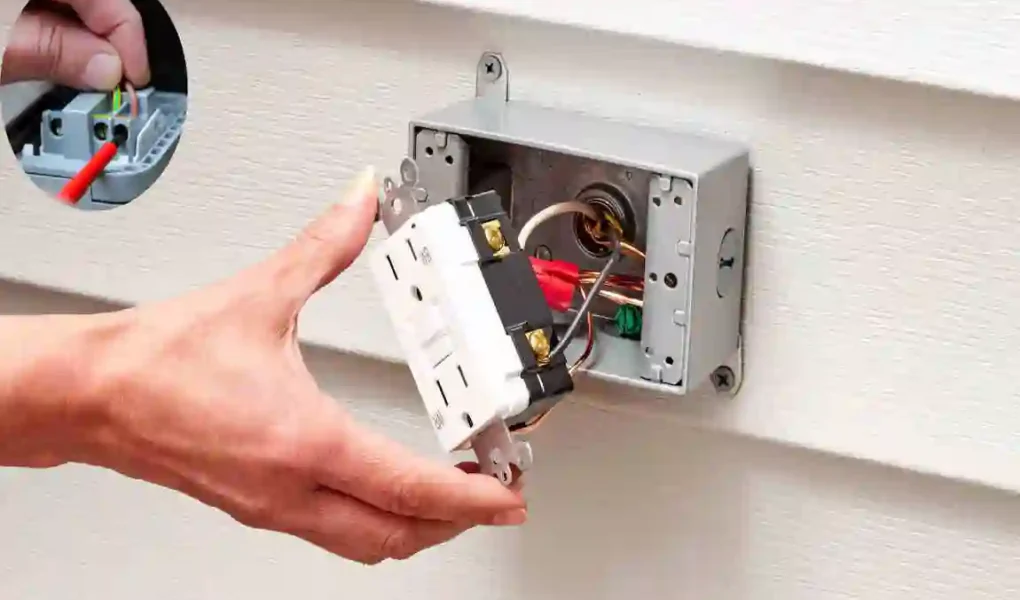
Wire the Outdoor Socket
Now connect the wires to the outdoor socket terminals.
Typically, you will work with three wires:
Wire Type, Typical Color, Purpose
Live Brown Carries electrical current
Neutral Blue Returns current
Earth Green/Yellow Safety protection
Connect each wire to the correct terminal inside the socket.
- Live wire to L terminal
- Neutral wire to N terminal
- Earth wire to E terminal
Make sure all terminal screws are tight and secure.
Loose connections can cause overheating or electrical faults.
Double-check wire positioning before closing the socket housing.
If you are uncertain about wiring connections, contact a qualified electrician.
Connect to Indoor Power Source
The outdoor socket is usually connected to an indoor power supply via a fused spur or an existing socket circuit.
A fused connection unit provides additional safety and overload protection.
Some installations may require a dedicated circuit depending on power demands.
Carefully follow wiring instructions and ensure the indoor connection is fully secure.
Avoid overloading older circuits with high-powered outdoor equipment.
If you are unsure about load capacity, consult a professional electrician.
Seal and Waterproof the Installation
Weatherproofing is one of the most important parts of outdoor socket installation.
Apply silicone sealant around:
- Cable entry points
- Back box edges
- Wall penetrations
Install waterproof glands at the points where cables enter the socket housing.
Check that rubber seals sit properly around covers and hinges.
Close the protective cover fully and ensure locking mechanisms work correctly.
A properly sealed installation helps prevent moisture damage and improves long-term reliability.
Test the Outdoor Socket
Once everything is complete, restore power at the consumer unit.
Use a socket tester to confirm the outdoor socket operates correctly.
Test:
- Power supply
- Polarity
- Earth connection
- RCD functionality
Press the RCD test button to verify proper operation.
Finally, plug in a small appliance to confirm the socket works normally.
If anything appears unusual, switch off the power immediately and inspect the installation.
If unsure at any stage, consult a qualified electrician.
Common Mistakes to Avoid When Installing an Outdoor Socket
Even simple DIY outdoor socket installation projects can go wrong if important details are ignored.
Using Indoor Sockets Outdoors
Indoor sockets are not designed for external conditions. Exposure to moisture can quickly create dangerous electrical hazards.
Always install a weatherproof outdoor socket with suitable IP protection.
Ignoring Waterproof Ratings
Not all outdoor sockets offer the same level of protection.
Low-rated products may fail during heavy rain or long-term outdoor exposure.
IP66-rated units usually provide excellent protection for most homes.
Overloading the Circuit
Outdoor appliances like pressure washers and heaters can draw significant power.
Connecting too many devices to one circuit may trip breakers or damage wiring.
Always check circuit capacity before installation.
Poor Cable Management
Loose or exposed cables can become damaged over time.
Use conduit, clips, and proper routing to keep wiring protected and tidy.
Forgetting RCD Protection
RCD protection is critical for outdoor electrical safety.
Without it, electrical faults become far more dangerous in wet environments.
Incorrect Wire Connections
Reversed or loose wiring can cause faults, overheating, or the risk of electric shock.
Always verify terminal connections carefully before restoring power.
How Much Does It Cost to Fit an Outdoor Socket?
The cost of fitting an outdoor socket depends on whether you complete the work yourself or hire an electrician.
DIY installation is usually cheaper if you already own tools and understand basic electrical work.
Typical DIY costs include:
- Outdoor socket unit
- Cable
- Conduit
- Sealant
- Fixings
Professional installation costs vary depending on:
- Cable distance
- Wall thickness
- Existing wiring condition
- Additional RCD protection
- Labor rates in your area
Here is a simple cost estimate table:
Installation Type Estimated Cost
DIY basic installation $40–$120
Professional installation $150–$400
Premium smart outdoor socket $80–$250
Additional circuit installation $200–$600
Complex installations may cost more if new circuits or upgrades to the consumer unit are required.
Although DIY can save money, safety should always come first.
DIY vs Hiring a Professional Electrician
Choosing between DIY and professional installation depends on your experience and confidence with electrical work.
DIY InstallationProfessional Installation
Lower cost , Safer installation
Flexible timing , Certified work
Requires electrical knowledge , Faster completion
Risk of mistakes , Regulation compliance
DIY outdoor socket wiring may suit experienced homeowners who understand electrical safety and local regulations.
However, beginners should seriously consider hiring a licensed electrician.
Professional installation offers:
- Proper testing
- Safer wiring
- Legal compliance
- Reliable waterproofing
- Reduced risk of faults
Electrical mistakes can become dangerous and expensive to fix later.
If you feel uncertain about any part of the process, professional help is the safest option.
Maintenance Tips for Outdoor Sockets
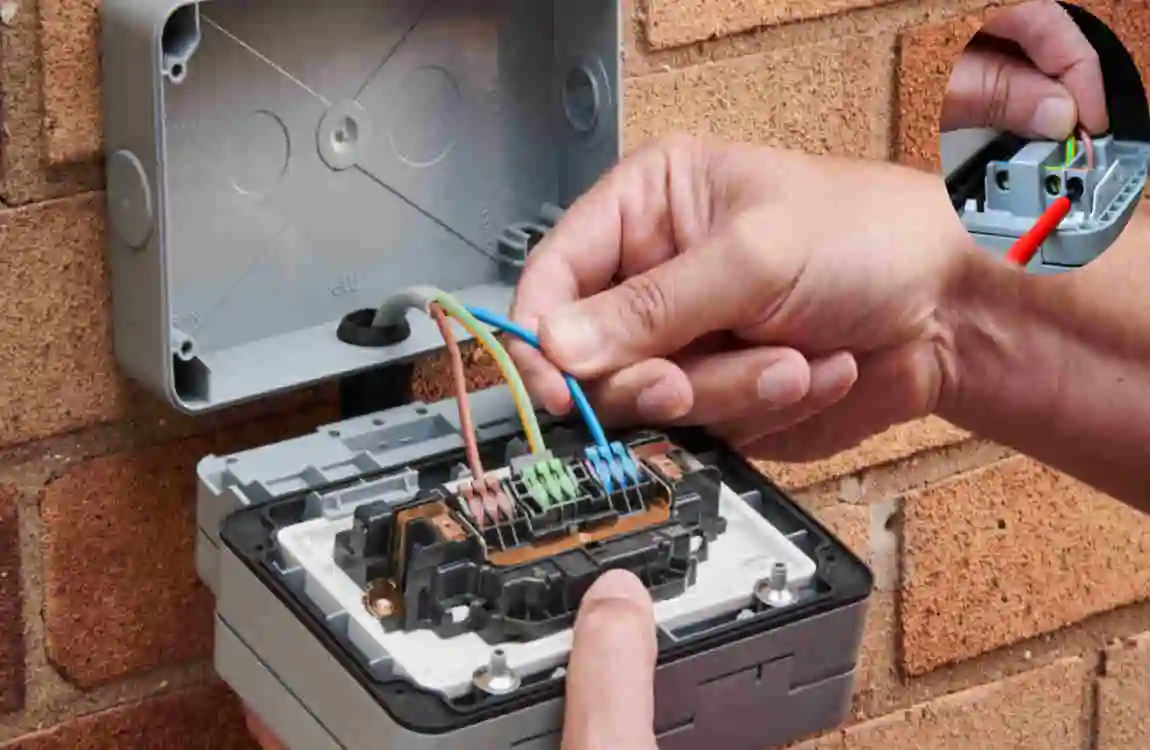
Regular maintenance helps keep your outdoor socket safe and reliable.
Inspect the socket every few months for signs of:
- Cracks
- Water damage
- Rust
- Loose fittings
- Damaged seals
Keep protective covers fully closed when the socket is not in use.
Moisture can still enter poorly sealed units over time.
Test RCD protection regularly using the built-in test button. This confirms the safety system still operates correctly.
Clean dirt and debris away from hinges and seals to maintain proper closure.
If you notice moisture inside the socket housing, disconnect power immediately and inspect the installation.
Good outdoor socket maintenance improves both safety and lifespan.
Best Uses for Outdoor Sockets Around the Home
Outdoor sockets add flexibility to many areas around your property.
Popular uses include:
- Garden lighting
- Patio heaters
- Outdoor kitchens
- Water features
- Electric grills
- Power tools
- Christmas decorations
- Security systems
They are especially useful for outdoor entertaining areas where extension leads would otherwise create clutter.
Many homeowners also install outdoor sockets near garages or driveways for charging accessories and powering equipment.
A garden power socket can completely change how you use outdoor spaces by making electricity easily accessible whenever needed.
Frequently Asked Questions (FAQ)
Can I fit an outdoor socket myself?
Yes, many homeowners can complete a DIY outdoor socket installation if they have basic electrical knowledge and follow safety rules carefully.
However, electrical work carries risks. If you are not comfortable working with wiring, it is best to hire a qualified electrician.
Some areas also require specific electrical work to meet local regulations or inspection requirements.
Always prioritize safety over saving money.
Does an outdoor socket need its own circuit?
Not always.
Many outdoor sockets are connected via a fused spur from an existing indoor socket circuit.
However, high-power equipment or multiple outdoor outlets may require a dedicated circuit for safe operation.
An electrician can help determine whether your current system can safely support additional load.
What IP rating is best for outdoor sockets?
IP66 is generally considered one of the best ratings for outdoor socket installation.
This rating provides strong protection against dust and heavy rain.
Lower ratings may still work in sheltered locations, but IP66 offers better long-term durability and weather resistance.
Can outdoor sockets get wet?
Weatherproof outdoor sockets are designed to resist rain and moisture, but they are not meant to be submerged in water.
Always keep protective covers closed when the socket is not in use.
Proper sealing and installation are essential for preventing moisture entry.
Damaged seals should be replaced immediately.
Do outdoor sockets need RCD protection?
Yes, outdoor sockets should always have RCD protection.
RCDs quickly disconnect power if they detect an electrical fault, helping reduce the risk of electric shock.
This protection is especially important in wet outdoor environments.
Many modern outdoor sockets include built-in RCD systems.
How long does it take to install an outdoor socket?
A simple installation may take between two and four hours.
More complex projects involving long cable runs, thick walls, or new circuits can take longer.
Professional electricians may complete the job more quickly due to their experience and specialized tools.
Can I run an extension lead instead?
You can use an extension lead temporarily, but permanent outdoor power access is usually safer and more convenient.
Long extension cables create trip hazards and may not provide proper weather protection.
A professionally installed outdoor electrical socket offers a cleaner and more reliable solution.
How much does an electrician charge to install an outdoor socket?
Professional installation costs usually range from $150 to $400, depending on complexity and local labor rates.
Additional work, such as installing a new circuit or upgrading the consumer unit protection, may increase the final price
| Step | What to Do | Important Tips |
|---|---|---|
| Choose the Location | Select a safe and convenient outdoor wall for the socket. | Keep the socket away from direct water exposure and place it at a suitable height. |
| Turn Off Power | Switch off the electricity from the main consumer unit. | Always test the circuit with a voltage tester before starting work. |
| Mark and Drill the Wall | Mark the installation area and drill a hole for the cable. | Drill at a slight downward angle to prevent water entering the property. |
| Install the Back Box | Secure the outdoor socket back box onto the wall. | Use wall plugs and weatherproof fittings for stability. |
| Run the Electrical Cable | Feed the cable through the wall from the indoor power source. | Protect the cable with conduit for outdoor safety. |
| Wire the Outdoor Socket | Connect live, neutral, and earth wires correctly. | Double-check wiring connections to avoid electrical faults. |
| Connect to Power Supply | Attach the cable to a fused spur or existing socket circuit. | Ensure the circuit has RCD protection for outdoor use. |
| Seal the Installation | Apply waterproof sealant around the cable entry points. | Use weatherproof covers to improve durability. |
| Restore Power and Test | Turn the electricity back on and test the socket. | Use a socket tester to confirm safe operation. |
| Perform Regular Maintenance | Inspect the outdoor socket periodically. | Check for moisture, damage, or worn seals to maintain safety. |