Adding a lean-to roof to the side of your house is one of the most practical and cost-effective ways to create extra covered space. Whether you’re looking to protect your patio, store outdoor equipment, or build a cozy workshop, a lean-to roof offers a simple and efficient solution. Not only does it enhance your home’s functionality, but it can also add curb appeal and increase property value.
Benefits of Building a Lean-To Roof
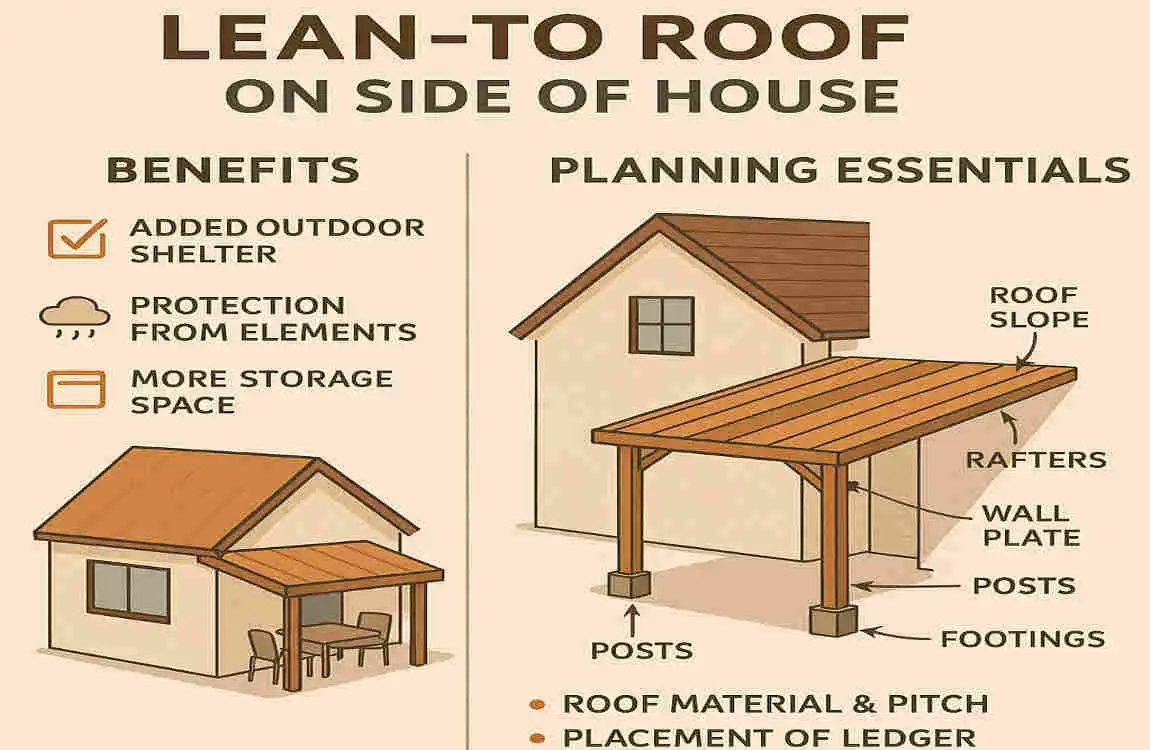
Before diving into the construction process, let’s explore why building a lean-to roof is a great idea:
Expand Usable Space
A lean-to roof allows you to create extra covered areas for:
- Patios: Enjoy outdoor seating without worrying about rain or harsh sunlight.
- Storage: Protect tools, firewood, or outdoor furniture from the elements.
- Workshops or Carports: Keep your car or workspace sheltered.
Save Costs
DIY construction using standard materials like lumber and plywood can save you up to 50% compared to hiring professionals. Plus, lean-to roofs are simpler than complete roofing systems, reducing labor and material costs.
Protect Your Home
With a proper roof pitch and materials, a lean-to roof can:
- Shield your house’s walls from rain, snow, and sun damage.
- Improve drainage and prevent water pooling near the foundation.
Tools and Materials Needed
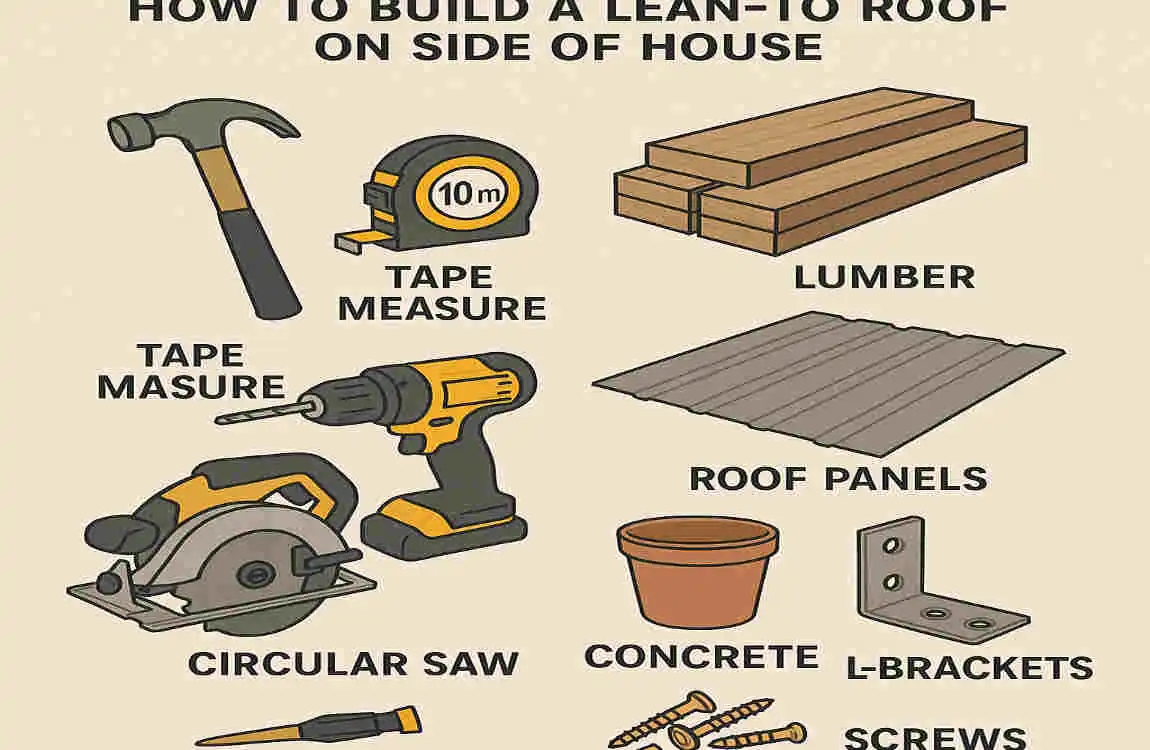
To build a lean-to roof efficiently, you’ll need the right tools and materials. Below is a breakdown of what you’ll need for a 10×12-foot lean-to roof.
Tools:
- Measuring tape and chalk line
- Level
- Circular saw
- Hammer or nail gun
- Ladder
- Safety gear: gloves, goggles, respirator
Materials:
Category Items Quantity Estimate Cost Range
Lumber 2×4 or 2×6 rafters 20–30 pieces $200–400
Sheathing Plywood sheets 8–10 sheets $150–250
Roofing Shingles + underlayment 10–12 bundles $200–350
Hardware Galvanized screws/nails Various $50–100
Support Posts 4×4 pressure-treated wood 2–4 posts $50–150
Pro Tip: Always buy about 10% more materials than estimated to account for cuts, waste, and errors.
Calculating Roof Pitch and Dimensions
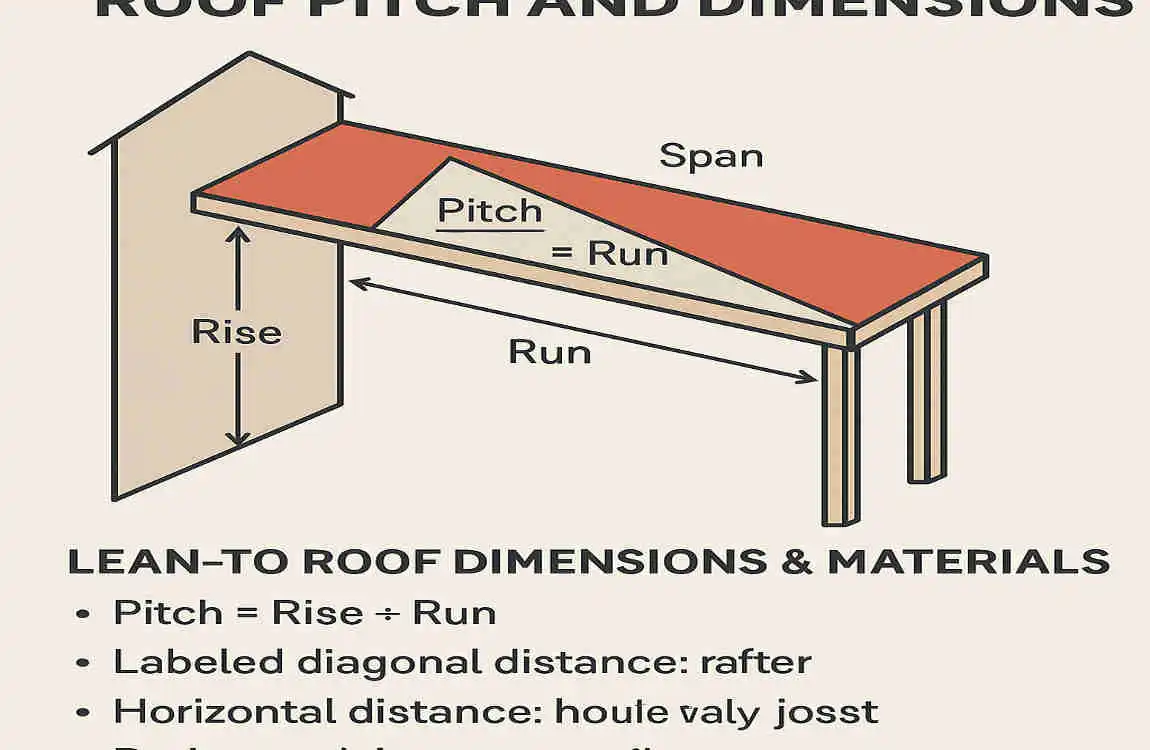
The roof pitch determines how steep your lean-to roof is and affects both its drainage and aesthetics. Here’s how to calculate it:
Understanding Roof Pitch
The pitch is expressed as a ratio of rise (vertical height) to run (horizontal length). Standard lean-to roof pitches include:
- 2:12: 2 inches of rise for every 12 inches of run (ideal for mild climates).
- 3:12: Suitable for moderate rain or snow.
- 4:12: Best for heavy snow areas.
Calculate Roof Dimensions
Use the formula:
Rise = Pitch Ratio x Run Length
For example, for a 4:12 pitch on a 12-foot run:
Rise = (4 ÷ 12) x 12 = 4 feet.
Common Roof Pitches and Recommended Spans
PitchRise per 12″ RunBest ForExample Span
2:12 2 inches Mild climates 10–14 ft
3:12 3 inches Moderate rain/snow 12–16 ft
4:12 4 inches Heavy snow areas 8–12 ft
Tip: Use a speed square or online roof pitch calculator to ensure accuracy.
Step-by-Step Guide to Building a Lean-To Roof
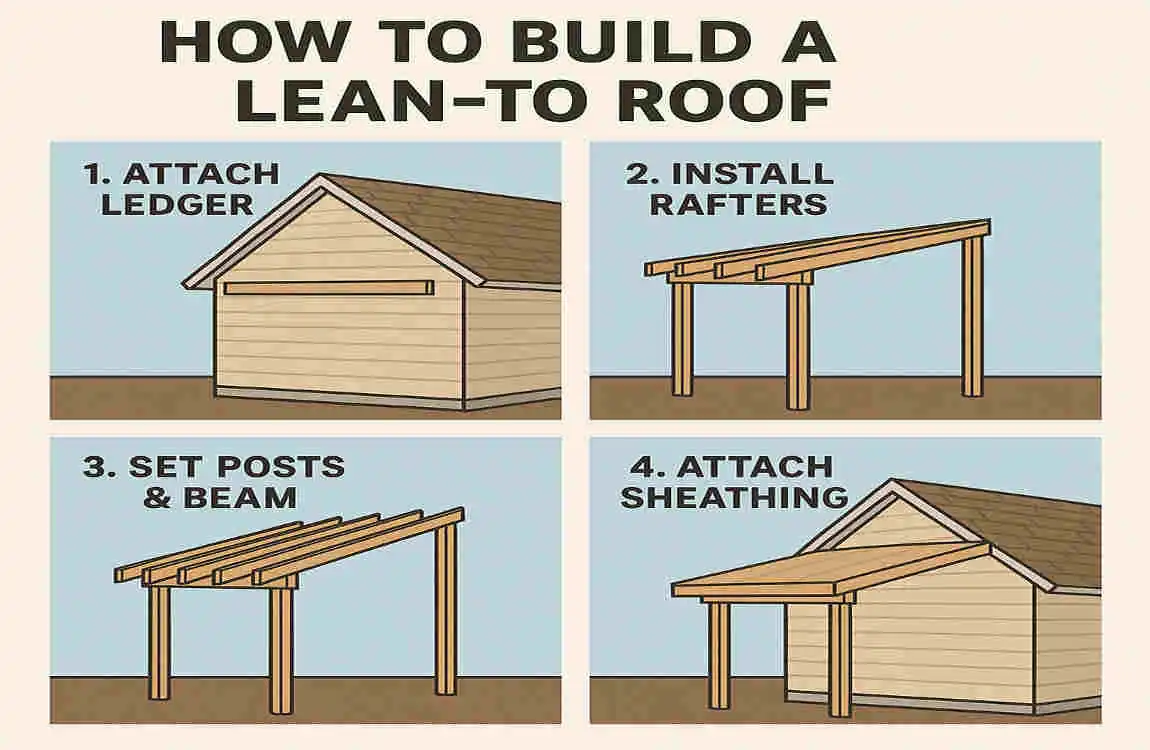
Let’s break the construction process into simple, manageable steps:
install the Ledger Board
- Mark the location of the ledger board on the house wall.
- Cut a 2×6 board to the desired length.
- Attach the ledger to the house using 1/2″ lag screws every 16 inches, ensuring it’s perfectly level.
- Add flashing above the ledger to prevent water damage.
Set Support Posts and Beams
- Dig postholes (at least 2 feet deep) and fill them with concrete.
- Place 4×4 posts into the concrete and let them set.
- Attach a horizontal beam (header) across the posts for rafter support.
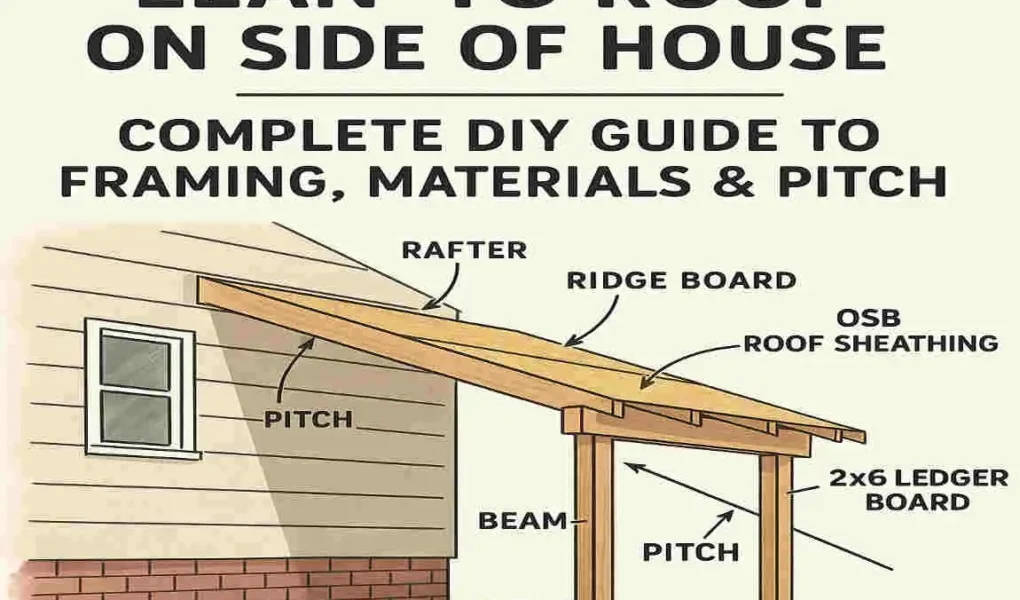
Cut and install Rafters
- Measure and cut rafters according to your pitch and span.
- Notch each rafter at the base to create birdsmouth cuts for a snug fit.
- Attach rafters to the ledger board using joist hangers.
- Secure the other end of the rafters to the header beam using nails or screws.
Add Sheathing and Bracing
- Lay plywood or OSB sheets perpendicular to the rafters.
- Nail the sheathing in place, leaving a 1/8″ gap between sheets for expansion.
- Add temporary bracing to stabilize the frame during construction.
Roofing Installation and Finishing
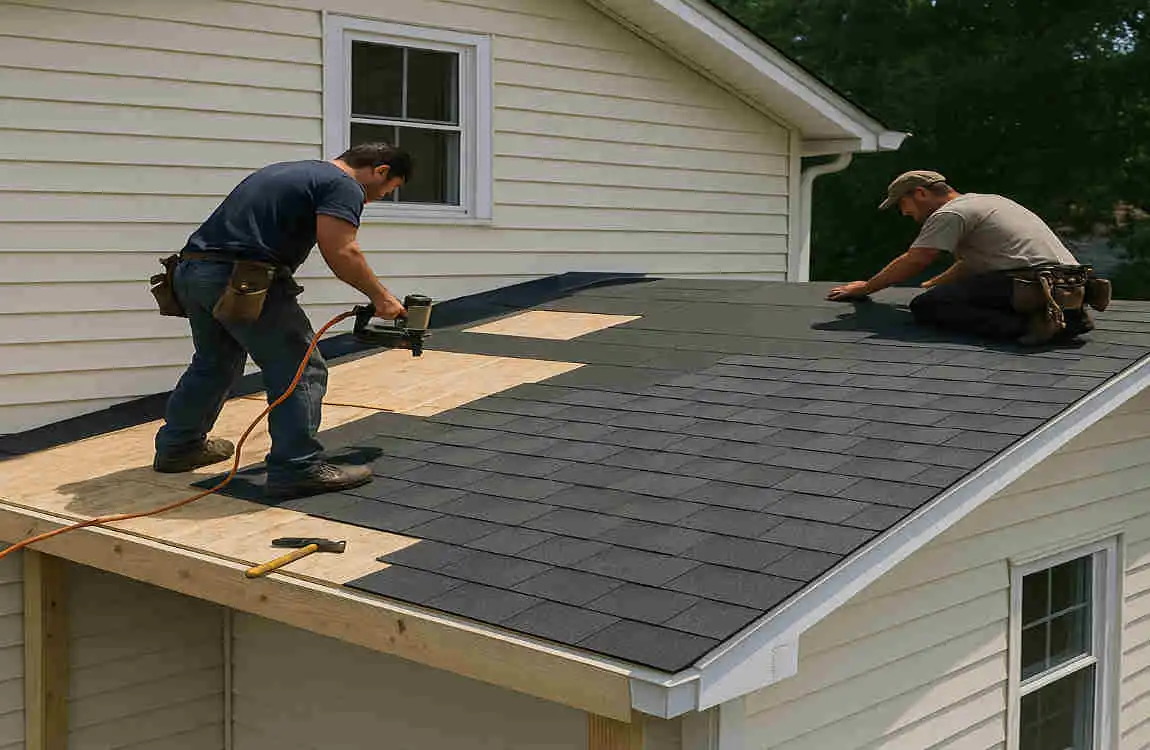
Now that the frame is complete, it’s time to add the roofing materials:
install Underlayment
- Roll out roofing felt or synthetic underlayment, overlapping each layer by 6 inches.
- Secure with roofing nails or staples.
Add Drip Edge and Shingles
- Nail a drip edge along the roof’s perimeter.
- Starting from the bottom, lay shingles in rows, overlapping each row by half.
- Alternatively, install metal panels for longer-lasting durability.
Finish with Flashing and Gutters
- Seal all edges with flashing to prevent leaks.
- Install gutters to direct water away from your foundation.
Common Mistake to Avoid: Improper flashing can lead to water leaks—ensure the flashing is double-layered where needed.
How to Build a Lean-to Roof on Side of House FAQ
Can beginners build a lean-to roof?
Yes! With basic tools and patience, it’s a beginner-friendly project.
Shingles vs. metal roofing?
Metal lasts longer and is better for wet climates, but shingles are more affordable.
Do I need permits?
Always check your local building codes before starting.