There’s nothing more frustrating than hearing that persistent drip of water during a rainstorm or spotting damp patches on your ceiling. Leaks in corrugated roof sheets are common, but the good news is that they are often easy to fix without requiring a complete roof replacement. Whether you’re dealing with a minor crack, a loose fastener, or overlapping sheets that aren’t sealed properly, you can take charge of the problem with the right tools and techniques.
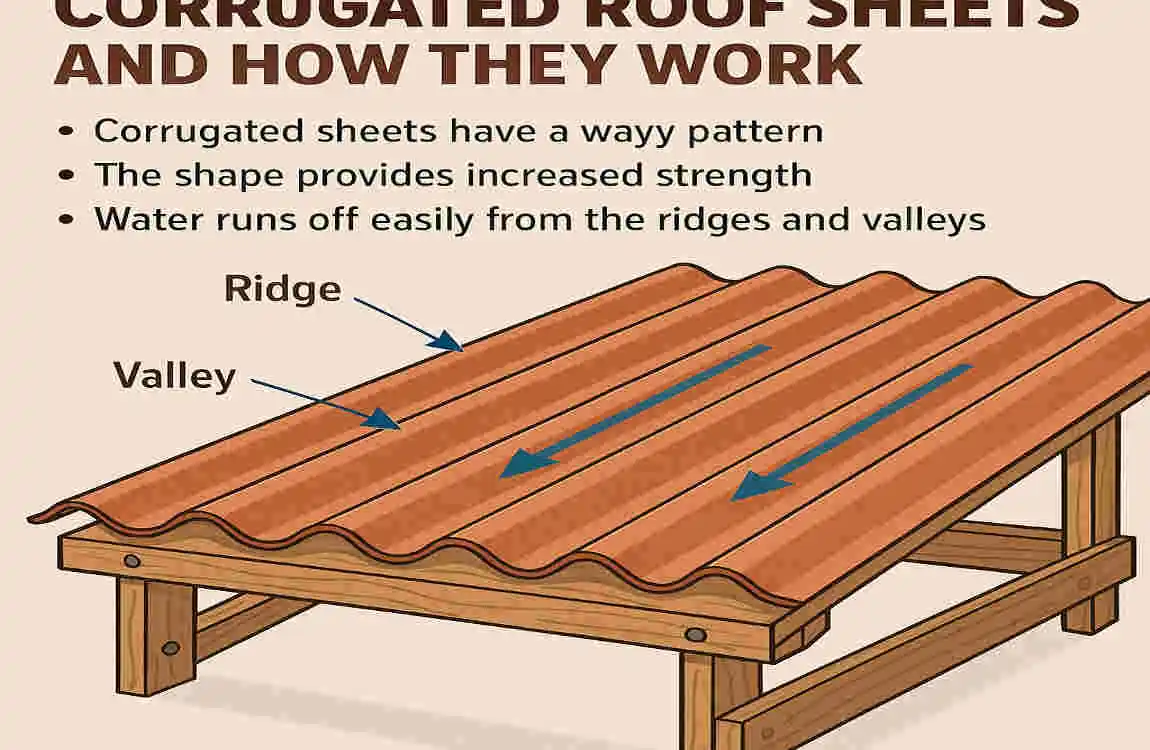
Corrugated roof sheets are a popular roofing choice due to their durability, lightweight nature, and affordability. These wavy, ridged panels are designed to provide excellent water drainage and structural strength. However, over time, factors like weather, improper installation, and general wear can lead to leaks.
Understanding Corrugated Roof Sheets and How They Work
What Are Corrugated Roof Sheets?
Corrugated roof sheets are roofing panels characterized by their wave-like ridges. These ridges aren’t just for aesthetics—they serve a functional purpose by improving the sheet’s structural strength and allowing rainwater to flow off efficiently. Common materials used for corrugated sheets include:
- Galvanized Steel: Durable and rust-resistant, ideal for long-term roofing.
- Aluminum: Lightweight and corrosion-resistant.
- Bitumen: Flexible and waterproof, often used for smaller projects.
- PVC (Plastic): Affordable and easy to work with, although less durable than metal options.
The corrugated design ensures these sheets can withstand heavy loads and resist environmental forces such as wind and rain. However, even the strongest materials need maintenance to prevent leaks and damage.
Common Reasons Corrugated Roofs Leak
Leaks in corrugated roof sheets can occur for several reasons:
- Age and Rust: Over time, metal sheets may corrode, especially if exposed to moisture without proper maintenance.
- Loose or Missing Fasteners: Screws and nails can loosen due to natural vibrations or weather conditions, leaving gaps for water to seep through.
- Damaged Sealants or Flashing: Sealants around roof joints or flashing around chimneys and vents can degrade over time.
- Improper Overlaps or Installation Errors: If the sheets were not installed with correct overlaps, water can flow backward into the gaps.
- Environmental Wear: High winds, heavy rain, and even bird nesting can cause physical damage to the sheets.
Before diving into repairs, it’s essential to identify the root cause of the problem to avoid recurring issues.
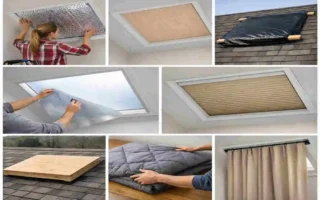
Tools and Materials You’ll Need
Before you start fixing your corrugated roof sheets, gather the right tools and materials. This ensures the repair process is smooth and effective.
Essential Repair Tools
Here’s a list of tools you’ll need for the job:
- Drill and Screwdriver: For loosening or tightening fasteners.
- Hammer and Pliers: To remove or adjust nails and clamps.
- Wire Brush or Sandpaper: For cleaning rust or debris from the damaged area.
- Utility Knife: To cut patching materials or sealant tape.
Replacement and Sealant Materials
You’ll also need the following materials to complete the repair:
- Replacement Screws or Nails: Choose galvanized fasteners to prevent rust.
- Roofing Sealant or Butyl Tape: These provide a watertight seal for leaks and joints.
- Patch Sheets: Use sheets made of the same material as your roof for compatibility.
- Silicone Roof Coating or Rubberized Roof Sealant: Ideal for long-lasting waterproofing.
Step-by-Step Guide on How to Fix Corrugated Roof Sheets
Fixing your corrugated roof sheets may seem daunting, but this step-by-step guide will break it down into manageable tasks:
Inspect and Locate the Leak or Damage
Start by inspecting your roof thoroughly. You can:
- Perform a Visual Inspection: Look for visible cracks, rust spots, or loose fasteners from the outside.
- Check the Attic: Look for light shining through gaps or damp areas indicating a leak.
- Use the Water Test Method: Spray water over suspect areas while someone checks for leaks indoors.
Clean the Damaged Area
Before applying any repair materials, the area around the leak must be clean:
- Remove Rust and debris: Use a wire brush or sandpaper to scrub away rust, old sealant, or dirt.
- Ensure a Dry Surface: Moisture can prevent sealants from adhering properly, so work on a dry day.
Tighten or Replace Fasteners
Loose fasteners are a common cause of leaks. To address this:
- Tighten Loose Screws: Use a screwdriver or drill to secure fasteners.
- Replace Rusted or Stripped Screws: Replace them with galvanized screws and washers to prevent water seepage.
- Seal Screw Heads: Apply a dab of silicone sealant over screws for added protection.
Apply Roof Sealant or Patching Material
For cracks or small holes:
- Apply Roofing Sealant: Spread the sealant evenly along the damaged area.
- Patch Larger Holes: Cut a piece of patch material to size, apply roofing cement, and press it over the hole.
- Smooth the Edges: Use a putty knife to ensure a watertight finish.
Fix Overlap or Joint Leaks
Leaks often occur where sheets overlap. To fix this:
- Apply Butyl Tape or Sealant: Run a strip of tape or a sealant bead along the joint.
- Ensure Proper Overlap Direction: Make sure water flows naturally over the sheets without seeping backward.
Repaint or Coat the Repaired Section
Once repairs are complete:
- Apply Anti-Rust Paint: This protects metal sheets from future corrosion.
- Use Reflective Roof Coating: It improves UV resistance and extends your roof’s lifespan.
Test Your Repair
Finally, test your repair by spraying water over the repaired area or waiting for rain. Check for any signs of continued leaks and address them immediately.
Pro Tip: Always repair from the highest point of the roof downward to maintain proper water runoff.
DIY vs Professional Help — When to Call a Roofer
When DIY Works Best
If the damage is minor, such as a small leak or loose screws, you can likely handle the repair yourself. This is especially true if you’re comfortable working on ladders and have the necessary tools.
When to Hire a Professional
For more significant issues, such as structural damage, extensive rust, or hard-to-reach areas, it’s best to call a professional roofer. They have the expertise and equipment to address complex problems safely.
Preventive Maintenance for Corrugated Roof Sheets

Regular maintenance can save you from costly repairs. Here’s how:
Inspect Regularly
Check your roof twice a year for:
- Rust spots or cracks.
- Loose screws or nails.
- Debris buildup in gutters and valleys.
Clean and Treat for Longevity
- Wash your roof annually with mild detergent.
- Treat rust spots with a rust-neutralizing primer.
- Apply a protective coating every 3–5 years.
Common Mistakes to Avoid When Fixing Corrugated Roof Sheets
- Applying sealant on wet surfaces.
- Over-tightening screws can damage sheets.
- Using mismatched patch materials.
- Ignoring small leaks, allowing them to worsen.
Cost of Repairing Corrugated Roof Sheets
Repair Type DIY Cost Professional Cost
Minor Leak Repair $20–$100 $200–$300
Larger Damage (Patching) $50–$150 $400–$800
Final Checklist and Summary
- Confirm all leaks are sealed.
- Clean up the repaired area.
- Note the repair date for future reference.
With patience and effort, you can master how to fix corrugated roof sheets, saving money and keeping your home safe from leaks.