you have just finished a long, relaxing, steamy shower. You feel fresh, clean, and rejuvenated. You slide open the shower door, step out, and your bare feet land on a soggy, cold, and slightly slimy surface. Suddenly, that spa-like experience completely vanishes. We have all been there. Damp mats that never seem to dry properly are notorious for breeding mold, mildew, and unpleasant odors right under our feet.
Understanding how to clean bathroom floor mats is not just about keeping your bathroom looking nice; it is a critical step for your household hygiene. Because these mats live in a warm, high-humidity environment, they naturally trap moisture, dead skin cells, and bacteria. If they are mishandled or neglected, they become a microscopic nightmare. Furthermore, using the wrong cleaning methods can easily ruin the materials, leading to cracked rubber, melted foam, or faded fabrics. Your mats need special, targeted care to survive and thrive.
Why Clean Bathroom Floor Mats Regularly
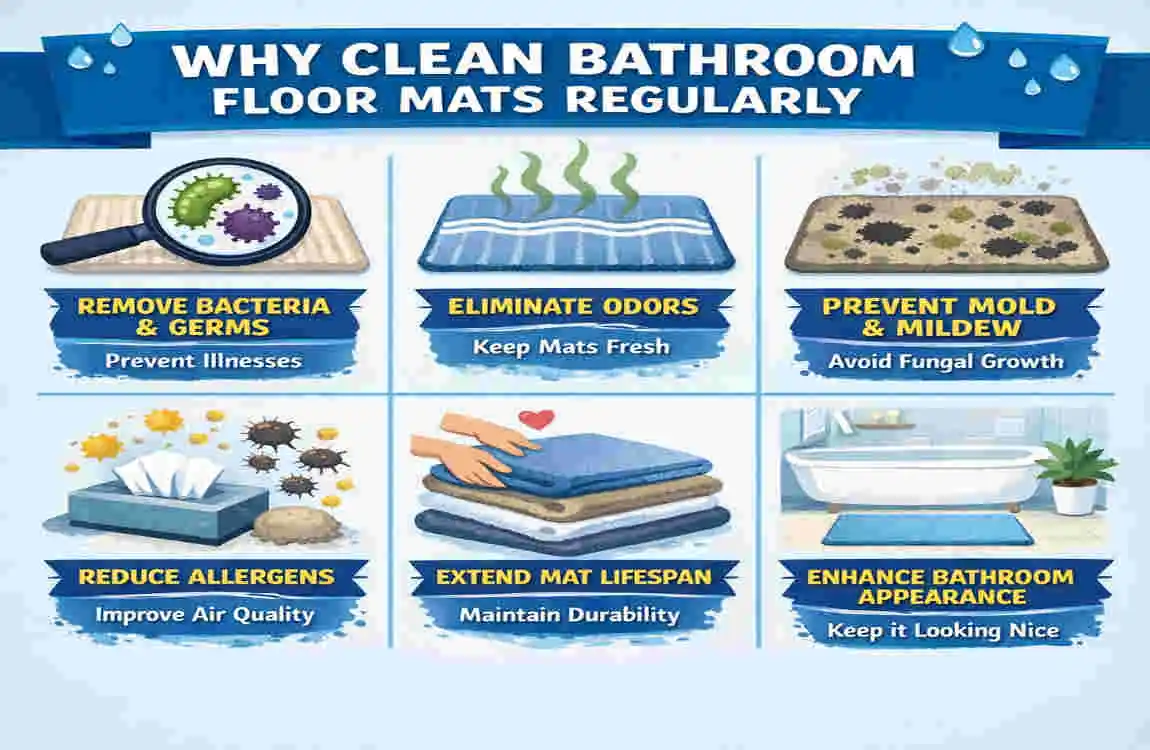
If you are wondering why you should add yet another chore to your weekly cleaning checklist, the answer lies in what you cannot see. Bath mats are highly absorbent sponges that live in the most humid room in your house. Let’s dive into the details of why regular maintenance is absolutely essential for your home.
First and foremost, let’s talk about the hygiene risks. Every time you step out of the shower, water drips onto the mat. If that moisture does not dry completely, it creates the perfect breeding ground for mold and mildew. Over time, these fungi release spores into the air, which can cause musty odors and even trigger respiratory allergies. In fact, some hygiene studies suggest that an unwashed bath mat can harbor up to ten times more bacteria than your actual toilet rim! That is definitely not something you want your clean, bare feet stepping onto every morning. Learning how to clean bathroom floor mats properly is your first line of defense against these hidden germs.
So, how often should you be tackling this task? The ideal routine involves a multi-tiered approach. You should aim for a weekly shake and vacuum to remove surface dust, hair, and loose debris. Then, plan for a bi-weekly wash to tackle trapped dirt and minor odors. Finally, you need a monthly deep clean to sanitize the mat fully and remove any stubborn, deeply embedded bacteria.
The benefits of keeping up with this routine are massive. Regular, proper cleaning can extend the life of your mats by two to three times, saving you money in the long run. Clean mats also maintain their texture, which prevents dangerous slips and falls on wet tile floors. Plus, nothing boosts the overall value and feel of your home quite like a meticulously clean aesthetic.
Tools and Supplies Needed
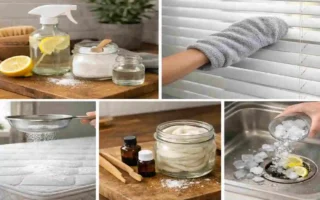
Before we jump into the specific techniques for bath mat cleaning by material, we need to gather our supplies. Having the right tools on hand makes the job significantly easier and ensures you will not accidentally damage delicate fabrics or synthetic blends. You already have most of these items sitting in your kitchen pantry or cleaning closet!
For your universal cleaning kit, you will need a high-quality, mild liquid laundry detergent. Avoid anything with harsh bleach or heavy synthetic fragrances. You will also need distilled white vinegar, which is a natural miracle worker for cutting through mildew and eliminating stubborn odors. Grab a box of baking soda to use as a gentle abrasive and odor absorber. You should also have a soft-bristled brush for scrubbing without tearing fibers, a vacuum with a brush attachment, some microfiber cloths, and a standard cleaning bucket.
When we look at material-specific needs, you might want to grab a bottle of Hydrogen’s’s peroxide. This is fantastic for tackling stubborn mold on rubber mats without degrading the material like traditional bleach would. For memory foam, a very gentle, pH-neutral soap is highly recommended to protect the delicate cellular structure of the foam.
Here is a quick breakdown of your essential budget-friendly toolkit:
Item Purpose Cost Estimate
White Vinegar Natural mold killer, fabric softener, and deodorizer $2
Baking Soda Powerful odor absorber and gentle stain lifter $1
Soft Brush Allows you to scrub dirt without damaging delicate fibers $5
Mild Detergent Lifts dirt and oils without stripping material colors $6
Hydrogen’s Peroxide Deep cleans and sanitizes rubber and PVC safely $3
Cleaning by Material
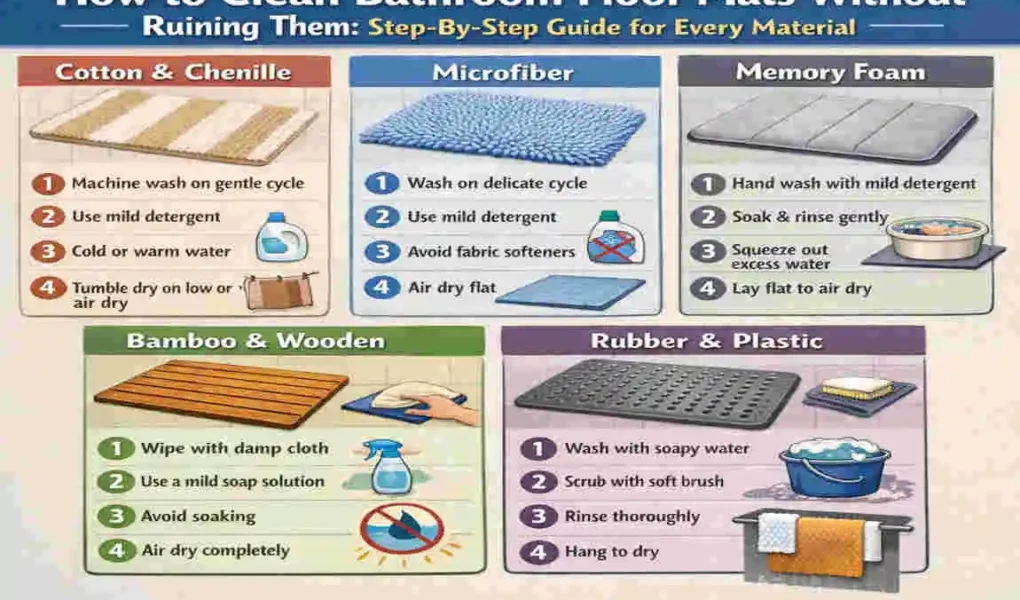
Now that our supplies are ready, let’s get to the main event. You cannot treat a wooden mat the same way you treat a plush microfiber one. Below is your comprehensive guide on bath mat cleaning by material. We will walk through the exact steps, safety warnings, and best practices to ensure your mats come out looking brand new.
Fabric, Cotton, and Polyester Mats
Fabric, cotton, and polyester mats are the most common types found in homes today. They are loved because they are highly absorbent, incredibly soft, and generally very easy to maintain. However, because they soak up so much water, they can develop a sour smell very quickly if they are not dried properly.
The Machine Wash Method:
- Shake and Vacuum: Take the mat outside and give it a vigorous shake to release loose hair and dust. Run your vacuum over it to pull up embedded debris.
- Load the Washer: Place the mat into your washing machine. If your washer is a top-loader with a central agitator, consider washing two mats at once or throwing in a few old towels to balance the heavy load.
- Add Cleaning Agents: Use your standard mild detergent. Instead of commercial fabric softener, which actually coats fibers and makes them less absorbent, pour half a cup of white vinegar into the softener dispenser. The vinegar will naturally soften the cotton and kill lingering odors.
- Select the Cycle: Run the machine on a gentle or delicate cycle using warm water. Avoid scalding hot water, as it can shrink natural cotton fibers and degrade any anti-slip backing.
The Hand Wash Alternative: If your mat has delicate fringes or you prefer not to use a machine, fill your bathtub with warm water, a tablespoon of detergent, and a cup of vinegar. Submerge the mat, let it soak for thirty minutes, and use your hands to agitate the fabric. Drain the tub and rinse thoroughly with cold water until the suds disappear.
Drying and Pro Tips: When it comes to drying, always opt to air dry flat on a drying rack. The intense heat of a mechanical dryer can easily melt the rubberized non-slip backing found on many fabric mats, ruining it instantly. For an amazing finishing touch, add five to ten drops of tea tree oil to your washing machine cycle. Tea tree oil acts as a fantastic antimicrobial boost and leaves behind a refreshing, clean scent!
Rubber and PVC Mats
Rubber and PVC mats are typically used directly inside the shower tub to prevent slipping. Because they are constantly submerged in water, soap scum, and shampoo residue, they are prime real estate for black mold and slippery slime. Knowing how to clean bathroom floor mats made of rubber is crucial for bathroom safety.
Prep Work: Before doing a deep scrub, you need to break down the barrier of soap scum. Mix a 50/50 solution of white vinegar and water in a spray bottle. Liberally spray the entire surface of the rubber mat, paying special attention to the suction cups on the bottom. Let this solution sit for at least ten minutes. The acidity of the vinegar will break down the mineral deposits and grime.
The Monthly Deep Clean: Once a month, your rubber mats need a heavy-duty soak.
- Fill your bathtub or a large basin with warm water.
- Add one cup of Hydrogen’s’s peroxide for every four liters (about one gallon) of water.
- Submerge the rubber mat entirely and let it soak for a few hours.
- After the soak, take your soft-bristled brush and gently scrub the mat. Spend extra time scrubbing the underside and inside the tiny suction cups, as this is where bacteria love to hide.
- Finally, rinse the mat under running water until it feels literally “squeaky” clean to the touch.
Drying and Warnings: To dry a rubber or PVC mat, lay it completely flat or drape it over a shower rod in a well-ventilated area. Never put a rubber mat in the dryer. The heat will immediately cause the rubber to warp, harden, and eventually crack, rendering it completely useless. Additionally, try to avoid using harsh bleach on colored rubber, as it will quickly cause severe fading and discoloration. Hydrogen’s peroxide is a much safer, color-safe alternative.
Bamboo and Wood Mats
Bamboo and wooden mats have become incredibly popular for creating a modern, spa-like atmosphere in the bathroom. They are eco-friendly, visually stunning, and naturally antimicrobial. However, wood and excessive water are natural enemies. If you do not learn how to care for them properly, they can warp, splinter, or rot.
The Wipe-Down Method: Unlike fabric or rubber, bamboo mats should never see the inside of a washing machine or a bathtub. Your daily and weekly maintenance should involve a quick wipe.
- Take a clean microfiber cloth and dampen it slightly with water.
- If the mat is particularly dirty, you can use a very mild, pH-neutral soap heavily diluted in water.
- Gently wipe down the wooden slats, ensuring you remove any dust, hair, or water spots.
- Immediately take a dry towel and wipe away any remaining surface moisture.
The Monthly Oiling Routine: To keep bamboo and wood looking vibrant and to protect it from the humid bathroom environment, it requires monthly hydration. Once the mat is completely dry, apply a small amount of food-grade mineral oil (or a specialized bamboo oil) to a soft cloth. Rub the oil into the wood following the grain. This creates a protective, waterproof seal that stops moisture from penetrating the fibers.
Drying and Warnings: For optimal sanitation, occasionally place your bamboo mat outside in direct sunlight for an hour or two. The UV rays act as a natural, chemical-free sterilizer. Warning: Absolutely no soaking! If you submerge a wooden mat in water, the wood will absorb the moisture, swell, warp the slats, and ultimately destroy the structural integrity of the mat.
Memory Foam Mats
Stepping onto a memory foam bath mat feels like stepping onto a warm, supportive cloud. The foam contours to your feet, offering incredible comfort. But memory foam is basically a dense sponge composed of thousands of tiny open cells. If you wash it incorrectly, those cells will break down, leaving you with a flat, lumpy, and uncomfortable rug.
The Cold Gentle Wash: Because memory foam is so delicate, heat and aggressive agitation are its biggest threats.
- First, take the mat outside and shake it well.
- Place it in the washing machine by itself or with a couple of light towels.
- You must use a cold water setting and the most gentle cycle available on your machine.
- Use a very small amount of mild, liquid detergent. Powdered detergents may not dissolve properly in cold water and can get trapped inside the foam’s pores.
Hand Soaking Alternative: If your memory foam mat is particularly thick, hand washing is the safest route. Fill a tub with cold water and a dash of mild detergent. Gently press the foam down into the water to allow the soap to penetrate, but do not wring, twist, or aggressively scrub it. Drain the tub, press the dirty water out, and refill with clean water to rinse. Keep pressing until the water runs clear.
Drying and Pro Tips:Absolutely no heat! Putting memory foam in a hot dryer will literally melt the internal structure and destroy the non-slip backing. You must air dry it fully to retain its shape. Hang it over a sturdy drying rack or lay it flat on a table outdoors in the shade.
If your memory foam mat develops an odor, do not use heavy perfumes. Instead, lightly mist it with white vinegar and let it air out. If you drop makeup or spill something on it, always blot stains first with a damp cloth rather than rubbing, which pushes the stain deeper into the foam.
Chenille and Microfiber Mats
Chenille and microfiber mats are instantly recognizable by their thick, soft, “noodle-like” textures. These materials are famous for picking up and holding onto an incredible amount of water, dust, and dirt. While they are great at keeping your bathroom floor dry, all that trapped moisture means they need frequent, thorough cleaning.
The Hand Wash Priority: While many microfiber mats claim to be machine washable, frequent trips through the washing machine can cause the delicate chenille fibers to unravel or lose their plushness. Prioritizing hand washing will dramatically extend their lifespan.
- Fill your bathtub with warm water.
- Add just a few drops of mild liquid detergent. Too much soap will get trapped in the dense fibers.
- Submerge the mat and let it soak for about fifteen minutes.
- Get in there and give it a gentle rub. You can even use your bare feet to gently stomp on the mat, mimicking the traditional way of washing grapes for wine! This gently forces the dirt out of the dense noodles.
The Sanitizing Rinse: Once the water turns murky, drain the tub. Now, refill it with clean, cool water and add a generous cup of white vinegar. A vinegar rinse is fantastic here because it strips away any leftover soapy residue, restores the fluffy texture of the microfiber, and naturally kills up to 99% of surface germs and bacteria.
Drying and Fluffing: Microfiber holds a lot of water, so drying can take time. After gently squeezing out excess water (do not wring it tightly), you need to hang it vertically in a well-ventilated area, preferably outside. Once the mat is completely dry, take a moment to rigorously shake it or use your hands to fluff the chenille noodles back to their original, bouncy state.
Step-by-Step Universal Guide
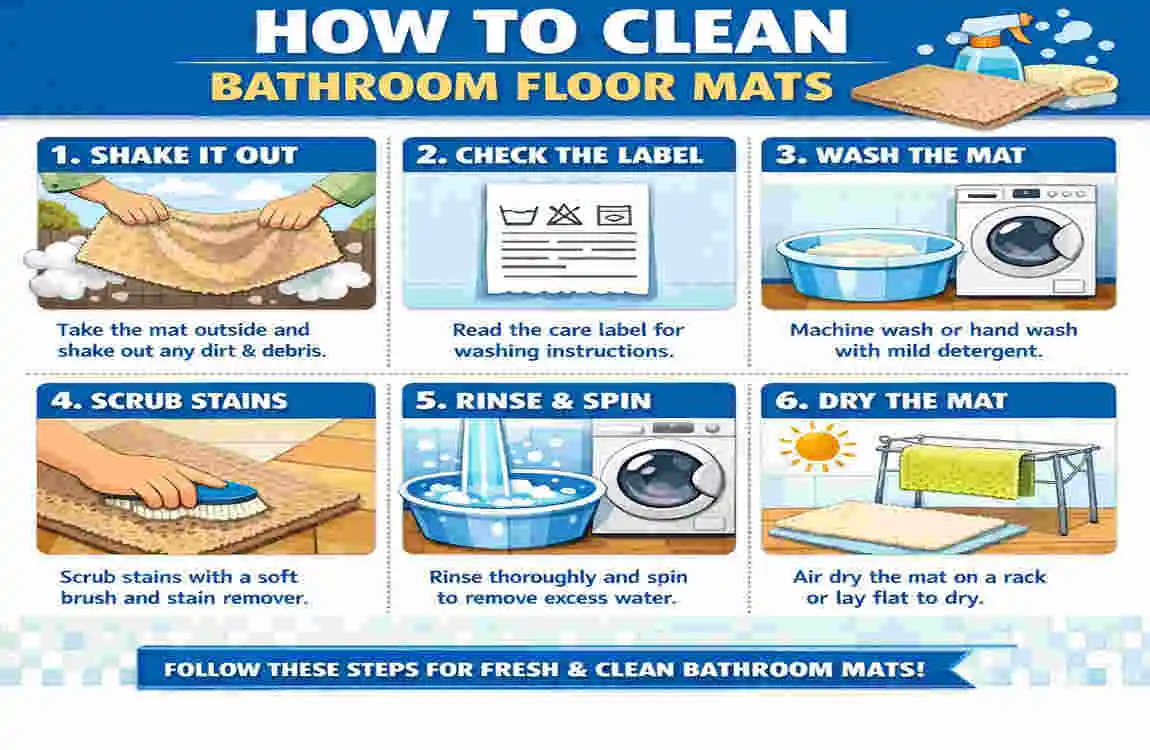
If you are in a rush and need the absolute core principles of how to clean bathroom floor mats, we have compiled a foolproof, universal workflow. No matter what material you are dealing with (excluding pure wood), these core steps will guarantee a successful wash day.
Here is your master checklist for clean bath mats:
Shake and Vacuum Loose debris Never get a mat wet before removing dry dirt! Take the mat outdoors and give it a firm shake. Follow up by using your vacuum’s upholstery attachment to suck up loose hair, dust bunnies, and dead skin cells. If you skip this step, water will turn that loose dirt into deep-set mud.
Pre-treat Any Stains Did you spill liquid foundation or drop toothpaste on the mat? Spot treat these areas before the main wash. Create a simple paste using baking soda and a few drops of water. Gently rub the paste into the stain using a microfiber cloth, let it sit for ten minutes, and gently wipe it away. Baking soda lifts the stain naturally without bleaching the color.
Wash According to Material Specs Refer to our specific guides above. Choose between a gentle machine wash (for durable cottons) or a bathtub hand soak (for memory foam and chenille). Always default to cold or warm water over hot water to prevent shrinking.
Rinse Thoroughly Soap residue is a magnet for new dirt. Ensure you rinse the mat repeatedly until the water runs crystal clear and there are zero bubbles left.
Disinfect and Deodorize Skip the toxic chemicals. Use a simple vinegar spray or add white vinegar to your rinse water. Vinegar safely kills mold spores, eliminates stubborn mildew smells, and softens fabric fibers naturally.
Dry Completely Before Use This is the most important step! A damp mat is a dirty mat. Hang your freshly washed rug over a drying rack, set up a floor fan directed at it, or place it out in the natural sun. Ensure it is 100% bone dry before placing it back onto your bathroom floor.
Maintenance and Prevention Tips
Cleaning your mats is great, but preventing them from getting severely dirty in the first place is even better. Implementing a few tiny daily habits will save you hours of deep cleaning down the line.
First, make it a strict household rule to hang the mat daily. After everyone has finished showering for the morning, pick the mat up off the floor and drape it over the side of the tub, a towel bar, or a shower rod. Getting it off the flat tile allows air to circulate around both sides, drying it out rapidly and stopping mold in its tracks.
Second, consider a quick weekly vinegar mist. Keep a small spray bottle filled with half water and half white vinegar in your bathroom cabinet. Once a week, give the mat a very light misting. The vinegar smell dissipates in minutes, but the anti-bacterial properties keep odors at bay between big washes.
When it comes to storage, if you have spare mats in your linen closet, always store them upright in a dry area. Do not fold rubber-backed mats tightly, as the creases can become permanent cracks. Roll them gently instead.
Finally, know when to replace your mats. Even with the best care, bath mats do not last forever. If you notice severe fading, crumbling rubber backing, or a persistent sour odor that does not go away after a deep clean, it is time to throw it out. Old, degraded mats are not just ugly; they lose their grip and become major slipping hazards.
Eco Hacks: Always choose white vinegar over heavy bleach. Bleach pollutes our waterways, degrades fabrics quickly, and can cause skin irritation. Vinegar is entirely natural, pet-safe, and incredibly cheap!
Common Mistakes to Avoid
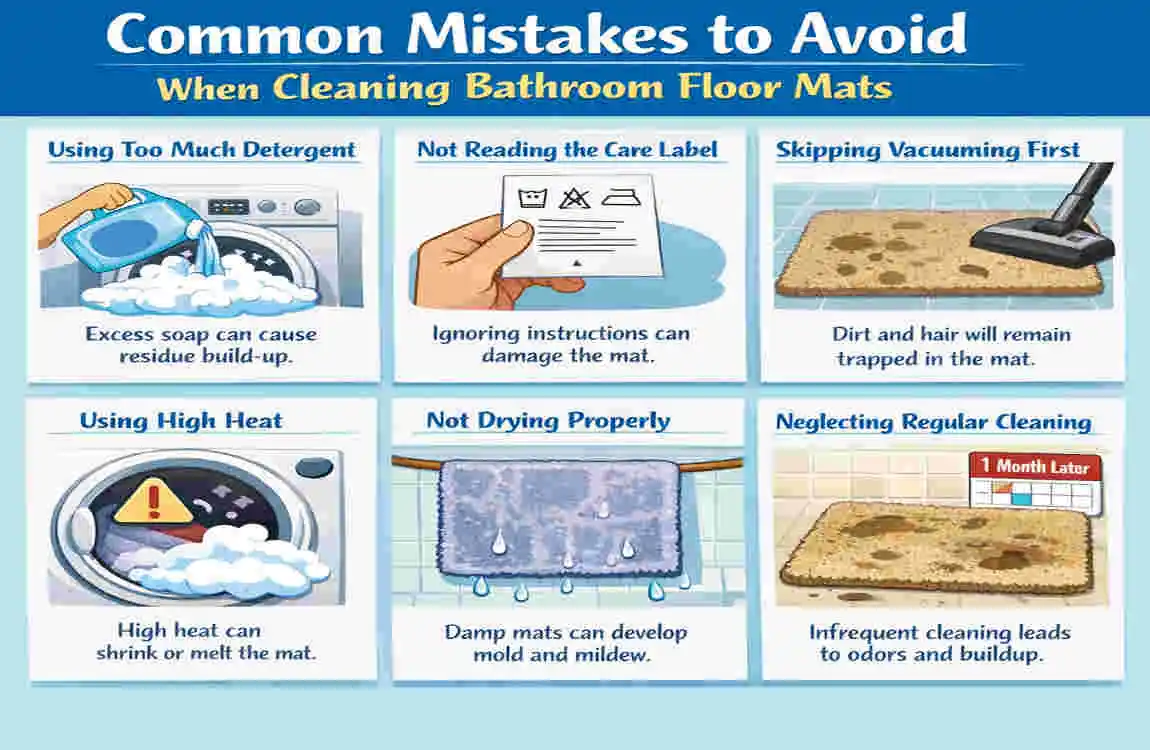
Even with the best intentions, it is easy to make a fatal error when learning how to clean bathroom floor mats. Avoiding these common pitfalls will save your favorite rugs from a premature trip to the trash can.
- Using Hot Water on Memory Foam: It cannot be stated enough—heat destroys foam. Washing memory foam in hot water will cause the internal cells to collapse, melting the foam into a hard, unyielding brick. Always use cold water.
- Putting Rubber in the Dryer: The intense, concentrated heat of a tumble dryer is a death sentence for rubber and PVC. The material will shrink, warp, and crack into pieces. Once rubber cracks, water seeps underneath it during showers, trapping mold directly against your tub floor. Air drying is non-negotiable.
- Using Bleach on Dyed Fabrics: Pouring bleach onto a colored cotton or polyester mat will instantly strip the dye, leaving you with ugly, permanent orange or white splotches. Stick to baking soda and vinegar for stain removal and brightening.
- Overloading the Washing Machine: Bath mats get incredibly heavy when saturated with water. If you wash a single, heavy mat in a top-loading machine, it will throw the drum completely out of balance, potentially damaging your expensive appliance. Always balance the load by adding two large bath towels on the opposite side of the drum.
FAQ
How often to clean bathroom floor mats? To maintain optimal bathroom hygiene, you should give your mats a brisk shake and vacuum them weekly to remove surface debris and hair. Then, put them through a proper wash (either by machine or by hand) on a bi-weekly basis. If multiple people share a single bathroom, you should increase the washing frequency to once a week.
Can I use bleach on my bath mats? Generally, you should avoid bleach as it degrades fibers and ruins colors. However, there is one exception. If you have a solid white, 100% pure rubber or PVC mat that has developed severe mold, you can use a highly diluted bleach solution (one tablespoon of bleach to one gallon of water) for a brief soak. For everything else, Hydrogen‘s peroxide or vinegar is much safer and equally effective.
Should I use a machine or wash by hand? The first thing you should always do is check the manufacturer’s care tag! As a general rule of thumb, standard cotton and polyester mats do perfectly well in a gentle machine wash. However, for delicates like memory foam, thick chenille, or anything with elaborate fringes, hand washing in the bathtub is the safest way to prevent accidental damage.
What is the best fix for existing mold? If your mat already smells musty or has visible dark spots, do not panic. Create a strong soaking bath using hot water (for cotton) or warm water (for rubber) and add two cups of pure white vinegar. Let the mat soak for a full hour. The vinegar penetrates the material to kill the mold down to its roots. After washing, ensure you dry the mat outside in direct, bright sunlight, as UV rays are nature’s best mold killer.