When it comes to building a solid foundation for your garage, concrete is hard to beat for durability and cost-efficiency. This guide will teach you how to lay a concrete base for a house garage, so you can save on labor costs, ensure a long-lasting structure, and customize the results to your needs.
Whether you’re parking your car, storing tools, or setting up a workspace, a well-laid concrete base ensures stability and prevents issues like sinking or cracking down the road. DIYing a concrete garage base may seem daunting, but with the right steps, tools, and preparation, it’s completely achievable—even for beginners.
Why Lay Your Own Concrete Garage Base?
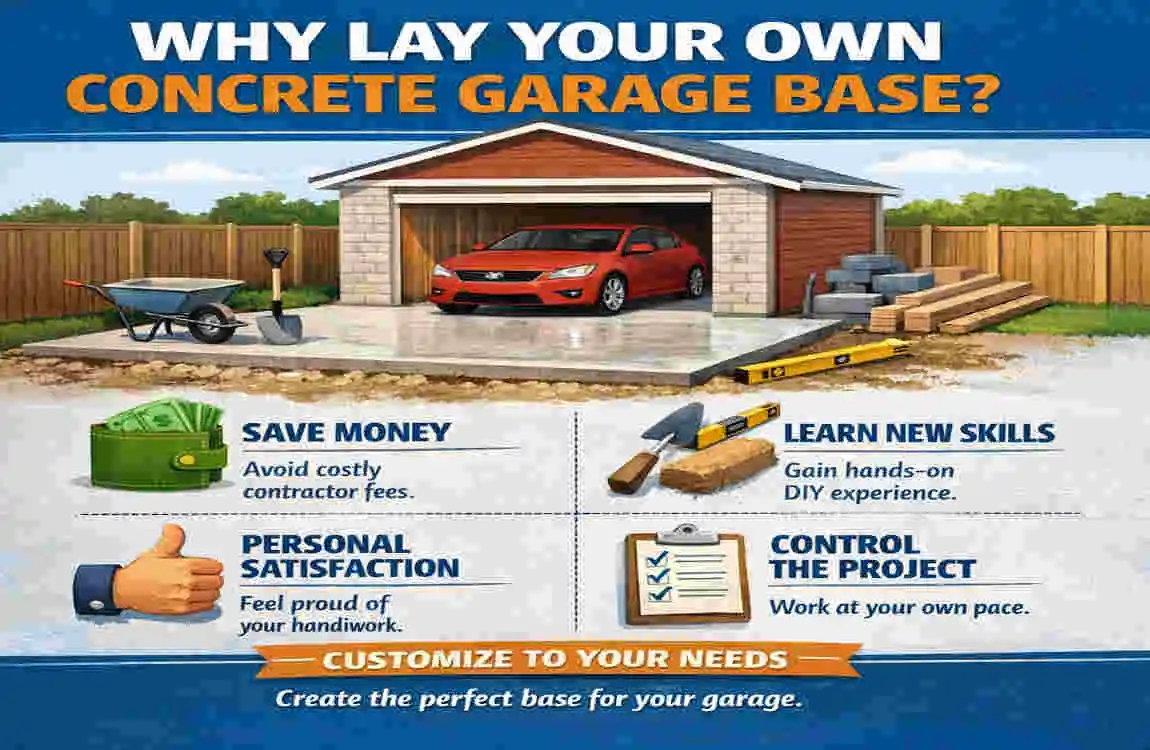
Deciding to build your own concrete base for a garage is a smart move for many reasons. Let’s explore the advantages:
Cost Savings
One of the biggest motivators for DIYers is the budget-friendly nature of this project. Hiring professionals to pour a garage slab can cost upwards of $8,000 for a standard 20×20 ft space. DIY costs range from $3,000 to $5,000, depending on your material choices and equipment rentals.
Here’s a quick comparison of costs:
DIY vs. ProfessionalCost (20×20 ft)TimeSkill Level
DIY $3,000-5,000 3-7 days Intermediate
Professional $8,000-12,000 1-2 days No skill needed
Full Control Over Design
By doing it yourself, you have control over key features, such as the slope for drainage. A slight slope (about 1-2% grade) prevents water from pooling and causing cracks or structural damage in the future.
Avoid Future Repairs
A poorly laid garage foundation can lead to sinking, cracking, and water pooling. By taking the time to do it right the first time, you save yourself from expensive repairs later.
This project is perfect for homeowners excited to learn how to lay a concrete base for a house garage without outsourcing the work. Let’s move on to the materials and tools you’ll need.
Materials and Tools Needed
Before you begin, make sure you have everything on hand. For a 20×20 ft garage base (400 sq ft), here’s what you’ll need:
Materials
- Concrete mix: Use C30 strength (4-6 bags per cubic yard) or order ready-mix concrete (about 4-5 cubic yards).
- Hardcore/sub-base: Crushed stone, 4 inches deep, approximately 10 tons.
- Damp-proof membrane (DPM): a plastic sheeting used to prevent moisture.
- Rebar/mesh reinforcement: 6×6 W1.4 for added strength.
- Formwork timber: 2x4s for framing.
- Expansion joints and sealant: To accommodate temperature changes.
Tools
- Shovel, wheelbarrow, and rake.
- Plate compactor (rental cost: ~$50/day).
- Level, string line, and tape measure.
- Concrete mixer (or order a truck delivery if preferred).
- Trowels, bull float, and broom for finishing.
- Safety gear: Gloves, boots, goggles.
Material Cost Overview
Here’s an estimate of material costs for a 20×20 ft base:
ItemQuantityCost Estimate
Concrete 5 cu yds $500-700
Hardcore 10 tons $300
Rebar 400 sq ft $200
DPM Sheeting 400 sq ft $50
With materials ready, it’s time to prepare the site.
Site Preparation Steps
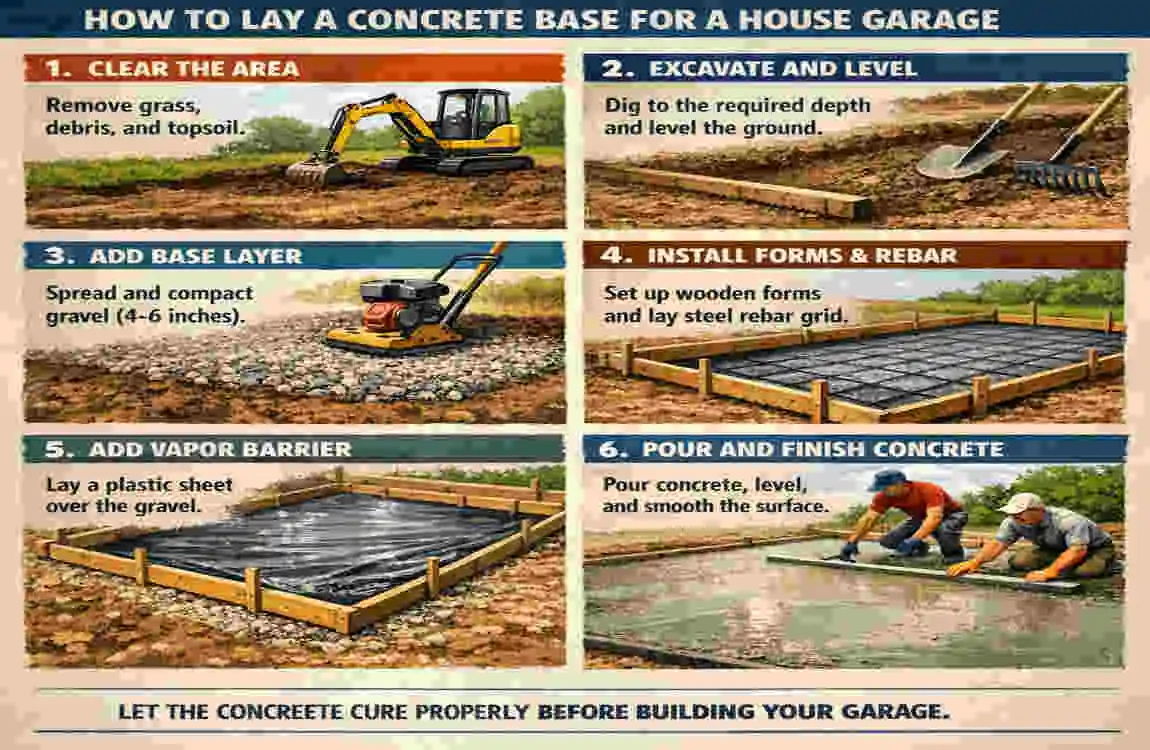
Laying a concrete base requires proper prep work to ensure a level, sturdy foundation. Here’s how to do it:
Mark and Measure the Area
- Use stakes and string to outline the garage base. Add an extra 3 inches on each side to accommodate the formwork.
- Ensure there’s a 1-2% slope for drainage (about 1/8 inch per foot).
Excavate the Ground
- Dig down 8-12 inches to allow for 4 inches of hardcore and 4 inches of concrete.
- Remove roots, debris, and loose soil. Uneven ground can cause the base to crack later.
Add and Compact the Sub-Base
- Spread hardcore (crushed stone) evenly across the excavated area.
- Wet lightly, then compact using a plate compactor. Compact in 2-3 inch layers for best results.
Lay the Damp-Proof Membrane (DPM)
- Spread plastic sheeting across the hardcore layer. Overlap and tape the joints to create a moisture barrier.
- Turn the edges up the sides of the formwork.
With the site prepared, it’s time to pour the concrete.
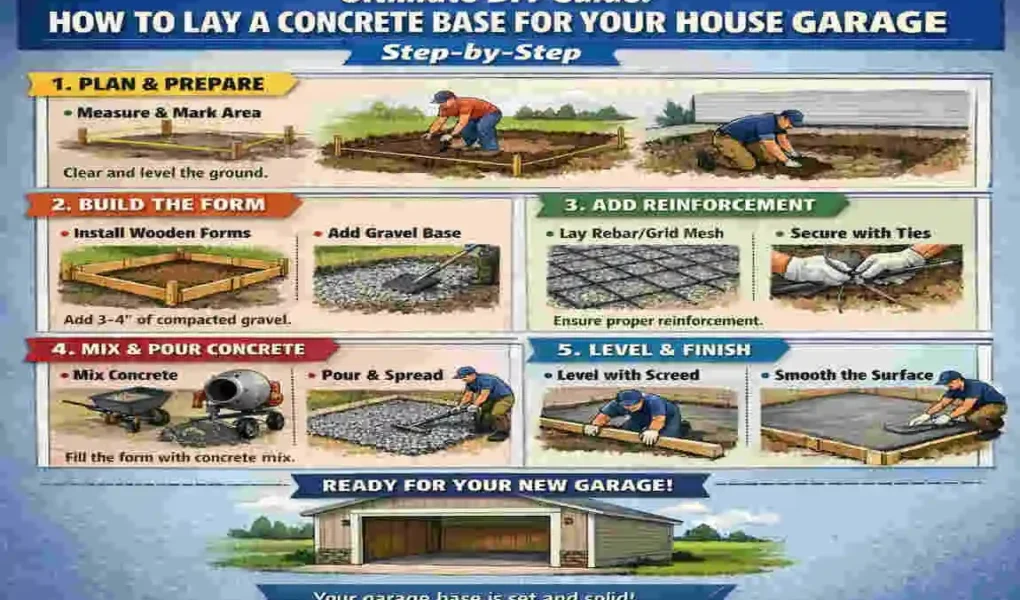
Step-by-Step: How to Lay the Concrete Base
Follow these detailed steps to pour and finish your garage slab like a pro:
Build the Formwork
- Assemble 2×4 timber into a rectangular frame around the site. Use stakes to secure the frame.
- Check the level and slope, bracing the corners for added strength.
Add Reinforcement
- Lay a rebar grid over the site with 12-18 inch spacing. Elevate the grid on chairs to position it in the middle of the concrete layer.
Calculate and Order Concrete
- Use this formula to calculate how much concrete you need:
- Length x Width x Depth (in feet) ÷ 27 = cubic yards.
- For a 20×20 ft base at 4 inches thick: 20 x 20 x 0.33 ÷ 27 = 5 cubic yards.
Pour the Concrete
- Start pouring concrete from one corner. Spread it evenly using a rake or shovel.
- Avoid over-pouring or leaving gaps.
Screed and Level
- Use a straight 2×4 to screed the surface. Move the screed across the forms in a sawing motion to level the concrete.
Finish the Surface
- While the concrete is still wet, use a bull float to smooth the surface.
- If a textured, non-slip finish is desired, use a broom to create light grooves.
Curing and Finalizing
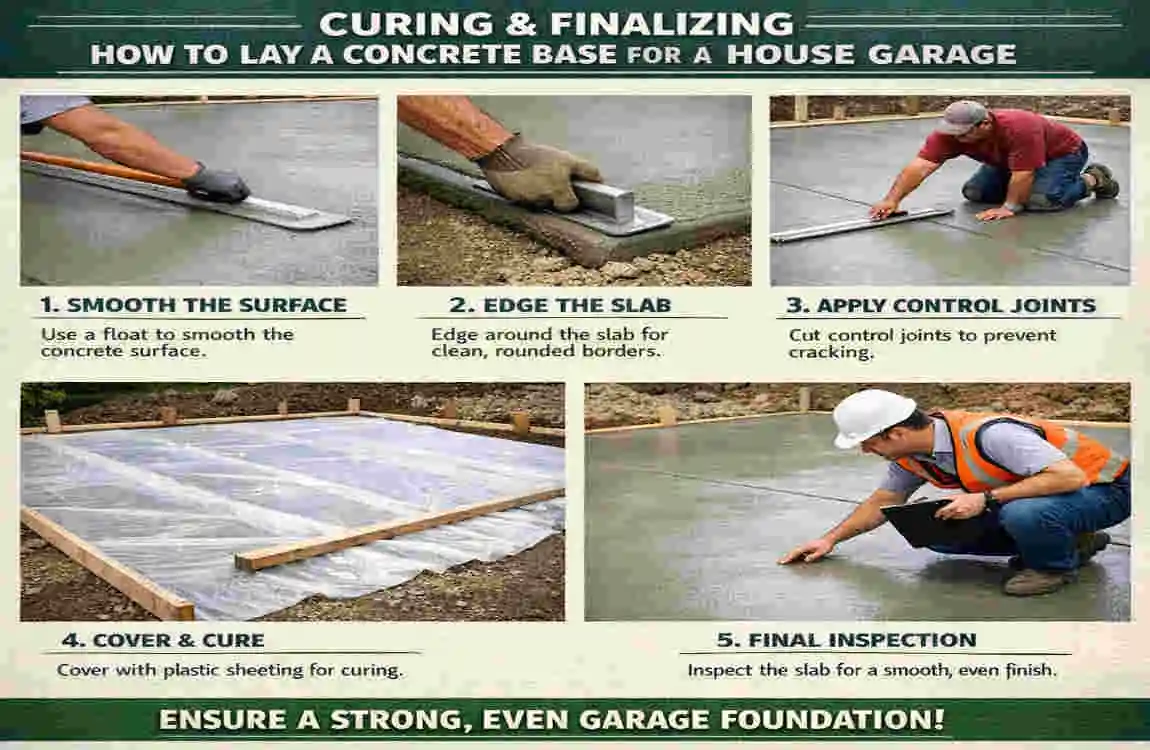
Curing is essential to achieve maximum strength for your garage base:
- Cover the slab with plastic sheeting to retain moisture.
- Mist the surface daily for 7 days.
- Remove the forms after 48 hours, but avoid heavy use until the concrete reaches full strength (28 days).
- Apply a concrete sealant after 30 days for added durability.
Common Mistakes and Pro Tips
Avoid these mistakes during your project:
- Skipping compaction: Poorly compacted sub-bases can lead to sinking over time. Always compact in layers.
- Ignoring weather conditions: Extreme heat or cold can affect curing. Aim for mild temperatures (50-70°F).
Pro Tip: Add control joints every 10-15 feet to prevent cracking.
FAQs
How thick should a garage base be?
Ideally, 4-6 inches thick (100-150mm).
Do I need a concrete mixer?
For large areas, yes. Otherwise, ready-mix delivery is a good option.
How much does this project cost?
Expect $3,000-5,000 for a 20×20 ft base.
How long does curing take?
Allow 28 days for full strength before heavy use.
Why is a slope important?
It prevents water pooling and structural damage.