Sliding windows are a popular choice for many homes due to their sleek design and ease of use. However, they can also be a weak point in your home’s security. Did you know that 23% of burglaries occur through windows? This statistic highlights the importance of securing your windows, especially sliding ones, which are often more vulnerable to forced entry.
Why install Sliding Window Locks?

Sliding windows, while convenient, come with certain vulnerabilities. Understanding these weaknesses and the benefits of installing locks can help you make an informed decision.
Common Vulnerabilities of Sliding Windows
Sliding windows are designed to glide along a track, which makes them easy to open and close. However, this design also makes them susceptible to:
- Lifting off the track: Without proper locks, intruders can easily lift the sliding panel out of its frame.
- Forced entry: The lack of a secure locking mechanism can make it easier for burglars to pry the window open.
Benefits of Installing Sliding Window Locks
Adding locks to your sliding windows offers several advantages:
- Enhanced security: Locks deter intruders and make it significantly harder to break in.
- Peace of mind: Knowing your home is secure allows you to relax and feel safe.
- Energy efficiency: Locks can help seal the window tightly, preventing drafts and reducing energy costs.
- Child safety: Locks can restrict how far the window opens, keeping young children safe.
Types of Sliding Window Locks
There are various types of locks available, each with its own features and installation difficulty. Here’s a quick comparison:
Lock TypeSecurity LevelInstall DifficultyCost (PKR)
Pin Locks Low Easy 500-1000
Keyed Locks High Medium 1500-3000
Surface-Mount Locks Medium Easiest 800-2000
Foot Locks High Medium 1200-2500
For a DIY project, surface-mount locks are often the easiest to install, while keyed locks provide the highest level of security.
Tools and Materials Needed
Before you begin, gather all the necessary tools and materials. Having everything ready will make the installation process smoother and more efficient.
Essential Tools
- Drill: For creating pilot holes.
- Screwdriver set: To secure screws in place.
- Measuring tape: To ensure accurate placement.
- Pencil: For marking positions.
- Level: To ensure the lock is installed straight.
Safety Gear
- Gloves: To protect your hands.
- Goggles: To shield your eyes from debris.
Lock Kit Components
Most lock kits include:
- Screws
- Packers (for adjustments)
- One-way screws (for tamper-proofing)
Budget Tip
You can purchase all these items for under PKR 2000 at local hardware stores or online platforms like Daraz.pk.
Preparation Steps
Proper preparation is key to a successful installation. Follow these steps to get started:
Prioritize Safety
- Turn off the power at the electrical outlet if the window is near one.
- Clear the area around the window to ensure you have enough space to work.
Measure Your Windows
- Measure the width and thickness of the window frame.
- Identify the centre overlap where the lock will be installed.
Choose the Right Lock
- Match the lock type to your window material (e.g., aluminium or wood).
- Consider your ventilation needs—some locks allow partial opening for airflow.
Clean the Surface
- Wipe down the window frame to remove dirt and debris. This ensures the lock adheres securely.
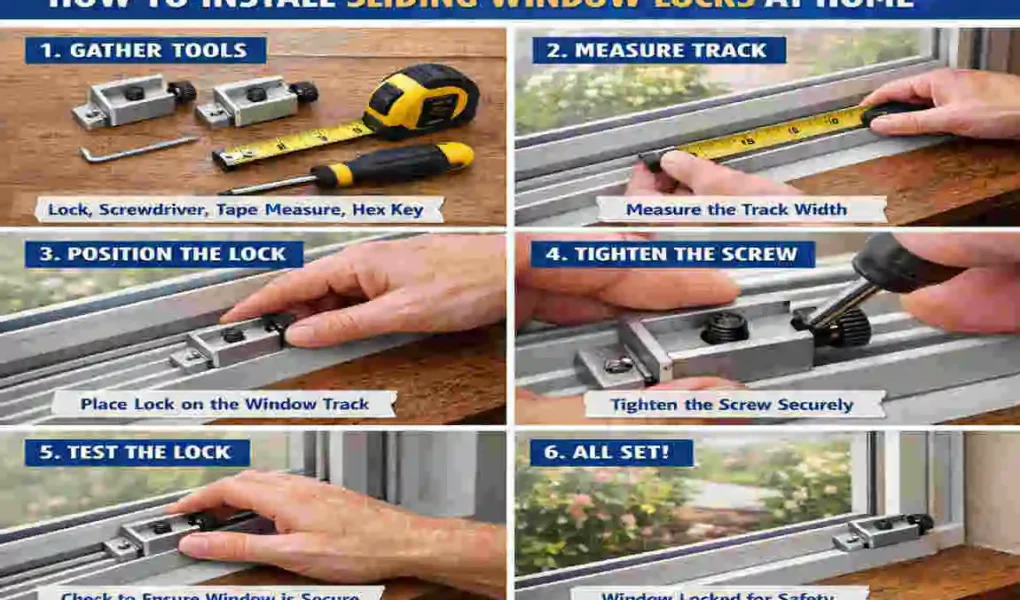
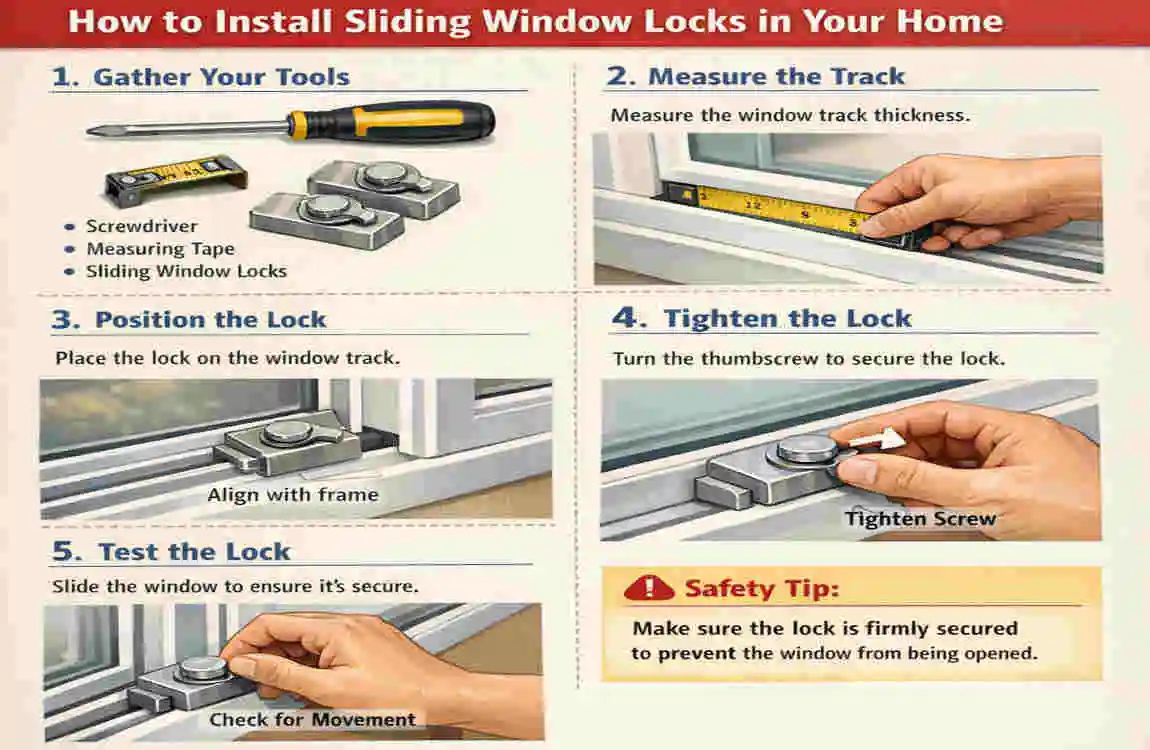
Step-by-Step Installation Guide

Now that you’re prepared, let’s move on to the installation process. Follow these steps carefully for a secure and professional-looking result.
Measure and Mark Positions
- Align the lock on the stationary frame where the sliding panels meet.
- Use a pencil to mark the screw holes.
- Ensure the lock is straight by using a level.
- Double-check the position to allow for a maximum opening of 100mm for ventilation.
Drill Pilot Holes
- Use a 3-5mm drill bit for standard screws or a 7mm bit for bolts.
- Drill vertically to avoid damaging the frame.
- For aluminium frames, use a low-speed setting to prevent material from stripping.
Mount the Lock Body
- Secure the lock body to the frame using 15-20mm screws.
- Test the lock in both closed and vented positions.
- For added security, replace standard screws with one-way screws.
Install the Strike Plate
- Align the strike plate on the sliding sash.
- Drill pilot holes and fasten the plate securely.
- Ensure the lock and strike plate engage flush when the window is closed.
Test and Adjust
- Open and close the window 10 times to ensure smooth operation.
- If the lock feels sticky, apply a small amount of lubricant.
- Perform a security check by tugging on the window to test the lock’s strength.
Advanced Options
- For keyed locks, install the cylinder and test the key mechanism.
- Consider upgrading to smart locks for app-based control and monitoring.
Common Mistakes to Avoid
Even with the best intentions, mistakes can happen. Here are some common errors and how to fix them:
MistakeFix
Misaligned holes. Use a jig or template
Over-tightened screws : Loosen slightly
Loose fit , add packers for stability
Avoid skipping the testing phase—it’s crucial for ensuring the lock functions properly.
Maintenance and Upgrades
To keep your sliding window locks in top condition:
- Perform annual checks to tighten screws and lubricate moving parts.
- Upgrade to smart locks for added convenience and security.
- DIY installation can save you over PKR 5000 compared to hiring a professional.
FAQs
Here are some common questions about sliding window locks:
- How long does installation take?
- Typically, 15-30 minutes per window.
- Are these locks renter-friendly?
- Yes, they can be installed without causing permanent damage.
- What’s the best lock for Lahore’s humid climate?
- Opt for rust-proof aluminium locks.
| Step | Action | Tools/Tips |
|---|---|---|
| Measure & Mark | Close window; mark lock position on frame where panels meet (center overlap). Use level for alignment. | Measuring tape, pencil, level |
| Drill Pilot Holes | Drill 5mm clearance holes and 7mm bolt hole (6-15mm deep). Vertical drilling prevents damage. | Drill with 3-7mm bits, goggles |
| Mount Lock Body | Secure to stationary frame with 15-20mm screws/packers. Test vent mode (under 100mm gap). | Screwdriver, packers |
| Install Strike Plate | Align on sliding sash; fasten flush for bolt engagement. | Screws, level |
| Test & Adjust | Open/close 10x; tug to check security. Lubricate if needed. | Pliers for tweaks |