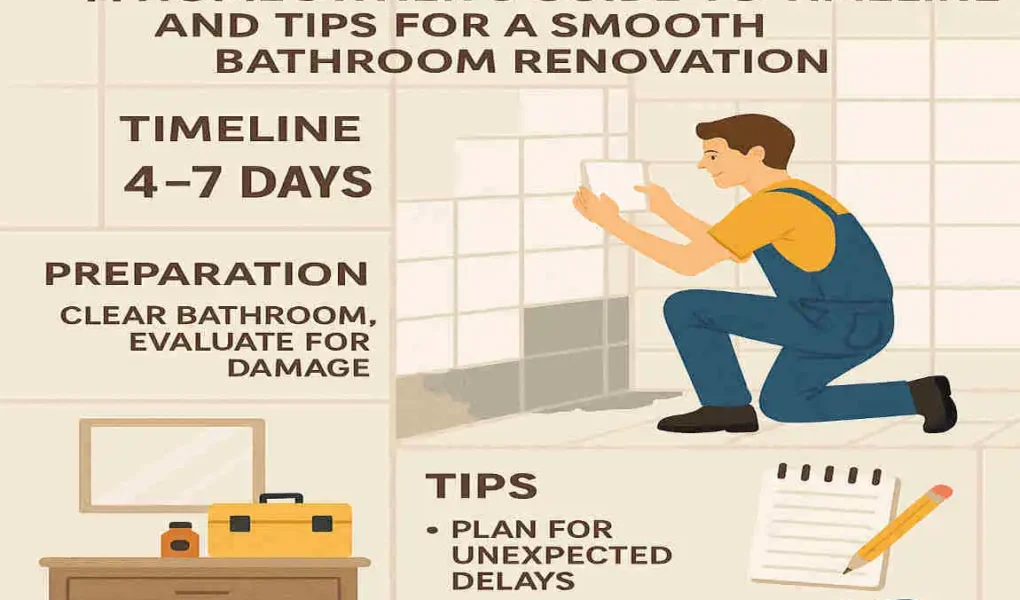
Retiling a bathroom typically takes about 2 to 4 days for the tile installation itself, but the whole bathroom renovation process usually spans 3 to 6 weeks depending on the size and complexity of the project. A small bathroom remodel can often be completed in about 3 to 4 weeks, including demolition, plumbing, electrical, drywall, painting, tiling, and fixture installation. Larger or more complex remodels, especially with custom features or plumbing relocations, can extend the timeline to 6 to 10 weeks or more.
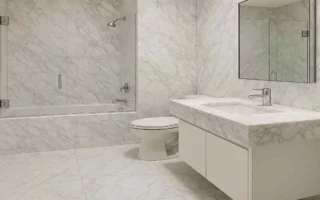
What Does Retiling a Bathroom Involve?
Before we dive into the timeline, let’s take a moment to understand what retiling a bathroom actually entails. It’s not just about slapping some new tiles on the walls and floor. Nope, there’s a whole process involved to ensure a successful and long-lasting result.
Here’s a quick rundown of the key steps:
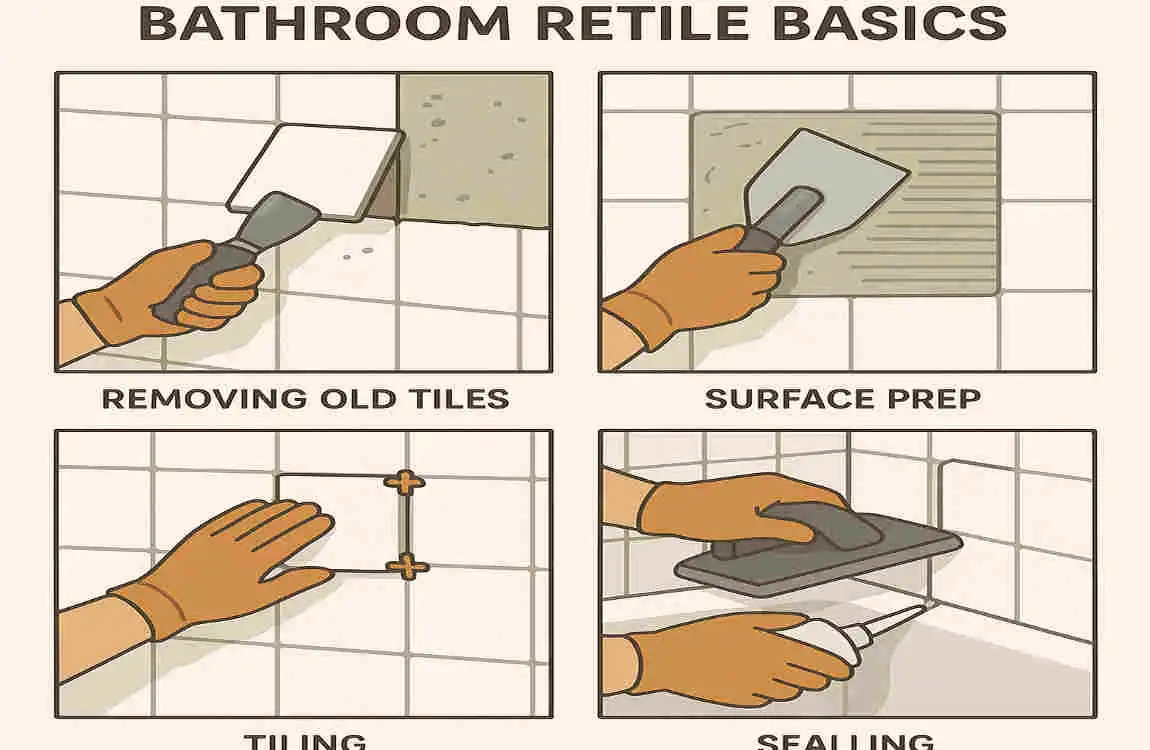
- Removing the old tiles: This is where the Demolition begins. You’ll need to carefully remove the existing tiles, which can be messy.
- Surface preparation: Once the old tiles are gone, it’s time to prep the surfaces. This includes cleaning, leveling, and waterproofing (essential in shower areas).
- Tiling: Now comes the fun part—installing the new tiles! This involves laying out the tiles, cutting them to fit, and carefully placing them in position.
- Grouting: After the tiles are set, it’s time to fill in the gaps with grout. This not only adds to the aesthetic appeal but also helps protect against moisture.
- Sealing: The final step is to seal the grout to prevent water damage and keep your new tiles looking their best.
Each of these steps plays a crucial role in the overall timeline of your bathroom tile project. And depending on the size of your bathroom and the areas you’re retiling (like the floor, walls, shower, or backsplash), the duration can vary.
Typical Timeline for Retiling a Bathroom: Step-by-Step Breakdown
Now that you have a general idea of what’s involved, let’s dive into the typical timeline for retiling a bathroom. Keep in mind that these time ranges are for a standard-sized bathroom, typically 5×8 ft to 8×10 ft.
Preparation and Demolition (1-2 days)
The first step in any bathroom retile project is the preparation and demolition phase. This is where you’ll remove the old tiles and dispose of the debris. It’s also a good time to inspect the surfaces and make any necessary repairs.
This stage typically takes about 1-2 days, depending on the size of your bathroom and the condition of the existing tiles. If you’re tackling this as a DIY project, be prepared to put in some elbow grease!
Surface Preparation (1 day)
Once the old tiles are gone, it’s time to prep the surfaces for the new tiles. This involves cleaning and leveling floors and walls to ensure a smooth, even surface.
If you’re retiling a shower area, this is also when you’ll apply waterproofing to protect against moisture. This step usually takes about a day, but it’s crucial for the success of your project.
Tile Installation (2-3 days)
Now comes the exciting part – installing the new tiles! This stage can take anywhere from 2-3 days, depending on the size and complexity of your bathroom.
You’ll need to carefully lay out the tiles, cut them to fit, and place them in position. If you’re using a complex pattern or design, this stage may take longer. But trust me, the end result will be worth it!
Grouting and Sealing (1-2 days)
After the tiles are set, it’s time to fill in the gaps with grout. This not only adds to the aesthetic appeal but also helps protect against moisture.
You’ll need to allow some drying time after the tile installation before applying the grout. Once the grout is in place, clean up any excess, then seal it to prevent water damage.
This stage typically takes about 1-2 days, depending on the size of your bathroom and the type of grout you’re using.
Final Touches and Cleanup (0.5-1 day)
The final stage of your bathroom tile project is the finishing touches and cleanup. This is when you’ll reinstall any fixtures, such as the toilet or sink, and conduct a final inspection of the work.
You’ll also want to give the bathroom a thorough cleaning to remove any dust or debris from the renovation process. This stage usually takes about half a day to a full day, depending on the size of your bathroom and the amount of work involved.
Factors That Influence How Long to Retile a Bathroom
Now that you have a general idea of the typical timeline for retiling a bathroom, let’s explore some factors that can affect your project’s duration.
Size and Layout of the Bathroom
The size and layout of your bathroom can significantly impact the timeline. A larger bathroom will naturally take longer to retile than a smaller one. And if your bathroom has a complex layout or multiple areas to be retiled (like the floor, walls, and shower), the project may take a bit longer.
Type and Size of Tiles Chosen
The type and size of the tiles you choose can also affect the timeline. Larger format tiles, for example, may be quicker to install than small mosaics. And certain types of tiles, like natural stone, may require more time for cutting and fitting.
Condition of the Existing Surfaces
The condition of the existing surfaces in your bathroom can also affect the timeline. If the walls or floors need extensive repairs or leveling, this can add time to the project.
Complexity of Design/Pattern
If you’re opting for a complex design or pattern, such as a herringbone or diagonal layout, it can also add time to the project. These designs require more precise cutting and placement, which can slow down the installation process.
Skill Level of the Installer
The installer’s skill level can also affect the timeline. A professional tiler with years of experience will likely be able to complete the job more quickly than a DIYer. But don’t let that discourage you – with the proper preparation and patience, you can still achieve great results!
Availability of Materials and Tools
The availability of materials and tools can also affect the timeline. If you’re waiting on a special order of tiles or a specific tool, this can delay the project. It’s a good idea to order your materials well in advance to avoid any holdups.
Weather and Drying Conditions
Finally, weather and drying conditions can also affect the timeline. High humidity, for example, can slow down the drying time for grout and sealants. It’s a good idea to plan your project during a time of year when the weather is more favorable.
How to Accurately Estimate Your Bathroom Retiling Timeline
Now that you know the typical timeline for retiling a bathroom and the factors that can affect it, let’s talk about how to accurately estimate your own project timeline.
Evaluate Your Bathroom’s Specific Needs
The first step in estimating your timeline is to evaluate your bathroom’s specific needs. Take a close look at the size, layout, and condition of your bathroom. Consider the areas you want to retile and the type of tiles you want to use.
Consult with a Professional
For complex jobs, it’s always a good idea to consult with a professional. A skilled tiler can assess your bathroom and provide a more accurate estimate of the timeline. They can also offer valuable advice on the best materials and techniques for your project.
Use Timeline Buffers
When estimating your timeline, it’s always a good idea to build in some buffers. Unexpected delays can happen, so it’s best to plan for extra time. This will help you avoid stress and keep your project on track.
Common Delays in Bathroom Retiling and How to Avoid Them
Even with the best planning, delays can still happen during a bathroom retile project. Let’s take a look at some common delays and how you can avoid them.
Delivery Delays for Tiles or Materials
One common delay is waiting for tile or other material deliveries. To avoid this, order your materials well in advance and confirm the delivery date with the supplier.
Unexpected Damage to Underlying Surfaces
Another potential delay is the discovery of unexpected damage to the underlying surfaces during demolition. To minimize this risk, do a thorough inspection of your bathroom before starting the project and budget for any necessary repairs.
Inadequate Drying Times
Inadequate drying times can also cause delays. Make sure to follow the manufacturer’s instructions for drying times for grout and sealants. And if you’re working in a humid environment, consider using fans or dehumidifiers to speed up the process.
Scheduling Conflicts with Contractors
If you’re working with a contractor, scheduling conflicts can also cause delays. To avoid this, communicate clearly with your contractor about the timeline and any potential conflicts. And be flexible – sometimes, a slight delay can be worth it for a better result.
DIY vs Professional Retiling: How Does the Timeline Differ?
Now, let’s talk about the big question: should you tackle your bathroom tile as a DIY project or hire a professional? And how does the timeline differ between the two options?
Timeline Comparison Chart
Stage DIY Timeline Professional Timeline
Preparation and Demolition 2-3 days 1-2 days
Surface Preparation 1-2 days 1 day
Tile Installation 3-5 days 2-3 days
Grouting and Sealing 2-3 days 1-2 days
Final Touches and Cleanup 1-2 days 0.5-1 day
Total 9-15 days 5-9 days
As you can see, a professional tiler can typically complete the job more quickly than a DIYer. But that doesn’t mean you should automatically rule out a DIY approach. If you have the time, patience, and skills, you can still achieve great results on your own.
Advantages and Risks of DIY Retiling
The main advantage of DIY retiling is the cost savings. You won’t have to pay for labor, which can be a significant expense. And you’ll have complete control over the project, from start to finish.
But there are also some risks to consider. If you don’t have tiling experience, you may make mistakes that can lead to a longer timeline and higher costs. And if you rush the job, you may end up with a subpar result that needs to be redone.
When to Hire a Professional
So, when should you hire a professional to retile your bathroom? Here are a few scenarios where it may be worth the investment:
- If you have a large or complex bathroom
- If you want a high-end or custom design
- If you’re short on time or don’t have the skills for a DIY project
- If you want to ensure a high-quality, long-lasting result
A professional tiler can bring expertise, efficiency, and peace of mind to your project. They’ll be able to complete the job more quickly and with fewer mistakes, which can save you time and money in the long run.
Essential Tips for a Smooth and Timely Bathroom Retiling Project
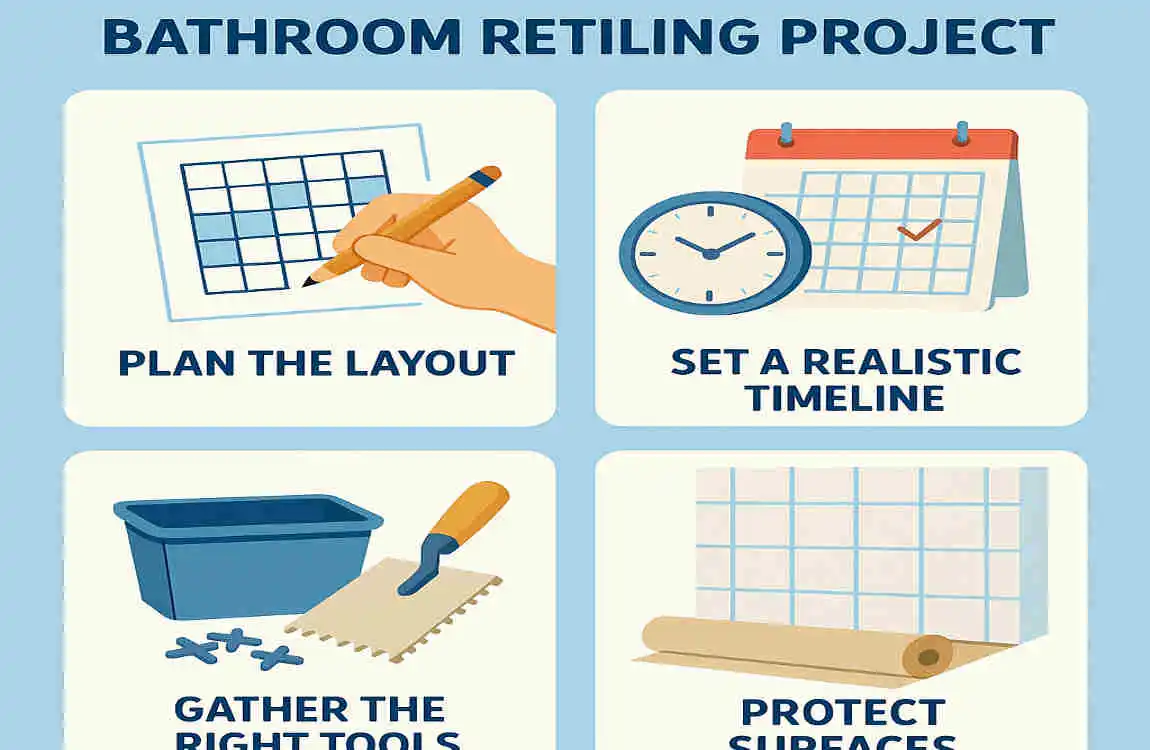
Whether you’re tackling your bathroom tile as a DIY project or hiring a professional, here are some essential tips to help you achieve a smooth and timely result:
Prepare Your Bathroom and Home
Before starting your project, take the time to prepare your bathroom and home. Remove any furniture or fixtures that may get in the way, and cover any surfaces you want to protect from dust or debris.
Organize All Materials
Make sure to organize all your materials before starting the project. This includes tiles, grout, sealants, tools, and any other supplies you’ll need. Having everything ready to go will help you avoid delays and keep the project on track.
Communicate Clearly with Your Contractor/Team
If you’re working with a contractor or team, make sure to communicate clearly about the timeline, budget, and any other expectations. Regular check-ins ensure everyone is on the same page and working towards the same goal.
Follow Manufacturer’s Instructions
When it comes to materials like grout and sealants, make sure to follow the manufacturer’s instructions carefully. This will help you achieve the best results and avoid any potential issues down the line.
Allow Sufficient Drying and Curing Time
Don’t rush the drying and curing process. Allow sufficient time for the grout and sealants to set properly before using the bathroom. This will help ensure a durable, long-lasting result.
Keep the Bathroom Well-Ventilated
During and after the tiling process, keep the bathroom well-ventilated to help with drying times. Open windows, use fans, or consider a dehumidifier to speed up the process.
Budget Considerations Related to Timeline
When planning your bathroom tile project, it’s essential to consider the budget implications of the timeline. Here are a few key points to keep in mind:
Longer Timelines Can Impact Costs
A longer timeline can affect your overall costs. For several, you may need to pay for additional labor or rental equipment. And if you’re living in the home during the renovation, a longer timeline can mean more disruption to your daily life.
Balance Speed vs Quality
When it comes to your bathroom tile, it’s important to balance speed and quality. Rushing the job to save time can lead to mistakes and a subpar result. On the other hand, taking too long can drive up costs and cause frustration.
Avoid Rushed Jobs
One of the most significant budget considerations is avoiding rushed jobs. If you try to speed up the process too much, you may end up with a result that needs to be redone. This can be a costly mistake, both in terms of time and money.
So, take your time, plan carefully, and prioritize quality. Your wallet (and your bathroom) will thank you!
Real Homeowner Case Studies: Retiling Bathroom Timelines
To give you a better idea of what to expect, let’s take a look at some real homeowner case studies and their bathroom tile timelines.
Small Bathroom, DIY
- Timeline: 10 days
- Size: 5×7 ft
- Areas Retiled: Floor and shower
- Factors Affecting Duration: Small size, simple design, DIY approach
- Lessons Learned: Taking the time to properly prepare the surfaces made a big difference in the final result. And while it was a lot of work, the homeowner was proud of the finished product.
Medium Bathroom, Professional
- Timeline: 7 days
- Size: 8×10 ft
- Areas Retiled: Floor, walls, and shower
- Factors Affecting Duration: Professional installer, efficient workflow, high-quality materials
- Lessons Learned: Hiring a professional saved time and ensured a high-quality result. The homeowner appreciated the peace of mind that came with working with an experienced tiler.
Large Bathroom, Complex Design
- Timeline: 14 days
- Size: 10×12 ft
- Areas Retiled: Floor, walls, shower, and backsplash
- Factors Affecting Duration: Large size, complex design, multiple areas to be retiled
- Lessons Learned: The homeowner knew the project would take longer due to the size and complexity, but they were thrilled with the end result. They appreciated the attention to detail and craftsmanship that went into the project.
These case studies show that the timeline for retiling a bathroom can vary widely, depending on factors such as size, design, and whether you’re tackling it as a DIY project or hiring a professional. But with careful planning and realistic expectations, you can create a beautiful, functional bathroom you’ll enjoy for years to come.