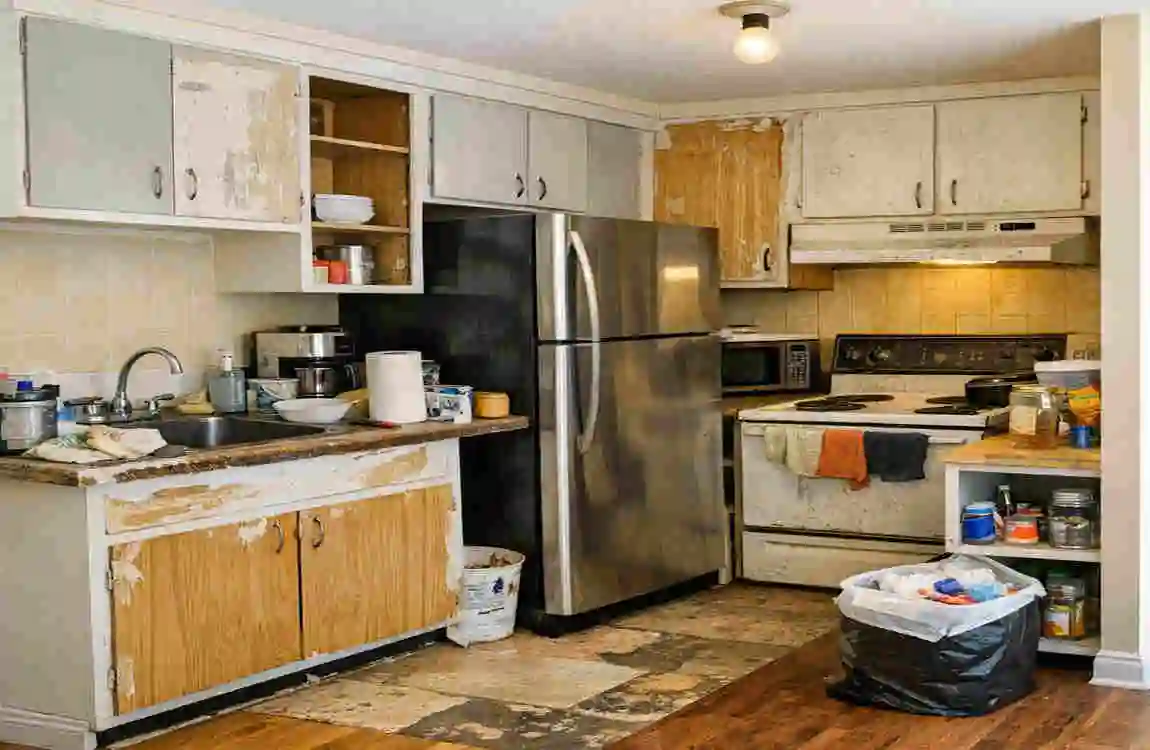
Did you know that nearly 80% of homeowners crave a fresh look for their cooking space, but most want to keep the total cost under $500? If you spend your mornings making coffee in a cramped, outdated space, you are definitely not alone. The good news is that you do not need a massive bank account to create a beautiful cooking area. In fact, small kitchen makeovers on a budget are taking the home design world by storm in 2026.
We all know the common pain points of a tiny house or apartment. The counters feel cluttered, the cabinets look stuck in the 1990s, and the lighting is just plain gloomy. It can feel really overwhelming to look at your space and think about the thousands of dollars a traditional remodel would cost. But what if I told you you could completely change the vibe of your home in just one weekend?
You do not need to tear down walls or hire expensive contractors. By focusing on quick, clever, and highly effective DIY projects, you can breathe new life into your home. Discover small kitchen makeovers on a budget that transform your home without breaking the bank. From peel-and-stick upgrades to clever storage hacks, we have gathered the ultimate list of affordable ideas to help you out.
Why Focus on Budget Small Kitchen Makeovers?
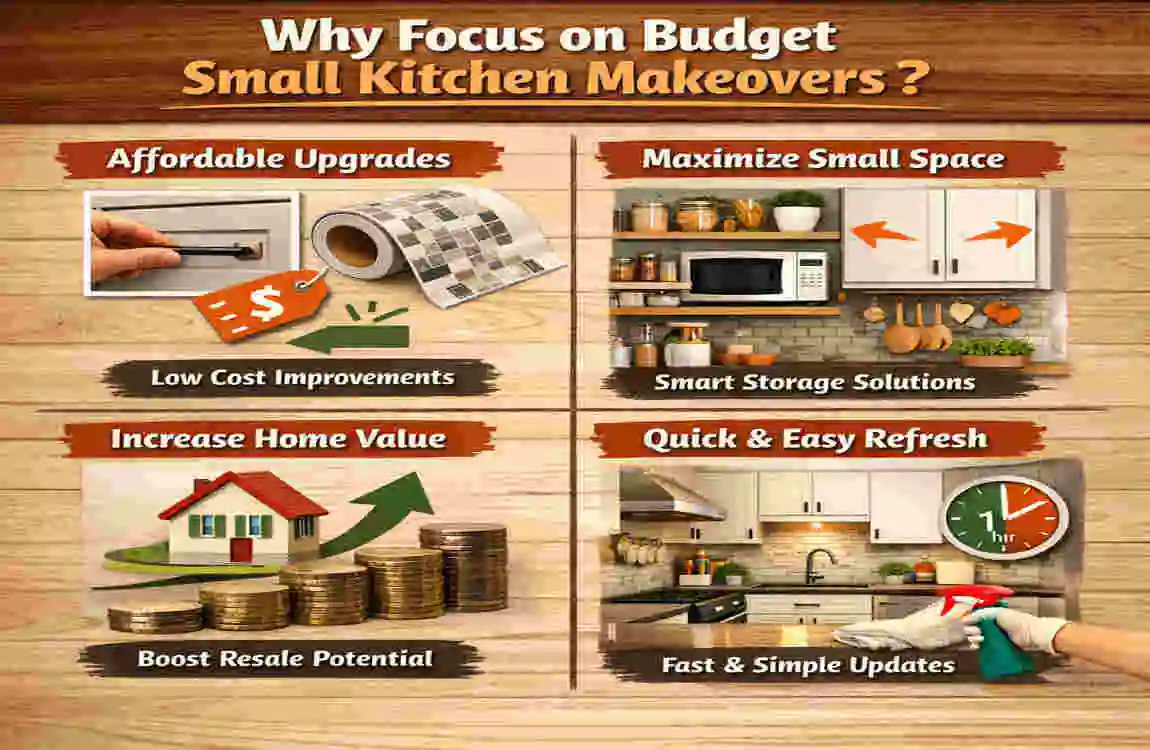
You might be wondering why so many people are choosing simple updates over full-scale demolitions right now. Post2025 inflation has made everyone a bit more mindful of their spending. Materials are more expensive, and contractor fees are at an all-time high.
At the same time, we have seen a massive rise in TikTok DIY videos and sustainable luxury home hacks. People are realizing that tossing out perfectly good cabinets just because they are an ugly color is terrible for the environment—and bad for your wallet. By choosing to upcycle and refresh what you already own, you are making an eco-friendly choice that feels great.
The financial benefits of these projects are huge. You can easily save up to 70% compared to a full remodel. Plus, even minor cosmetic changes can increase your home’s overall value by 5% to 10%. If you ever decide to sell, buyers love seeing a clean, modern, and updated cooking space.
Preparation: Quick Prep for Small Kitchen Makeovers on a Budget
Before you dive into the fun part of painting and decorating, you need to set the stage. Proper preparation is the secret ingredient to making cheap updates look like high-end professional work.
First, tackle the clutter. Create a decluttering checklist. Empty out all of your cabinets and drawers. Throw away expired food, donate gadgets you never use, and clear off your counters completely. A blank canvas will help you see your space’s true potential. Next, give everything a really deep clean. Use a heavy-duty degreaser to wipe down your cabinet doors, walls, and backsplashes. Paint and adhesive will not stick to kitchen grease!
For your budget breakdown, plan to spend $50-$200 total per makeover on this list. You can tackle one project a month or combine a few for a larger weekend transformation.
Gather your essential supplies early. Stock up on painter’s tape, a good bonding primer, and keep an open mind for thrifted finds. Finally, never ignore safety. Always ensure you have proper ventilation by opening windows when painting or using strong cleaners. Make sure to unplug your appliances before working near outlets or water sources.
Here is a quick checklist to get you ready:
- Declutter all surfaces and inside cabinets.
- Deep clean with a strong degreaser.
- Gather tools like tape, scissors, screwdrivers, and paintbrushes.
- Set a firm budget for your chosen project.
- Secure the area by unplugging appliances and laying down drop cloths.
Peel-and-Stick Backsplash Bliss
If you want the fastest, most dramatic change for your room, look no further than the walls behind your sink and stove. Small kitchen makeovers on a budget almost always feature this incredible hack.
Why does it work so well? Because a new backsplash instantly modernizes a tiny space. Traditional tile requires messy mortar, expensive wet saws, and days of labor. Peel-and-stick tiles give you the same look in a fraction of the time, without the massive mess.
Cost: Usually between $20 and $50, depending on the size of your wall.
Step-by-Step Guide:
- Measure and Clean: Measure your wall space to know how many tile sheets you need. Then, scrub the wall with a degreaser. It must be completely dry before you start.
- Cut to Size: Use a sharp utility knife and a straight edge to cut the tile sheets. Make sure to measure around your electrical outlets carefully.
- Peel and Press: Remove the backing from the tile. Align it perfectly with your counter or the previous tile, and press firmly against the wall. Smooth out any air bubbles as you go.
The before-and-after results of this simple project are staggering. Imagine a dark, dingy galley kitchen suddenly glowing with bright, glossy subway tiles. You can also play with variations! Metallic finishes look amazing in modern houses, while Moroccan-inspired patterns add a beautiful, global warmth. This is truly one of the easiest small kitchen makeovers on a budget.
Thrifted Cabinet Revamp
Your cabinets take up the most visual real estate in your room. If they are dark, scratched, or orange-toned oak, they are making your entire space feel smaller. You do not need to buy new boxes or doors. A thrifted cabinet revamp is your best friend.
The ultimate hack here is a combination of elbow grease, fresh paint, and updated hardware you can find at local flea markets or thrift shops.
Cost: $30-$60 for paint, primer, and secondhand handles.
DIY Tutorial:
- Remove and Label: Remove all cabinet doors and drawers. Take out the hinges and knobs. Label everything so you know exactly where each door goes when you put them back!
- Clean and Sand: Wash the wood with a degreaser. Lightly sand all the surfaces with 120-grit sandpaper. You want to remove the glossy finish so the new paint will stick.
- Prime Time: Apply a high-quality bonding primer. This stops stains from bleeding through and helps the paint grip tightly.
- Paint: Apply two thin coats of your chosen cabinet paint. Use a foam roller for a smooth, factory-like finish. What are the color trends for 2026? Warm, creamy whites and soft earth tones like sage green or terracotta are huge right now.
- Add New Hardware: Once dry, reattach the doors and screw in your new, thrifted handles. A sleek matte-black or brushed-brass pull changes the whole look.
This pro move completely transforms the room. Lighter colors reflect natural light, effectively doubling the perceived size of small spaces.
Open Shelving Swap
Do your bulky upper cabinets make you feel boxed in? It is time to ditch them for a much more airy, open feel. Removing just one or two upper cabinet boxes and replacing them with open wooden shelves is a game-changer.
Cost: Roughly $40 for wooden shelf boards and metal brackets, plus a few dollars for cute storage bins.
Install Guide: First, carefully unscrew and remove the upper cabinet. Patch any holes in the wall with spackle and touch up the paint. Next, find your wall studs using a stud finder. This is crucial because dishes are heavy! If you cannot hit a stud, you absolutely must use heavy-duty wall anchors.
Secure your brackets to the wall, making sure they are perfectly level. Then, lay your wooden shelves across the top and screw them into the brackets from underneath.
Now comes the fun part: styling! Do not clutter these shelves. Keep it minimal. Stack your favorite everyday plates, display some pretty coffee mugs, and add a trailing houseplant, like a pothos, to bring life to the room.
The trends for 2026 range from rustic farmhouse (thick reclaimed wood) to sleek minimalist (thin, floating white shelves). Either way, this project forces you to stay organized and makes your walls look twice as wide.
Smart Lighting Lift
Lighting is the most ignored element in home design, yet it dictates how everything else looks. A dark room feels dirty, no matter how much you scrub it. Upgrading your lighting is a vital part of small kitchen makeovers on a budget.
The secret weapon here? LED light strips are placed directly under your upper cabinets.
Cost: Very affordable, usually $15-$30.
The Impact: Under-cabinet lighting eliminates the dark shadows that gather on your countertops. By shining light directly onto your prep area, the entire room feels brighter, cleaner, and significantly larger. It gives the illusion of depth, pushing the walls back visually.
You do not need to hire an electrician for this. Buy a plug-in roll of LED strip lights. They come with a sticky backing. Just peel off the tape, stick them right under the lip of your upper cabinets, and plug them into the nearest outlet.
For modern homes, you can buy app-controlled smart LED strips. You can change the color temperature from your phone. Use a bright, cool white for chopping vegetables, and switch to a soft, warm yellow glow for a cozy, late-night ambiance.
Countertop Contact Paper Magic
Let us talk about countertops. Replacing old laminate with real granite or quartz will cost thousands of dollars. But what if your current counters are stained, scratched, or have an ugly 1980s pattern? Enter countertop contact paper magic.
High-quality vinyl contact paper can mimic the look of expensive Carrara marble, soapstone, or butcher block wood perfectly.
Cost: An incredibly low $10-$20 per roll.
Application Steps:
- Deep Clean: Wash the counters thoroughly. Use rubbing alcohol as a final step to ensure there is zero grease left behind.
- Measure and Cut: Measure your counter depth and length. Cut the contact paper, leaving a few extra inches on all sides for wrapping over the edges.
- Peel and Smooth: Peel back just the first few inches of the backing. Stick it to the edge of the counter. Use a plastic smoothing tool (or an old credit card) to push the paper down, working slowly to push out any air bubbles.
- Heat the Edges: When you reach the edge of the counter or the corners, grab a hair dryer. Blow hot air onto the vinyl to soften and stretch it. Pull it tightly over the edge for a seamless, professional wrap. Use a utility knife to trim the excess.
This material is surprisingly durable for daily use. While you should not put hot pans directly on it or use it as a cutting board, it holds up beautifully to everyday wiping and splashes of water.
Pull-Out Pantry Hack
When you live in a compact house, every single inch of space matters. Have you ever noticed that annoying, empty five-inch gap between your refrigerator and the wall? Or between your lower cabinets and the stove? That is prime real estate!
You can build a hidden, pull-out pantry hack to maximize your vertical space.
Cost: As low as $10 if you get creative!
How to do it: You can buy narrow, rolling shelving units designed specifically for these gaps, but if you are strictly budgeting, use the tension rod trick.
Buy a few cheap, short tension rods (the kind used for small curtains). Place them horizontally inside that narrow gap between the fridge and the wall. You can rest lightweight wire baskets on top of these tension rods.
Suddenly, you have created custom, vertical storage for your spices, foil boxes, and small condiment bottles. It completely clears up your main cabinets and utilizes space that was collecting dust. This is what makes small kitchen makeovers on a budget so satisfying—finding clever solutions to annoying problems!
Wall Art + Color Pop
Never underestimate the psychological power of color. If your cooking space feels boring, it just needs a little personality. Adding a color pop is incredibly fast and completely renter-friendly.
Cost: Around $20 for a small can of accent paint or a roll of bold wallpaper.
The Strategy: You do not have to paint the whole room. Choose one small accent wall—perhaps the wall around a window, or the side of an exposed cabinet. Paint it a rich, bold color like deep navy blue, mustard yellow, or emerald green.
Alternatively, use peel-and-stick wallpaper featuring a fun botanical or geometric print. You can even frame small pieces of leftover wallpaper and hang them as wall art.
The Psychology: Why does this work? Colors that energize small spaces actually trick the eye. A bold pop of color draws your attention, making you focus on the beautiful design rather than the room’s tight dimensions. It adds instant character and charm.
Multipurpose Island Cart
In a tiny room, lack of counter space is the number one complaint. You do not have enough room to chop an onion, stage your ingredients, and hold your mixing bowls all at once. An island sounds like a luxury, but a multipurpose island cart is totally within reach.
Cost: Between $50 and $100 for a solid, budget-friendly option.
How to Choose and Style: Look for a rolling cart with a sturdy butcher block top. The wheels are the most important part! A rolling cart lets you push it into the center of the room when you are cooking a big meal, then tuck it away against a wall or in a corner when you are done.
Style the cart for maximum utility. The top is your new prep space. Use the shelves below to store bulky items that don’t fit in your cabinets, such as your slow cooker, heavy pots, or large mixing bowls. You can even attach small metal hooks to the side of the cart to hang your dish towels and large spoons.
It is a prep station, a storage unit, and a serving tray all rolled into one brilliant piece of furniture.
Eco-Friendly Sink Upgrade
Your sink is the workhorse of your house. If you have an old, crusty, low-pressure faucet, doing the dishes feels like a terrible chore. Replacing the entire faucet can be pricey, but an eco-friendly sink upgrade add-on is cheap and highly effective.
Cost: About $25.
The Sustainable Angle: Instead of a plumber, head online or to a local hardware store and buy a swivel spray faucet add-on. This unscrews your current aerator (the little mesh screen at the tip of your faucet) and screws right into place.
These attachments instantly turn your hose into a high-pressure, flexible spray hose. You can reach all corners of your sink to blast away food. Better yet, they tie perfectly into the sustainable 2026 trends. These clever attachments aerate the water, increasing pressure while using less water overall. You save money on your water bill while making cleanup a breeze.
Herb Garden Vertical Boost
Finally, bring some life into your home! A space feels instantly fresher and more inviting when there are living plants around. But when counter space is limited, you cannot sacrifice room for bulky plant pots. The solution is a vertical herb garden boost.
Cost: Just $15.
How it Works: Purchase small canvas wall pockets or tiny magnetic metal tins. Hang them on an empty strip of wall near a window, or stick the magnetic tins right onto the side of your refrigerator.
Plant fresh culinary herbs like basil, mint, and cilantro. Not only do these bright green leaves tie into the whole “house freshness” theme, but they also make your home smell incredible. Plus, having fresh herbs literally at arm’s reach will elevate your everyday cooking. It is a tiny detail that makes a budget room feel like a gourmet chef’s space.
Before-and-After Gallery: Real Small Kitchen Makeovers on a Budget
To really prove how effective these strategies are, let us walk through a few real-life transformations. When you combine just two or three of these ideas, the results are nothing short of magical.
The Lahore Rental Refresh Ayesha, a renter in a bustling Lahore apartment, hated her dark brown cabinets and stained counters. She could not paint the wood, so she got creative. She added bright white peel-and-stick subway tile over the old floral backsplash and covered the counters in faux-marble contact paper.
- User Story: “I completely transformed my Lahore rental kitchen for just $150. My landlord even complimented it!”
- Metrics: Completed in one weekend; cost per square foot was under $3.
The Studio Glow-Up Mark lived in a tiny studio where the cooking area was just a single wall. It felt flat and boring. He used the smart lighting lift, installing LED strips under the upper shelf, and painted one accent wall a deep, trendy forest green.
- User Story: “The LED lights make it feel like a high-end bar at night. It took me two hours to do.”
- Metrics: Saved over $400 by avoiding professional lighting installation.
The Family Clutter Buster Sarah’s family of four was constantly bumping elbows. Her counters were covered in spices and appliances. She implemented the pull-out pantry hack next to the fridge and bought a multipurpose rolling island cart.
- User Story: “Getting the clutter off the main counters changed everything. We actually have room to bake cookies together now.”
- Metrics: Doubled usable prep space for exactly $85.
The 90s Oak Overhaul David bought his first home, but the 1990s orange-oak cabinets were an eyesore. He spent three days sanding, priming, and painting them a soft cream color. He finished it off with matte black thrifted handles.
- User Story: “It was a lot of elbow grease, but it looks like a brand new house.”
- Metrics: Saved $5,000 on new cabinetry; increased home equity.
The Airy Open Shelving Nadia felt claustrophobic in her narrow galley layout. She took down two upper cabinets near the window and replaced them with cheap wooden open shelves. She added a vertical herb garden on the opposite wall.
Budget Breakdown & Shopping List
If you are reading this and thinking, “I want to do all of it,” you absolutely can! The beauty of small kitchen makeovers on a budget is that they stack well together. Even if you attempted every single project on this list, your total would still stay well under $1,000.
Here is a quick breakdown to help you plan your shopping trip:
Makeover Idea, Estimated Cost, Time Required, Difficulty Level
Peel-and-Stick Backsplash $20 – $50 2 – 3 Hours Beginner
Thrifted Cabinet Revamp $30 – $60 2 – 3 Days Intermediate
Open Shelving Swap $40 3 Hours Intermediate
Smart Lighting Lift $15 – $30 30 Minutes Beginner
Countertop Contact Paper $10 – $20 2 Hours Beginner
Pull-Out Pantry Hack $10 1 Hour Beginner
Wall Art + Color Pop $20 4 Hours Beginner
Multipurpose Island Cart $50 – $100 1 Hour (Assembly) Beginner
Eco-Friendly Sink Upgrade $25 15 Minutes Beginner
Herb Garden Boost $15 30 Minutes Beginner
Total Estimated Spend $235 – $370 Varies Highly Accessible
Where to buy your supplies: You can source almost everything locally. Check out local hardware stores and urban markets in places like PK for great deals on paint and tools. For specialized items like peel-and-stick tiles or smart LED strips, browse major online retailers like Amazon or Daraz for fast shipping and customer reviews.
Scaling Tips: Do not overwhelm yourself! If you are new to DIY, pick just three things from this list to start. A great beginner combo is the smart lighting, the backsplash, and the sink upgrade. Those three alone will totally change how the room feels.
Common Mistakes to Avoid in Small Kitchen Makeovers on a Budget
Even simple DIYs can go wrong if you rush. To make sure your hard work looks professional and lasts a long time, avoid these common pitfalls:
- Overbuying Materials: Always measure your space twice before buying contact paper or peel-and-stick tiles. Guessing leads to buying too much (wasting money) or too little (leaving an ugly gap while you wait for a second order).
- Skipping the Prep Work: This is the biggest mistake you can make. If you do not thoroughly degrease your cabinets before painting, the paint will peel off in a week. If you do not clean your walls, your backsplash will fall. Do the boring cleaning first!
- Ignoring Lighting: You can paint the cabinets the prettiest color in the world, but if your room only has one dim ceiling bulb, it will still look gloomy. Always prioritize layering your light.
- Forgetting Scale: Do not buy massive, oversized cabinet handles or a giant island cart for a tiny room. Make sure the items you buy fit the exact proportions of your home.
FAQs: Small Kitchen Makeovers on a Budget
You likely have a few questions before you grab a paintbrush. Here are the most common questions we hear from readers:
How long do these makeovers actually take? Most of these projects are designed for a single weekend. Things like sticking on a backsplash, setting up LED lights, or building a vertical herb garden take less than three hours. Painting cabinets is the only project that requires a few days due to drying times.
Are these ideas renter-friendly? Yes, almost all of them! Peel-and-stick wallpaper, contact paper, and adhesive backsplashes are designed to be removable. Just use a hair dryer to warm up the adhesive when it is time to move out, and peel them right off. Always check with your landlord before painting cabinets, though!
Will contact paper on the counters actually last? If applied correctly on a very clean surface, vinyl contact paper can last for a few years. It is water-resistant, making it perfect for wiping up spills. However, you must always use a cutting board and never place hot pots directly on the surface.
What is the cheapest way to make my kitchen look expensive? Swapping out your cabinet hardware and upgrading your lighting. Fresh, modern drawer pulls paired with under-cabinet LED lights immediately elevate the space, making it look custom-built.
Do I need special tools for these projects? Not really! A basic household toolkit containing a screwdriver, a measuring tape, scissors, a utility knife, and a level will get you through 90% of the ideas on this list.