Let us be completely honest right from the start. Figuring out how to move a tank water heater from your basement is much harder than it looks. When you look at that large, bulky metal cylinder sitting in the corner of your lowest floor, it might not seem overly complicated. However, the reality of dragging it up a narrow flight of stairs is an entirely different story.
Moving a heavy appliance like this comes with a unique set of challenges. You are dealing with intense weight, leftover water sloshing around, delicate electrical wires, and potentially dangerous gas connections. This is not the kind of chore you want to rush through on a lazy Sunday afternoon without a solid plan.
| Step | Key Actions | Safety Tips & Tools | Common Pitfalls |
|---|---|---|---|
| Preparation & Planning | Turn off power/gas supply, water supply, and open hot water faucet. Measure dimensions and path (doorways, stairs). Check local codes for new location (ventilation, clearance from combustibles). | Non-contact voltage tester, pipe wrenches. Plan manpower (2-3 people for 140-200 lb empty tank). | Skipping code checks or poor path planning leads to failed moves or hazards. |
| Draining the Tank | Attach garden hose to drain valve, run to floor drain or outside. Open valve slowly; use siphon tube if clogged. Drain fully (full 50-gal tank ~500 lbs). | Buckets, hose, pliers. Allow 1-2 hours; open pressure relief valve if needed. | Incomplete drain causes spills or excessive weight (400+ lbs). |
| Disconnecting Lines | Disconnect water lines (cold/hot), gas/electric (pro for gas), vent pipe. Cap lines to prevent drips. | Screwdrivers, wire strippers, thread sealant. Shut off gas line first. | Damaging delicate pipes or ignoring gas leaks. |
| Protecting & Lifting | Wrap tank in blankets/padding. Use appliance dolly or straps; secure upright. For stairs, use winch or team lift slowly. | Moving straps, dolly, blankets, gloves. Never tip tank. | Tipping or dropping causes injury/damage; solo lifting risky. |
| Transporting Up Stairs | Dolly up stairs carefully; pivot slowly. Clear obstacles. | Team of 3+, padding for walls. Go slow on turns. | Stair falls common without straps/team. |
| New Location Setup & Reinstall | Level platform/drain pan. Reconnect lines, vent, power/gas. Test for leaks. | Level, flexible connectors, T&P relief valve. Pro for gas/electrical. | Improper venting or connections cause fires/leaks. |
Understanding the Challenges of Moving a Tank Water Heater
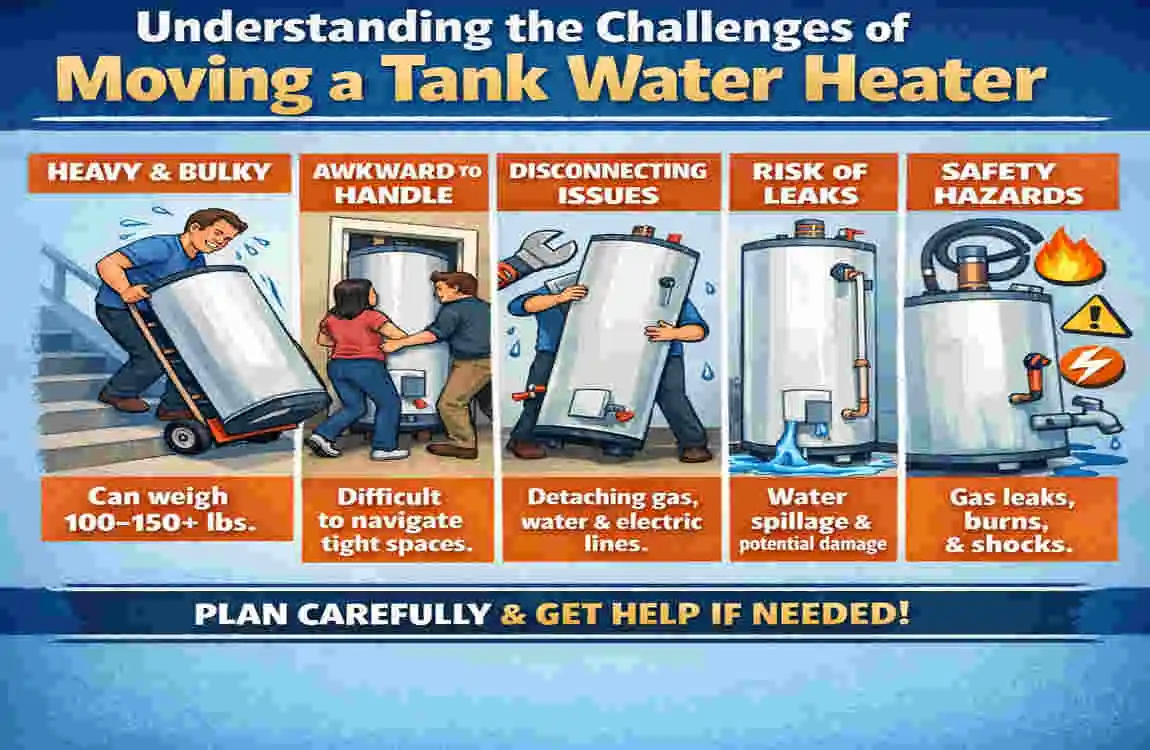
Before you put on your work gloves, you need to understand exactly what you are going up against. Knowing the enemy is half the battle, and in this case, the enemy is a heavy, awkwardly shaped metal tank.
Why Tank Water Heaters Are Difficult to Move
First and foremost, we have to talk about the sheer weight of these units. Even when they are completely drained and empty, a standard unit typically weighs anywhere from 80 to over 150 kilograms (150 to 300+ pounds). This is entirely dead weight, meaning it is dense and lacks easy gripping points.
Furthermore, the bulky cylindrical shape makes it incredibly frustrating to hold onto. Unlike a square box or a couch, a cylinder wants to roll. It does not sit perfectly flush against your body or your moving equipment.
Finally, you have to consider your environment. You are not just moving this across a flat garage floor. You are likely dealing with awkward, steep, or narrow basement staircases. Navigating a massive metal tube up wooden steps requires patience, strength, and serious strategy.
Potential Risks Involved
Whenever you move heavy household machinery, risks are involved. Personal injury is the most common danger. If you lift with your back instead of your legs, you could face severe back strain, muscle pulls, or dangerous slips on the stairs.
Property damage is another major concern. One wrong step, and that heavy metal edge will punch a massive hole straight through your basement drywall. It can also gouge your wooden stairs, scratch your flooring, or break door frames.
The most severe risks, however, involve your home’s utilities. If you mishandle the removal process, you could cause hidden plumbing leaks or, much worse, dangerous gas leaks. Safety must always be your absolute top priority.
When You Should NOT DIY
We love a good DIY project, but sometimes you have to know when to step back and call in the professionals. Do not attempt this project if you are facing severe gas line complications. If the shut-off valve is rusted, stuck, or smells like rotten eggs, stop immediately.
You should also skip the DIY route if you have a tight, winding, or spiral staircase. Moving a tall cylinder up a twisting stairway is nearly impossible without specialized moving gear.
Lastly, if you do not have the proper equipment, do not try to “wing it.” Trying to carry a tank without a dolly manually is a guaranteed trip to the emergency room.
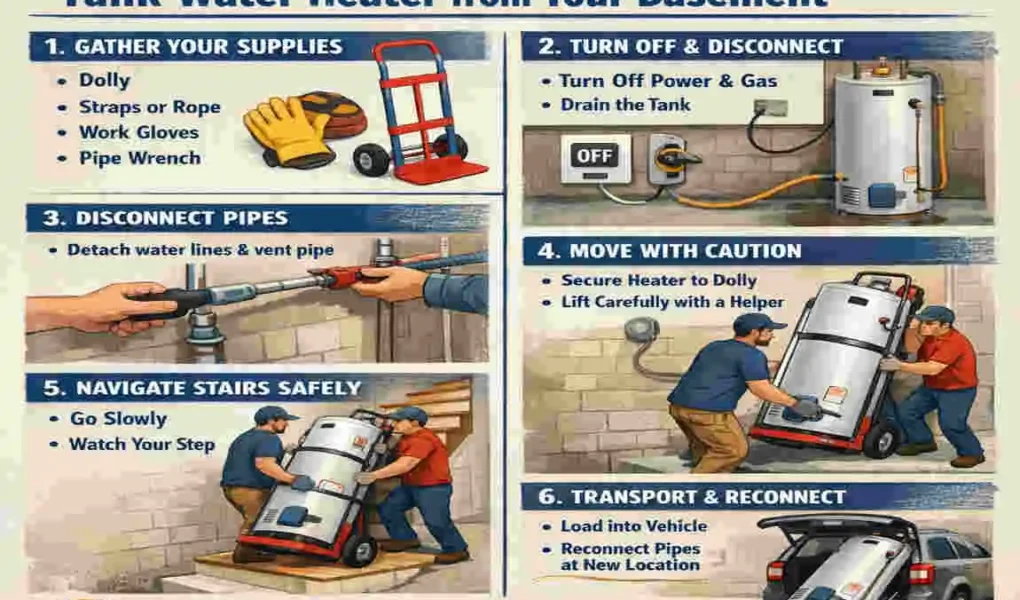
Tools and Equipment You’ll Need
You cannot build a house without a hammer, and you cannot move a massive basement appliance without the right gear. Gathering your tools beforehand will save you hours of frustration later.
Essential Tools Checklist
Here is a quick list of the absolute necessities you need to gather before you start:
- Appliance dolly (with built-in straps): A standard box dolly will not work. You need a heavy-duty appliance dolly that can handle the weight and strap the cylinder down tightly.
- Pipe wrench: Essential for loosening stubborn plumbing connections.
- Screwdrivers: You will need both flathead and Phillips head screwdrivers for various access panels.
- Adjustable wrench: Perfect for disconnecting water supply lines.
- Garden hose: You will use this to drain the leftover water out of the tank and into a floor drain or outside.
Safety Gear
Do not underestimate the importance of protecting your body. You should absolutely wear thick, heavy-duty work gloves. The edges around the heating elements and the bottom pan can be surprisingly sharp.
Protect your toes by wearing steel-toe boots or thick work boots. If the dolly slips, you do not want hundreds of pounds of metal crushing your sneakers. Finally, wear a back support belt to keep your spine aligned during the heavy lifting phases.
Optional Tools for Easier Movement
If you want to make your life a whole lot easier, consider renting or buying a few extra items. A stair-climbing dolly has special rotating wheels that make gliding up steps incredibly smooth.
Pick up some furniture sliders to push the unit across flat floors without scratching your hard surfaces. Finally, moving straps (also known as lifting harnesses) can help distribute the weight across your shoulders if you are carrying it with a partner.
Preparing Your Water Heater for Safe Removal
You cannot just grab the tank and start walking. Proper preparation is the most vital step in learning how to move a tank water heater from your basement safely.
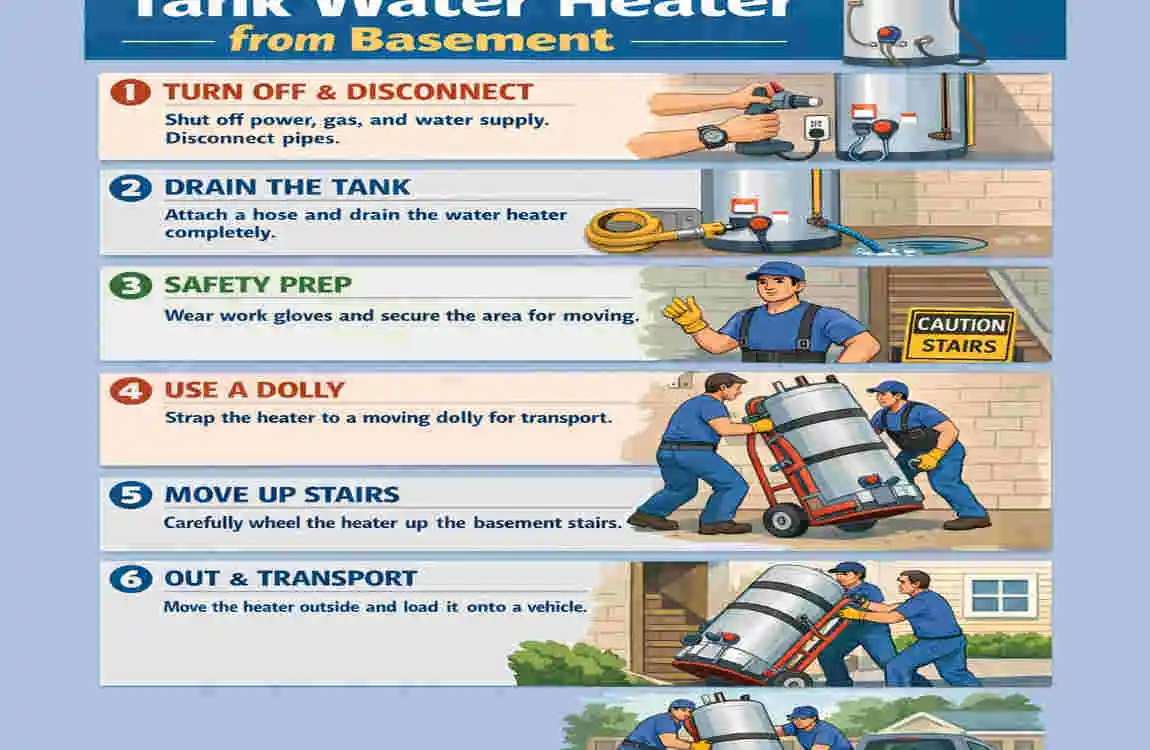
Turn Off Power and Water Supply
The very first thing you must do is cut off the energy source. If you have an electric unit, go to your main electrical breaker box and flip the switch for the hot water system to the “OFF” position. Verify the power is dead using a non-contact voltage tester.
If you have a gas system, locate the gas shut-off valve on the pipe leading into the bottom of the unit. Turn the valve so the handle is perpendicular (forming a cross) to the gas pipe. This stops the flow of gas.
Next, find the cold water supply valve located at the top of the tank. Turn this valve clockwise until it is completely tight to stop new water from flowing into the tank.
Drain the Tank Completely
Now, you have to get rid of the water sitting inside. This is crucial because water is incredibly heavy! Connect your standard garden hose to the drain valve located near the very bottom of the tank.
Run the other end of the garden hose to a floor drain, a sump pump pit, or straight out into your yard. To help the water flow smoothly, go to the nearest sink in your home and turn on the hot water tap. This breaks the vacuum seal inside the system, allowing the water to rush out easily.
Open the drain valve on the tank. Be very careful—the water coming out will be scalding hot! Let it drain completely. This can take anywhere from 20 minutes to an hour, depending on the size and sediment buildup.
Disconnect Plumbing and Power Lines
Once the tank is bone dry, it is time to detach it from your house. Use your wrenches to loosen and remove the cold water inlet pipe and the hot water outlet pipe at the top.
For electrical units, open the junction box on the top and uncap the wire nuts to disconnect the power wires. For gas units, carefully disconnect the gas line and the metal exhaust vent hood at the top.
Important: If you feel unsure about disconnecting gas or electrical lines, stop right here and call a certified professional.
Step-by-Step Guide on How to Move a Tank Water Heater from Basement
Now comes the main event. The unit is disconnected, drained, and ready to travel. Follow these precise steps to get it up those stairs and out the door.
Clear the Pathway
Do not pick up a heavy load until you know exactly where you are walking. Walk your intended path from the basement to the final exit door.
Remove all obstacles. Move the laundry baskets, kick the stray shoes out of the way, and roll up any slippery throw rugs. Take a tape measure and check the width of your doorways and staircases. Compare those numbers to the width of the tank on the dolly. You need to ensure you actually have the clearance to make it through!
Secure the Heater to a Dolly
Tilt the empty tank slightly backward and slide the base of your appliance dolly completely underneath it. The tank should rest flush against the back of the dolly.
Take the heavy-duty straps attached to the dolly and wrap them securely around the middle of the tank. Pull the straps as tight as humanly possible. The cylinder should not wiggle or shift even a millimeter. A loose tank is a massive safety hazard once you hit the stairs, so double-check your tension.
Navigate Basement Stairs Safely
This is the trickiest part of your basement appliance moving tips. You should never do this alone. You need a dedicated team. The ideal method is the two-person or three-person technique.
The strongest person should be at the top of the stairs, pulling the dolly handles backward, step by step. The second person should be at the bottom, carefully pushing the base of the tank upward and acting as a spotter. If you have a third person, they should stand to the side to help guide the wheels and steady the load.
Use a slow, deliberate “bumping” movement. Pull the dolly back, bump the wheels up onto the next step, pause to regain balance, and repeat. Do not try to rush. Take breaks on the landings if your muscles start to burn.
Transport Through the House
Congratulations, you made it up the stairs! But the job is not over yet. Now you have to wheel it through your living spaces.
Lay down thick cardboard or moving blankets over your hardwood floors or delicate tiles. Appliance dolly wheels can easily leave black scuff marks or deep scratches under heavy weight. When turning corners, pivot slowly. Because the cylinder is tall, it carries a high center of gravity. Taking a corner too fast can cause the entire dolly to tip over sideways.
Load Into a Vehicle or New Location
If you are throwing the old unit away, you will need to load it into a pickup truck or a large van. Bring the dolly right up to the edge of the tailgate.
Together with your partner, tilt the dolly back until the top of the tank rests on the bed of the truck. Grab the bottom of the tank, lift with your legs, and slide it flat into the vehicle. Once it is inside, use strong ratchet straps to tie it down securely so it does not roll around while you are driving down the highway.
Pro Tips to Make Moving Easier and Safer
Even with a great plan, the actual physical labor can be tough. Here are a few insider secrets to keep things running smoothly.
Work With a Team
We cannot emphasize this enough: do not try to be a lone wolf. Moving a water heater safely requires a minimum of two physically capable adults, but three is the sweet spot. Having extra hands to stabilize the load, open doors, and provide clear directions is incredibly valuable. It turns a stressful nightmare into a manageable team effort.
Use Proper Lifting Techniques
Your spine is precious. Whenever you have to lift, tilt, or shift the tank, you must use proper body mechanics. Keep your feet shoulder-width apart for a solid base of support.
Always bend at your knees, keeping your back as straight as possible. When you lift, push upward with your powerful leg muscles. Keep the heavy load hugged close to your center of gravity. Reaching out with your arms to lift a heavy object is a quick way to pull a back muscle.
Protect Your Home
Your walls and stairs are just as vulnerable as your back. Wrap the actual water heater in a thick moving blanket before you strap it to the dolly. This provides a soft cushion if you accidentally bump into a doorframe.
Tape thick cardboard along the walls of tight staircases. It is much easier and cheaper to throw away a piece of dented cardboard than it is to patch, sand, and repaint a massive hole in your drywall!
Common Mistakes to Avoid
When people mess up their DIY water heater removal, it is usually because they fell into one of these common traps. Avoid these blunders at all costs.
Not Draining the Tank Fully
Sometimes, the drain valve gets clogged with white, chalky calcium sediment, causing the water flow to slow down to a drip. Impatient DIYers often think, “Well, it’s mostly empty, let’s just go.”
Do not do this! Even just a few inches of leftover water can add 20 to 30 pounds of extra weight. Worse, that water will slosh violently back and forth as you move up the stairs. This sudden shift in weight can easily throw you off balance and cause you to drop the dolly. Take the time to drain every last drop.
Ignoring Safety Gear
“I’ll just wear my running shoes, it’ll be fine.” This is a famous last thought before a toe gets broken.
Skipping safety gear because you are in a hurry is a terrible idea. Work gloves give you the grip you desperately need on smooth metal surfaces. Steel-toe boots protect you from gravity. Take the extra five minutes to gear up properly.
Attempting Solo Lifting
There are plenty of things around the house you can fix or move alone. A 150-pound metal cylinder full of sharp edges is not one of them. Attempting to carry heavy appliances upstairs alone is how serious, life-altering back injuries happen. If your buddy cancels on you, delay the project. It is simply not worth the risk.
Improper Disconnection
Yanking pipes off without properly loosening them first can strip the threading on your home’s main plumbing lines. If you force a gas line off without the right wrench, you could crack the pipe, leading to a silent and deadly gas leak. Always use the right tools, apply gentle but firm pressure, and double-check that all supply valves are completely shut.
What to Do After Moving the Water Heater
You got the old unit out, and you brought a brand new one down into the basement. What are your next steps?
Inspect for Damage
If you moved an existing unit that you plan to reuse, look it over carefully. Walk around the tank and inspect it for any severe dents. Check the drain valve and the temperature and pressure relief (TPR) valve to ensure they were not snapped off during the move. Ensure all the connection threads are still intact and undamaged.
Reinstallation Basics
Putting it back together is generally the reverse of taking it apart. Maneuver the tank into its final resting spot. Reconnect the cold water inlet and the hot water outlet using fresh plumber’s tape (Teflon tape) on the threads to prevent leaks.
Crucial Step: Before you turn the power or gas back on, you must fill the tank entirely with cold water! If you turn on an electric heating element while the tank is empty, it will burn out and explode in seconds (a process known as dry-firing). Open a hot water faucet upstairs, turn on the cold supply valve, and let the tank fill until water flows normally out of the upstairs faucet.
When to Call a Professional
If you run into stripped pipes, confusing wiring, or you feel overwhelmed, stop. Call a licensed plumber. They handle complex installations every single day. Paying for an hour of professional labor is vastly cheaper than repairing massive water damage from a botched DIY hookup.
This is especially true for gas reconnections. A professional will have the right tools to test for invisible gas leaks, ensuring your family sleeps safely at night.
Cost Comparison: DIY vs Hiring Professionals
Are you still on the fence about whether you want to tackle this yourself? Sometimes looking at the raw numbers makes the decision easier. Here is a handy breakdown of what you can expect to spend depending on the route you take.
Option Average Cost Pros Cons
DIY Move Low ($0–$100) Saves a lot of money; works on your own schedule. High risk of personal injury; high risk of property damage.
Professional Movers Medium ($150–$500) Safe, fast, and fully insured against dropping it. Higher upfront cost; you still have to unhook the plumbing yourself.
Plumber + Movers High ($300–$800+) Full comprehensive service. They unhook, move, and reinstall. Most expensive option; requires scheduling and taking time off work.
As you can see, the DIY route is incredibly budget-friendly. If you already own a dolly and basic tools, it might not cost you a single dime.
However, hiring professional movers specifically for heavy lifting offers immense peace of mind. If they drop the tank on the stairs, their insurance pays for the repairs.
Opting for a full-service plumber is the ultimate luxury. They handle the messy disconnections, haul away the old junk, and perfectly install the new system. It drains your wallet, but it completely eliminates your stress.
Safety Regulations and Local Codes to Consider
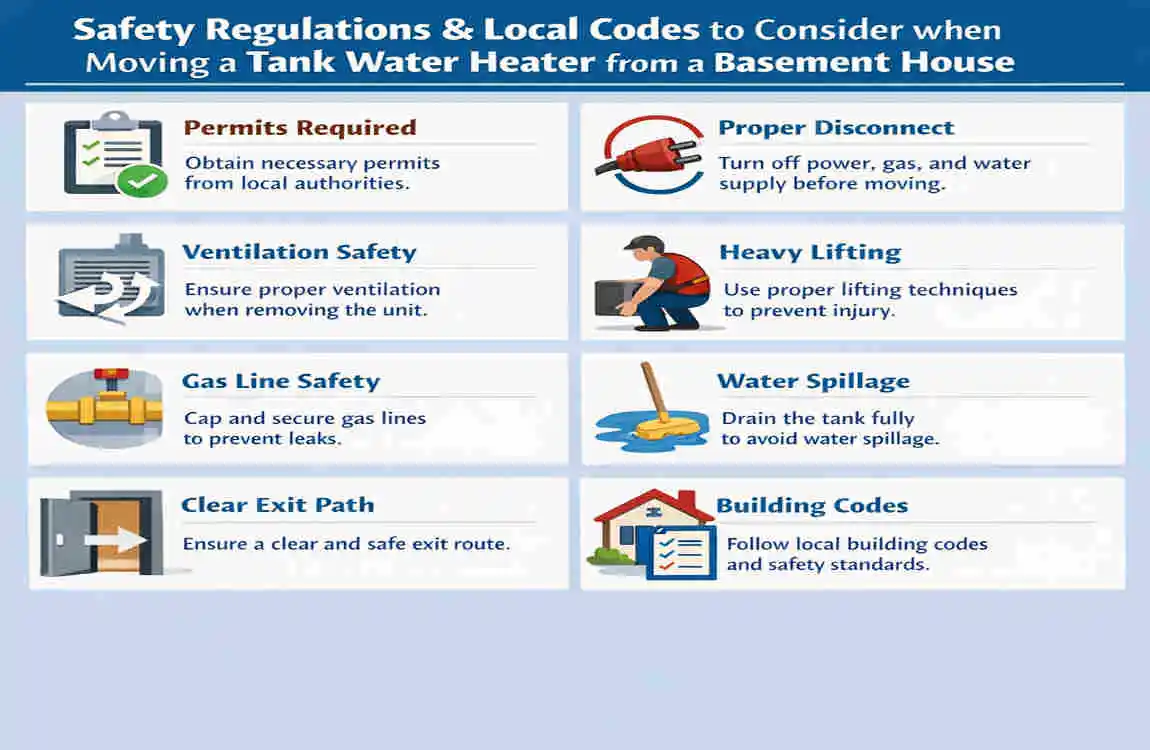
Home improvement is not just about physical labor; it is also about following the law. Your local government has strict rules regarding heavy appliances and utilities for a good reason.
Plumbing Codes
Most municipalities require specific safety features for hot water systems. For example, local plumbing codes dictate exactly how your Temperature and Pressure Relief (TPR) valve must be installed and where it must drain.
You may also be required to install an expansion tank above the unit to absorb excess water pressure, or a drain pan underneath the unit to catch accidental leaks. Always check your local city building website before hooking a system back up.
Gas Line Safety Rules
Gas lines are heavily regulated. In many cities and counties, it is actually illegal for an unlicensed homeowner to modify, disconnect, or reconnect gas lines. You may be required by law to pull a permit and hire a certified gas fitter or plumber. Breaking these rules can void your homeowner’s insurance policy, meaning if a fire starts, you will not get a single penny in compensation.
Disposal Regulations (If Replacing)
You cannot just leave a massive metal tank on the curb with your regular Tuesday morning trash bags. The garbage trucks will ignore it.
You must follow local disposal regulations. Many city dumps require you to pay a special “bulky item” fee. Alternatively, you can take the empty tank to a local metal scrap yard. Because it is made of heavy steel, some scrap yards will actually pay you a few dollars for the recycled metal!
Alternative Options Instead of Moving
Reading through this guide has made you rethink the entire project. If moving your current setup sounds like too much of a headache, you have other options.
Replace Instead of Move
If you are renovating your basement and need the tank out of the way, consider its age. Traditional storage tanks usually only last between 8 and 12 years. If your unit is already 10 years old, it is nearing the end of its life anyway.
Instead of going through the brutal physical labor of moving an old, rusty tank to reinstall it, this might be the perfect time to throw it out entirely. Buy a brand new unit and have the delivery team install it in the new location. You save yourself the backache and get a more efficient appliance.
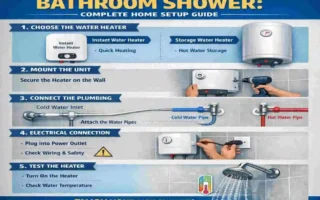
Upgrade to Tankless Water Heater
If space in your basement is tight, moving a bulky cylinder to another corner might not solve your layout problems. Have you considered upgrading to a modern tankless water heater?
Tankless systems (also known as on-demand systems) are small, sleek, rectangular boxes that mount directly onto your wall. They are about the size of a small suitcase. They heat water instantly as it passes through the pipes, meaning you never run out of hot water.
They save a massive amount of floor space, are highly energy-efficient, and—best of all—they do not weigh 150 pounds!
FAQs About Moving a Tank Water Heater from Basement
We know that readers usually have specific, burning questions about this process. Let us tackle the most common inquiries right here.
How heavy is a tank water heater?
The weight depends entirely on its size and whether it is full. An empty 40-gallon tank usually weighs around 100 to 120 pounds. An empty 50-gallon tank can weigh 130 to 160 pounds.
However, water is incredibly heavy—weighing about 8.3 pounds per gallon. Therefore, a full 50-gallon unit weighs well over 550 pounds! This is why draining it completely is the most important step of the entire process.
Can one person move a water heater?
The short and firm answer is: No, it is highly discouraged.
While a very strong individual might be able to drag an empty tank across a flat garage floor, maneuvering it up a flight of basement stairs solo is incredibly dangerous. The tall shape blocks your vision, the center of gravity is awkward, and if it starts to fall backward, a single person cannot stop it. Always grab a partner.
Do I need a plumber to disconnect it?
This depends heavily on the type of fuel your system uses and your local laws. If you have an electric unit, a handy DIYer can usually flip the breaker and unhook the wires safely.
However, if you have a gas unit, we strongly recommend hiring a plumber. Gas lines can be fragile, and a tiny mistake can lead to a dangerous leak in your home. It is always better to play it safe with combustible fuels.
How long does the process take?
If everything goes perfectly according to plan, expect the entire process to take between 2 to 4 hours.
Draining the water usually takes the longest amount of time, sometimes up to an hour if the drain valve is clogged with sediment. The physical moving part—strapping it to the dolly and walking up the stairs—usually only takes about 20 to 30 minutes of actual intense labor.
Is it worth moving an old unit?
In most cases, no. If your system is over 8 years old, the internal lining is likely already corroding. Moving it can disturb the internal rust and sediment, which causes it to start leaking once you hook it back up. If it is old, save yourself the hassle of moving it twice and replace it with a fresh, modern model.