You are living in a bustling urban home, perhaps right in the heart of Lahore. You enjoy the modern aesthetic of your flat roof, and you may even use it for evening teas or family gatherings. But then, the infamous monsoon season hits. The torrential downpours start, and suddenly, that beautiful architectural feature becomes your worst nightmare. Flat roofs are incredibly common in urban architecture, especially in regions with hot climates. However, they come with a significant catch: poor waterproofing inevitably leads to frustrating leaks, dangerous mold growth, and structural damage. If ignored, you could be looking at devastating repair bills skyrocketing up to PKR 500,000.
How can you waterproof a flat roof without hiring expensive professionals? You are completely in the right place. Taking control of your home’s maintenance does not have to be an overwhelming task. We promise you a complete, easy-to-follow DIY guide using highly affordable materials, such as modern liquid membranes.
Why Waterproof Flat Roofs?
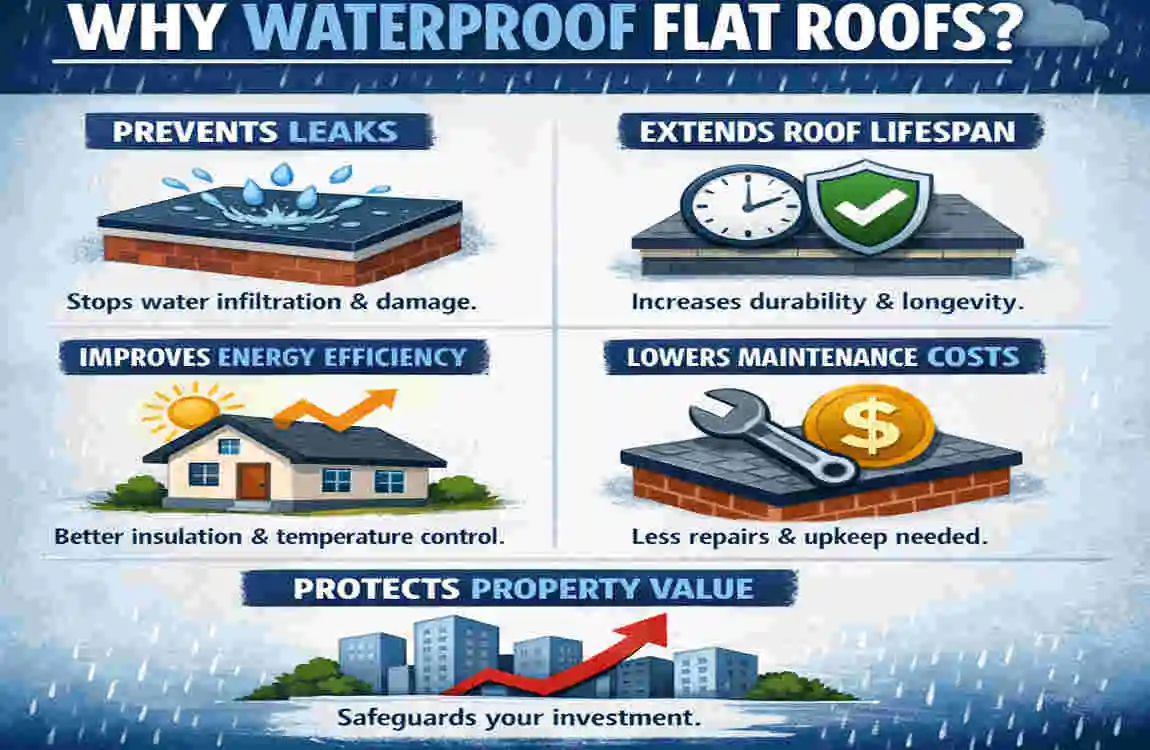
You might be asking yourself why flat roofs require so much more attention than traditional pitched roofs. The answer boils down to simple gravity. Flat roofs tend to retain standing water for much longer than sloped roofs. When heavy rain falls during Pakistan’s intense rainy seasons, a pitched roof quickly sheds the water. A flat roof, on the other hand, gives that water time to sit, pool, and aggressively search for tiny vulnerabilities in your concrete or roofing material.
Understanding how to waterproof a flat roof is fundamentally about protecting your home’s structural integrity. When water seeps into your ceiling, it rots the underlying wooden structures, rusts the metal reinforcements, and compromises the concrete slab.
But the benefits of proper flat roof waterproofing go far beyond just stopping drips in your living room. Here is what you stand to gain:
- Extended Roof Life: A meticulously applied waterproofing system can extend your roof’s lifespan by 20 to 30 years.
- Massive Energy Savings: Modern waterproofing materials, especially white or reflective liquid membranes, bounce the sun’s harsh UV rays away from your home. This simple thermal reflection can save you up to 40% on your summer air conditioning and energy bills.
- Boosted Property Value: A certified, leak-free roof is a massive selling point if you ever decide to put your home on the market.
However, we must issue a word of caution. Industry statistics reveal a sobering fact: nearly 60% of flat roof failures stem from poor surface preparation and sloppy waterproofing. It is not always the material that fails; it is usually the human applying it.
Tools & Materials Needed
Before you learn exactly how to waterproof a flat roof, you need to gather your arsenal. Rushing out to buy supplies mid-project is a guaranteed way to ruin your curing times and compromise the waterproof seal.
To make your shopping trip as simple as possible, we have categorized the essential tools and materials. Keep in mind that prices can fluctuate, but these estimated costs in Pakistani Rupees (PKR) will help you budget your DIY project effectively.
Category Items Required Cost Estimate (PKR)Important Notes
Cleaning Pressure washer, stiff-bristled sweeping brush, soft brush, specialized roof detergent 5,000 – 10,000 Always use low-pressure washing settings on older roofs to avoid causing further structural damage.
Primers & Sealants High-quality roof primer, liquid rubber or polyurethane membrane 15,000 – 30,000 As a general rule of thumb, 1 Liter of quality liquid membrane will cover roughly 10 square meters of roof space.
Membranes EPDM rubber sheet or heavy-duty fiberglass matting 20,000+ Fiberglass matting is essential for reinforcing liquid applications, especially around joints and corners.
Tools Flocked paint rollers, sturdy paddle roller, large paint trays 5,000 Do not forget to purchase specialized edge trims to manage water drips along the roof’s perimeter.
Safety Gear Safety harness, non-slip rubberized boots, heavy-duty gloves, protective goggles 3,000 Never compromise on safety. A wet roof is incredibly slippery, making harnesses essential for high buildings.
We highly recommend buying slightly more material than your initial measurements suggest. Having a 10% buffer prevents you from stretching the liquid membrane too thin and leaving it unfinished.
Ready to start gathering your supplies? Stock up on the best materials via our trusted local suppliers, or contact our Lahore team directly if you need to purchase bulk, professional-grade supplies for a larger commercial project!
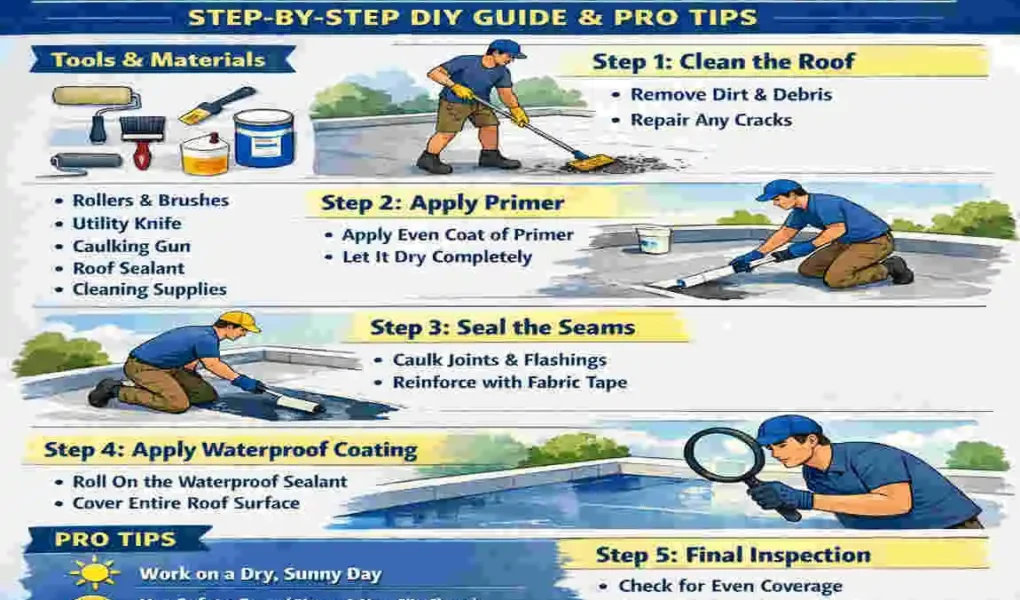
Step-by-Step DIY Guide on How to Waterproof Flat Roof

This is the core of our guide. We have broken down the entire process into highly detailed, easily manageable segments. Follow these steps meticulously, and you will master waterproofing a flat roof like a seasoned professional.
Inspect & Prepare the Surface
We cannot stress this enough: preparation dictates the success of your entire project. If you apply the most expensive liquid applied membrane flat roof system over a dirty, dusty surface, it will peel off within a month. Remember that 60% failure rate we mentioned earlier? Skipping this step is exactly how you become part of that statistic.
Start by conducting a thorough visual inspection of your roof. Look for deep cracks, areas where water naturally forms puddles (ponding), and any buildup of debris, leaves, or moss. Use a stiff brush to sweep away all loose dirt and biological growth aggressively.
Next, bring out the pressure washer. Wash the entire surface methodically to remove embedded grime, oils, and stubborn dirt. If you are dealing with a concrete roof, ensure all the pores are completely flushed out.
Once the roof is impeccably clean, you must practice patience. You need to let the roof dry for at least 48 to 72 hours. If you trap residual moisture beneath your new waterproofing layer, the sun will heat that moisture, causing it to turn into vapor. This vapor will create massive blisters under your membrane, completely ruining your hard work. Finally, if you are working over an old bitumen or fiberglass (GRP) roof, you will need to apply a specialized primer to ensure the new materials bond correctly.
Measure & Cut Your Materials
Precision saves money. Before opening any buckets of liquid or unrolling heavy rubber sheets, you need to calculate your roof’s exact surface area.
Measure the length and width of your roof space, then multiply them to find the square footage (area). However, do not just measure the flat ground. You must also account for vertical edges, parapet walls, and any raised structures, such as skylights or ventilation pipes. Water loves to sneak in through these 90-degree corners.
Once you have your total measurements, add that 10% waste buffer. If you are using rolled materials, such as EPDM flat roof waterproofing or fiberglass matting, pre-cut your strips on a clean, dry surface. Cut your edge trims and drip edges to the exact lengths of your roof perimeters. Having everything pre-cut and staged makes the actual application process smooth and stress-free.
install Edge Trims
Edge trims are the unsung heroes of a dry home. They are the physical barriers that direct rainwater exactly where you want it to go—usually into your gutter system—rather than letting it run down the sides of your exterior walls and ruining your paint job.
Identify where water naturally drains off your roof. Along these specific edges, you will install drip trims. On the edges where you want to prevent water from falling over, you will install non-drip (raised) trims.
Secure these trims tightly around the perimeter using a high-quality outdoor construction adhesive and galvanized roofing nails or screws. Ensure they overlap correctly so water cannot seep between the joints.
Apply the Primer and First Coat
Now the real transformation begins. Put on your safety goggles, gloves, and non-slip boots.
If your specific roof substrate requires a primer (such as bare, porous concrete or aging wood), apply it now with a roller. The primer acts as an anchor, sinking deep into the roof and providing a sticky surface for the main waterproofing membrane to grab onto. Allow the primer to dry according to the manufacturer’s instructions—usually around 2 to 4 hours.
Once primed, open your primary liquid applied membrane flat roof coating. Stir it thoroughly with a paddle mixer attached to a drill to ensure all the active compounds are blended. Using a heavy-duty roller, apply an even, thick base layer across the roof. Work in small, manageable sections (about 1 square meter at a time). Do not stretch the liquid too thin; it needs to meet the manufacturer’s thickness specifications to perform correctly.
Embed the Reinforcement Membrane
While that first base coat is still completely wet and sticky, it is time to add structural strength. This is particularly vital for DIYers learning how to waterproof a flat roof to withstand thermal expansion.
Take your pre-cut strips of fiberglass matting or reinforcement fabric and lay them gently directly into the wet liquid coat. Use a dry roller or a specialized paddle roller to firmly press the fabric down. You want the liquid to soak up through the pores of the fiberglass.
Roll out any wrinkles, creases, or trapped air bubbles. The surface must be perfectly flat. Pay special attention to the corners where the roof meets the parapet walls—embed the fabric tightly into these 90-degree angles. Once the reinforcement is fully saturated and embedded, step back and let this foundational layer cure for a full 24 hours.
Apply Topcoats and Final Curing
After 24 hours, your roof should feel solid to the touch. Now, you will apply your secondary and, if required, tertiary liquid layers over the embedded fiberglass.
For the topcoats, we highly recommend a polyurethane-based liquid. Polyurethane is incredibly flexible, meaning it will effortlessly stretch and contract as the Lahore sun bakes the roof during the day and cools it at night. Apply these final layers using a cross-hatching method: if you rolled the first coat from north to south, roll the second coat from east to west. This guarantees absolutely zero pinholes or missed spots.
Now comes the hardest part: doing nothing. A full, chemical cure takes at least 48 hours. During this time, strictly prohibit any foot traffic, pets, or heavy equipment from coming into contact with the roof. Once fully cured, you will have a seamless, rubberized, impenetrable shield protecting your home.
Best Flat Roof Waterproofing Methods Compared
While our DIY guide focuses heavily on liquid membranes, it is crucial to understand all the best flat roof waterproofing methods available on the market. Different budgets, skill levels, and roof types require different solutions.
To help you make an educated decision, we have broken down the top industry choices in this detailed comparison table.
Waterproofing Method The Pros The Cons Best Suited For Expected Lifespan
Liquid Membranes (Polyurethane/Acrylic) Completely seamless, exceptionally easy for DIY projects, highly flexible to prevent cracking. Requires absolutely perfect surface preparation and strict drying times. Overlays on existing older roofs, complex roof shapes, and DIY beginners. 15 – 25 years
EPDM Rubber Sheets Incredibly durable, highly UV-resistant, and handles standing water beautifully. Much harder to install smoothly, seams require specialized taping, heavy to lift. New roof installations and large, perfectly flat, unobstructed commercial spaces. 30+ years
Bitumen Torch-On (Felt) Very affordable, traditional, thick, and physically strong. Major fire risk during installation (requires an open-flame blowtorch); dangerous for DIY. Heavy-duty commercial buildings and professional installations. 10 – 20 years
Single-Ply (TPO/PVC) Lightweight, highly reflective for energy savings, eco-friendly. Professional installation highly preferred; requires specialized heat-welding equipment for seams. Ballasted roofs or large industrial complexes. 20 – 30 years
Deep Dive into the Methods
When researching how to waterproof a flat roof, you will notice a fierce debate between liquid systems and sheet systems.
Liquid Applied Membranes: These are undoubtedly the kings of the DIY realm. Because you apply them like thick paint, they naturally self-level and contour to any bumps, dips, or protruding pipes on your roof. For the intense heat of Lahore, polyurethane liquid is our top recommendation. It remains highly elastic. When the concrete beneath expands in 45°C heat, the liquid membrane stretches with it rather than snapping or cracking.
EPDM Flat Roof Waterproofing: Ethylene Propylene Diene Monomer (EPDM) is a massive, heavy-duty inner tube for your roof. It is a synthetic rubber that is virtually immune to UV degradation. While it boasts a massive 30-year lifespan, DIYers often struggle with the seams. If you do not glue and tape the overlapping joints perfectly, water will seep beneath the giant rubber sheet, and you will not know until it is too late.
Bitumen and TPO: Torch-on bitumen is an older, reliable technology, but we strongly advise against DIYers using open-flame blowtorches on their rooftops. Leave this to the insured professionals. TPO and PVC are fantastic, modern, single-ply options, but because the seams must be melted together with a robotic heat welder, they sit firmly outside the standard DIY toolkit.
Pro Tips & Common Mistakes
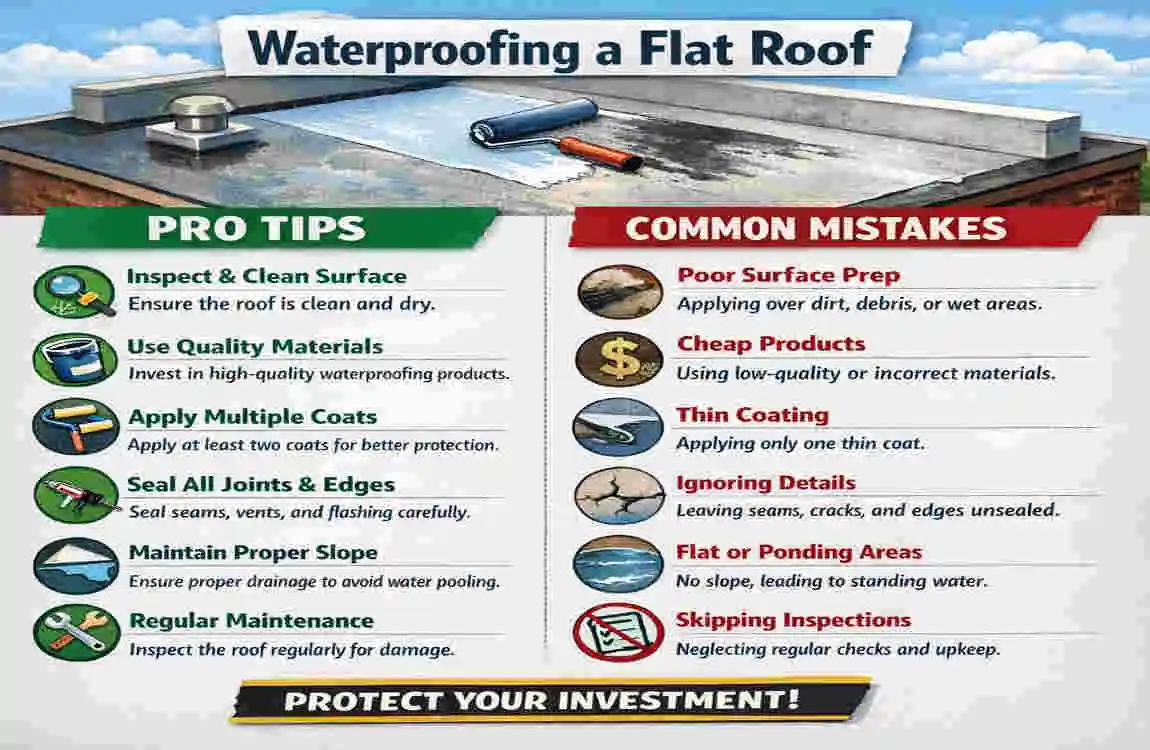
Even with the best instructions, human error happens. Over our years in the roofing industry, we have seen DIYers make the same heartbreaking mistakes over and over again. Save yourself time, money, and stress by strictly following these pro tips for ultimate flat roof waterproofing.
- Always Test a Small Patch First: Before you commit to coating the entire 100-square-meter roof, test your primer and base coat on a small 1×1 meter corner. Wait 24 hours and check the adhesion. If you can easily peel it up with your fingers, your roof isn’t clean enough, or you are using incompatible materials.
- Watch the Weather Like a Hawk: Weather dictates everything. You need a window of at least 3 to 4 dry days. The ideal temperature range for applying liquid membranes is between 10°C and 30°C. If you apply it when it is too hot (mid-day Lahore summer), the top layer dries instantly, trapping wet liquid underneath and causing massive chemical bubbles. Apply early in the morning or late in the afternoon.
- Avoid Over-Thinning: Some DIYers try to save money by diluting the polyurethane membrane with harsh chemical thinners. Do not do this. Over-thinning destroys the chemical bonds that make the product waterproof.
- Do Not Ignore Your Slopes: Waterproofing stops water from penetrating, but it doesn’t make water disappear. If your roof has significant dips, use a self-leveling concrete compound to even out the slopes before applying the waterproof membrane.
When it comes to longevity, proactive care is your best friend. Incorporate these flat roof maintenance tips into your yearly routine: inspect your roof every autumn, gently sweep away any pooling autumn leaves, and ensure your gutters are completely free of blockages.
Frequently Asked Questions (FAQs)
We know that embarking on a major home improvement project can raise many specific anxieties. Here are the most common questions homeowners ask us when learning how to waterproof a flat roof.
How much does it truly cost to waterproof a flat roof yourself? If you choose the DIY route using high-quality liquid polyurethane membranes and fiberglass reinforcement, you should budget between PKR 200 to PKR 500 per square foot. This includes the cost of rollers, brushes, and cleaning supplies. Hiring a professional will easily double or triple that price due to labor costs.
Can I apply these DIY membranes directly onto bare concrete? Yes, absolutely. However, bare concrete is incredibly porous and dusty. You cannot skip the primer. You must thoroughly wash the concrete, let it bone-dry, and apply a specialized masonry/concrete primer to seal the pores before rolling on your waterproof liquid.
What happens if my roof still leaks after I finish the project? Do not panic. If a leak persists, it usually means there is a pinhole you missed or an edge trim that wasn’t sealed tightly. Wait for a dry day, locate the vulnerability, clean the specific area, and apply a thick, localized patch of your topcoat liquid membrane directly over the leak.
As a beginner, should I choose EPDM or Liquid Membranes? Without a doubt, choose liquid applied membranes. EPDM requires precision cutting, specialized contact adhesives, and complex corner folding techniques. Liquid membranes are as simple to apply as painting a wall, making them highly forgiving for first-timers.