You stretch, head to the kitchen to brew your morning coffee, and turn the faucet. But instead of a steady stream of water, you get a hollow sputter—or worse, absolutely nothing. It is a frigid 15°F cold snap outside, and your worst winter fear has just become a reality: the pipes under your mobile home have frozen solid.
This is a remarkably common and highly stressful scenario for many manufactured home residents. If you live in a mobile home, your plumbing system faces a unique set of challenges compared to traditional, site-built houses. You are dealing with thinner pipes that are often suspended in exposed, unheated crawl spaces. Without the protective buffer of a deep, insulated basement, your plumbing is essentially on the front lines, fighting a tough battle against the freezing elements.
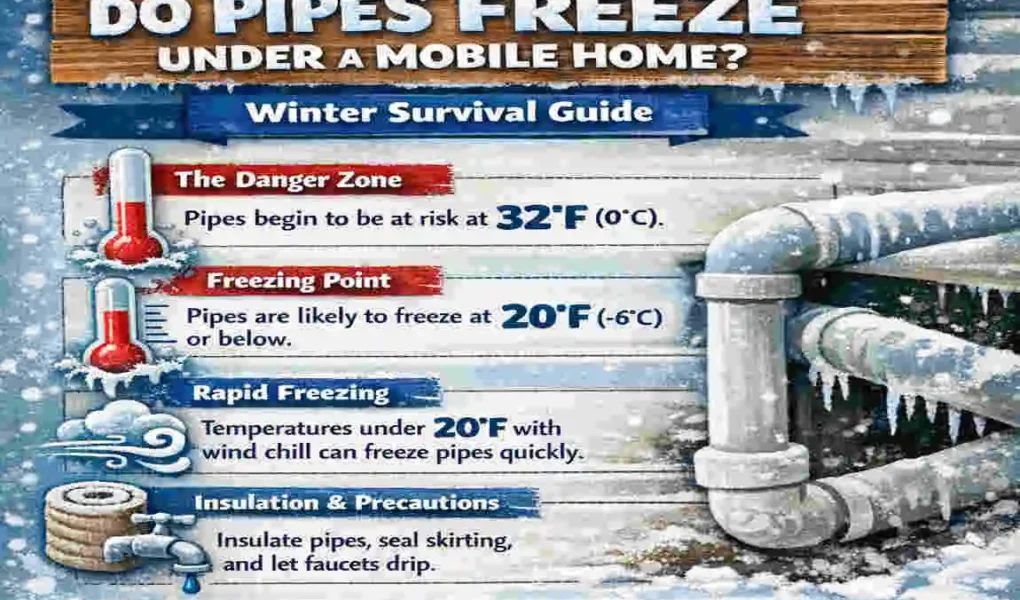
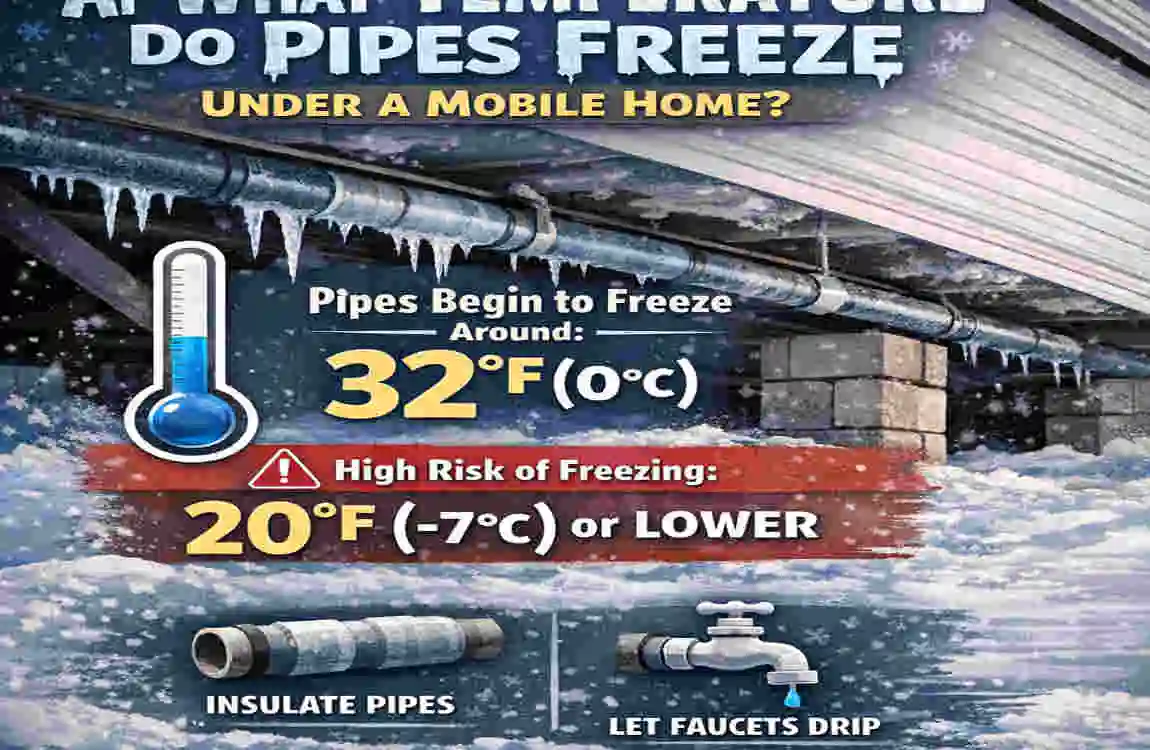
While we all learned in grade school that water freezes at 32°F (0°C), the actual danger zone for pipes tucked under mobile homes typically sits at 20°F (-6°C) or below. However, depending on wind chill, the quality of your skirting, and how exposed your plumbing is, that freezing risk can begin the moment outside temperatures drop to that initial 32°F mark.
Why Pipes Freeze Under Mobile Homes
When the winter months roll in, mobile homes are inherently more vulnerable to the cold than traditional houses. To understand what temperature pipes freeze under a mobile home, we first need to look at the unique architecture and plumbing layout of manufactured housing.
The Unique Risks of Mobile Home Plumbing
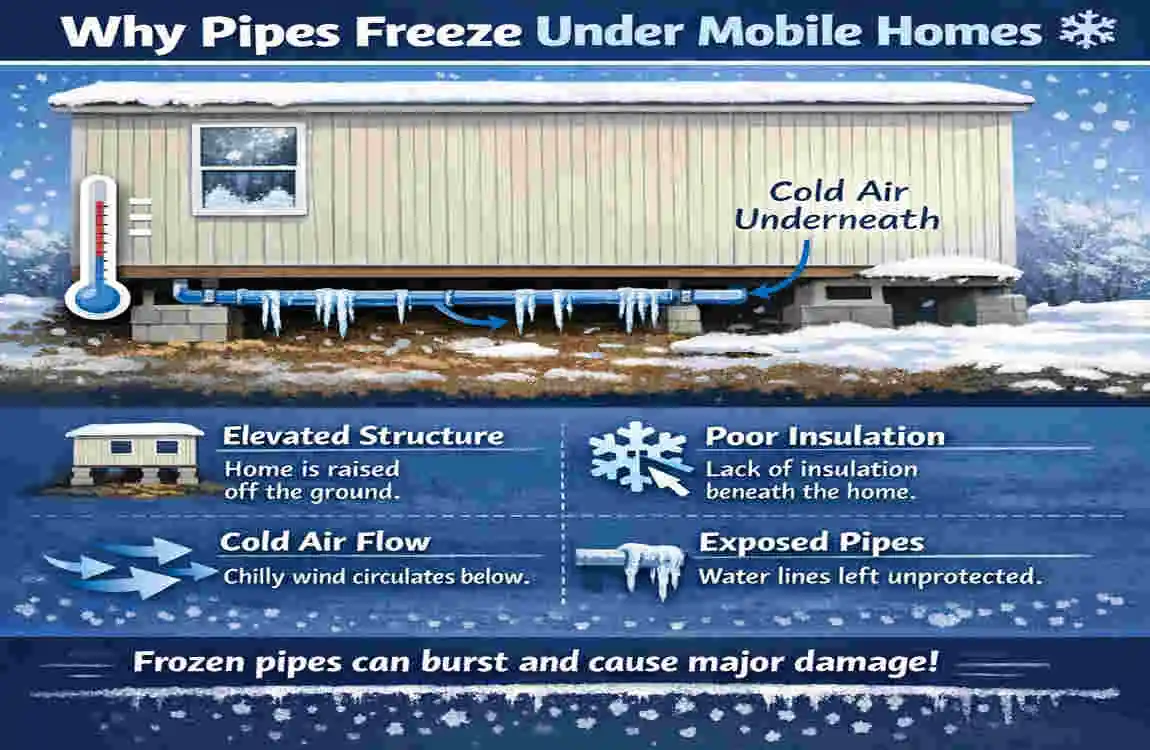
Unlike standard houses that sit on solid concrete foundations or above deep, climate-controlled basements, mobile homes are elevated. They sit on blocks or piers, leaving a wide-open crawl space directly underneath the floorboards.
This open space is typically enclosed by skirting—a thin barrier made of vinyl, metal, or wood. While skirting looks nice and keeps larger animals out, it is rarely airtight. Gaps in the skirting allow freezing winter winds to sweep directly under your home. Furthermore, mobile homes often feature minimal insulation. Because the plumbing lines run directly through this shallow, exposed, and drafty crawl space, they are subjected to temperatures that drop much faster than the air inside your living room.
Factors That Speed Up the Big Freeze
Not all freezing nights are created equal. Several environmental and structural factors can speed up the rate at which your pipes freeze:
- Wind Chill: A 25°F night might seem manageable, but if a 20 mph wind is blowing through gaps in your skirting, the wind chill effect quickly strips away any residual heat radiating from your home’s floor.
- Pipe Materials: The type of pipes you have matters. Older mobile homes often feature thin copper or galvanized steel pipes, which transfer heat rapidly and freeze incredibly fast. Newer homes usually use PEX piping (cross-linked polyethylene) or PVC. While plastic pipes offer a tiny bit more insulation, they are still highly susceptible to freezing without external protection.
- Stagnant Water: Water that sits perfectly still freezes much faster than moving water. When you are asleep at night, and no faucets are running, the water inside your pipes becomes stagnant, turning your plumbing into sitting ducks for the cold.
The Science of Freezing Water and Bursting Pipes
You might be wondering why a frozen pipe is such a massive disaster. It all comes down to basic physics. When water turns into ice, it expands in volume by roughly 9%.
However, the ice itself is not always what bursts the pipe. As the water inside your plumbing freezes and turns into an ice blockage, it acts like a tight plug. If the freeze continues, the remaining liquid water trapped between the ice blockage and your closed faucet has nowhere to go. The expanding ice pushes against this trapped water, causing a massive spike in hydraulic pressure.
Eventually, that extreme pressure becomes too much for the pipe walls to handle—the pipe ruptures, often far away from the actual ice plug. Once the ice thaws, water rushes out of the newly formed crack, leading to devastating floods. In fact, statistics show that frozen and burst pipes account for nearly one in four winter home insurance claims, with mobile homes in cold climates taking some of the hardest hits.
Visualizing Your Mobile Home Plumbing Layout
Picture a mental diagram of your mobile home. The main water supply line rises from the ground, exposed to the air before it enters the underbelly. From there, a network of hot and cold water lines branches out, running horizontally just above the skirting, feeding into your kitchen, bathrooms, and laundry room. Every single inch of that horizontal branching is a potential freeze zone if the crawl space temperature plummets.
The Exact Freezing Temperature Threshold
When mapping out your winter Survival strategy, understanding exactly what temperature pipes freeze under a mobile home is your most powerful tool.
Unpacking the 20-Degree Danger Zone
As mentioned, pure water freezes at 32°F. So why do experts often cite 20°F as the true threshold for frozen pipes?
The answer lies in ambient heat. Even on a freezing night, the ground beneath your mobile home retains a slight amount of residual warmth from the sun. Additionally, the heat from your home’s interior radiates slightly downward through the floorboards into the crawl space.
Because of this residual warmth, a brief dip to 30°F usually isn’t enough to freeze the water inside your pipes solid. It requires a sustained, deep freeze. When the outdoor temperature drops to 20°F (-6°C) and stays there for several hours, the ambient heat is entirely overcome by the cold. At this critical threshold, uninsulated pipes under a mobile home will begin to form ice blockages rapidly.
Variables That Shift the Threshold
You should never treat the 20°F rule as an absolute guarantee. Your actual freezing point can shift based on three major variables:
- Pipe Material: Metal pipes lose heat incredibly fast and may freeze at 25°F if exposed. Plastic PEX pipes hold out slightly longer but will still succumb at the 20°F mark.
- Location in the Crawl Space: Pipes located near the outer edges of your mobile home, right pressed against the skirting, will freeze far faster than pipes running through the center of the underbelly, where it is slightly warmer.
- Duration of the Cold Snap: A quick, one-hour dip to 15°F before sunrise might not freeze your pipes. However, a prolonged overnight freeze lasting six to eight hours at 25°F can absolutely cause a massive ice blockage.
Freezing Risks by Temperature
To help you gauge the danger level, refer to this handy reference table. Keep in mind that these timeframes apply to uninsulated pipes in a standard mobile home crawl space.
Temperature Risk Level Time to Freeze (Uninsulated Pipes)
32°F (0°C) Low 12+ hours
25°F (-4°C) Medium 6 – 12 hours
20°F (-6°C) High 3 – 6 hours
Below 20°F Severe Under 3 hours
Regional Considerations and Real-Time Monitoring
Your approach to winterization should match your climate. If you live in a notoriously cold belt—like the northern United States, Canada, or even regions experiencing unusual winter storms like Punjab—you cannot afford to wait for the first freeze warning. You need to be proactive.
Proven Prevention Strategies for Winter
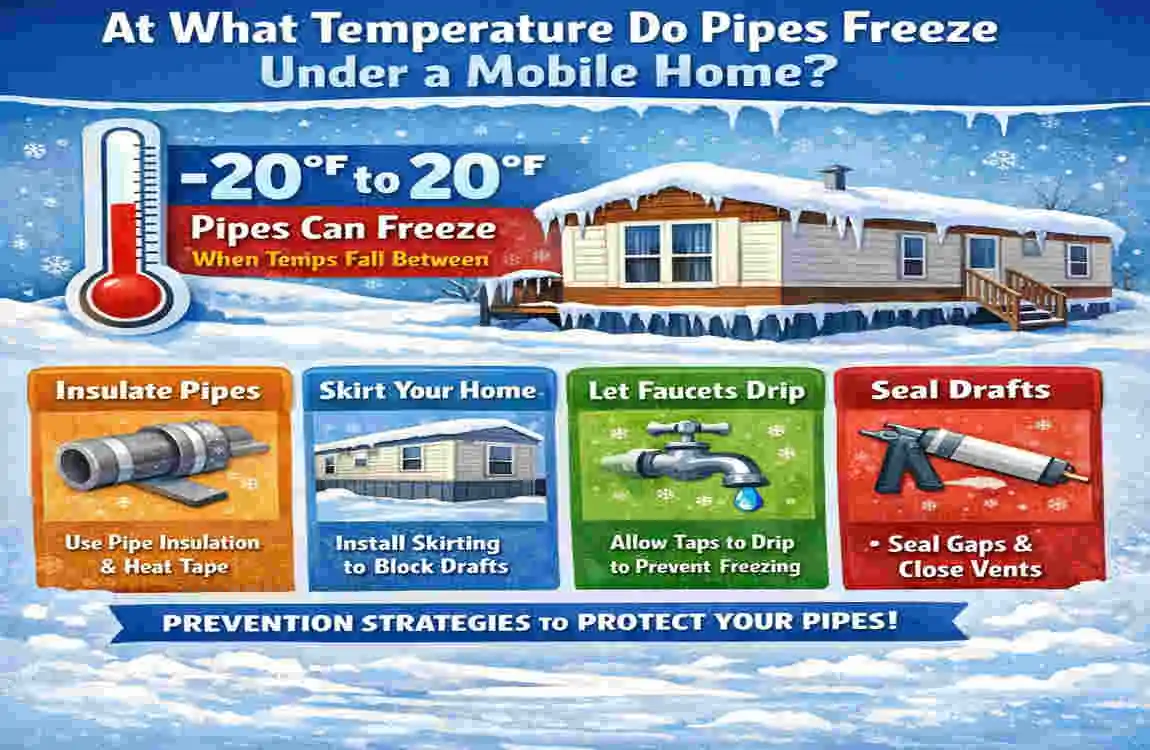
Now that you know exactly what temperature pipes freeze under a mobile home, it is time to take action. Preventing a freeze is always cheaper, easier, and less stressful than repairing a burst pipe. Here are the top, proven methods to keep your water flowing through the darkest days of winter.
Top Methods to Keep Your Pipes Flowing
Insulate Your Pipes. Your very first line of defense is pipe insulation. Do not leave your plumbing naked against the winter chill. You can purchase highly affordable foam pipe sleeves or fiberglass wraps from any local hardware store. These sleeves act like a thick winter coat for your plumbing, trapping the heat inside the water and slowing down the freezing process. Make sure you cover every single inch of exposed pipe, including bends, joints, and the main water shut-off valve.
install Quality Heat Tape. If you live in a region where temperatures regularly plunge below 20°F, insulation alone will not be enough. You need heat tape (also known as a heat cable). Modern heat tape is self-regulating, meaning it features a built-in thermostat. It automatically turns on when the temperature drops below roughly 40°F and turns off when it warms up. You wrap this electrical cable directly against your water pipes before putting the foam insulation over it. It provides a constant, gentle warmth that absolutely guarantees your pipes will not freeze.
Seal and Reinforce Your Skirting. Your mobile home skirting is the shield that protects your crawl space from the biting wind. Walk around the perimeter of your home and inspect the skirting carefully. Look for cracks, holes made by animals, or panels that have blown loose. Use weather-resistant exterior caulk or expanding spray foam to seal up small gaps. For added protection, you can attach rigid foam insulation boards to the inside of your skirting panels. This dramatically cuts down on the wind chill factor and keeps the ambient temperature in your home several degrees warmer.
Employ Smart Thermostat Tricks When the forecast predicts a deep freeze, do not drastically lower your interior heat at night to save a few pennies on your energy bill. Set your home’s thermostat to a minimum of 55°F (13°C), even if you are leaving town for the weekend. The heat from your home will radiate down through the floor and help warm the crawl space. Additionally, open the cabinet doors under your kitchen and bathroom sinks. This allows the warm air from your living space to circulate directly around the uninsulated pipes tucked beneath your counters.
Drip Your Faucets Overnight. As we learned earlier, moving water requires much colder temperatures to freeze than stagnant water. If a severe overnight freeze is approaching, turn both your hot and cold faucets on just enough to allow a slow, steady drip. This trick does two things: it keeps the water constantly moving through your system, and it relieves the internal water pressure in the pipes, which drastically reduces the chances of a burst pipe even if a small ice blockage does form.
Step-by-Step Underbelly Insulation Guide
If you are a handy homeowner, installing heat tape and insulation is a very achievable DIY project. It typically takes a couple of hours and costs between $50 and $100 for materials. Here is your action plan:
- Step 1: Inspect and Measure. Crawl under your home with a flashlight and a tape measure. Measure the length of your main water inlet and all exposed branching pipes. This tells you how much heat tape and foam insulation to buy.
- Step 2: Apply the Heat Tape. Follow the manufacturer’s instructions carefully. Run the self-regulating heat tape straight along the underside of the pipe. Use electrical tape or the provided zip ties to secure it snugly every few inches. Never overlap or cross the heat tape over itself unless the specific product manual explicitly says it is safe, as this can create a fire hazard.
- Step 3: Wrap with Foam Sleeves. Once the heat tape is secured, wrap the entire pipe in your foam insulation sleeves. The foam goes directly over the heat tape, trapping the heat against the pipe.
- Step 4: Seal the Joints. Use heavy-duty waterproof tape (like duct tape or specialized insulation tape) to seal the seams where the foam sleeves meet. You do not want any cold air sneaking through the gaps.
- Step 5: Plug It In. Ensure your heat tape is plugged into a grounded GFCI (Ground Fault Circuit Interrupter) outlet to prevent electrical shorts.
7 Quick Wins for Winter Plumbing Protection
If a storm is approaching and you only have an hour to prepare, execute this rapid-fire checklist:
- Insulate exposed lines: Throw foam sleeves over the most vulnerable pipes near the skirting edges.
- Plug your vents: Temporarily block crawl space ventilation grates during extreme cold snaps to keep freezing air out (remember to open them in the spring).
- Skirt with foam board: Lean rigid foam boards against the inside of drafty skirting.
- Set the thermostat: Keep your interior heat set steadily between 50-55°F at a bare minimum.
- Drip the faucets: Let the water trickle overnight to relieve pressure and prevent freezing.
- Close garage/shed doors: If your mobile home has any attached unheated structures where pipes run, seal them up tight.
- Use antifreeze in drains: If you are vacating the home for the winter, pour RV-safe, non-toxic antifreeze down your toilet bowls and sink P-traps to prevent the standing water from shattering the porcelain or PVC.
What If Pipes Freeze? Your Emergency Action plan
Even with the best preparation, nature can sometimes win. You wake up, check the sink, and realize you have a frozen pipe. Panic starts to set in. Take a deep breath. How you react in the first few hours can mean the difference between a simple inconvenience and a disastrous flood.
Spotting the Danger Signs
The most obvious sign of a frozen pipe is a complete lack of water flow when you turn on a faucet. However, there are other early warning signs you should watch for:
- Sputtering Water: If the water trickles or spits out air before flowing, ice is likely forming and restricting the line.
- Frost on Exposed Lines: If you look under your sink or in your crawl space and see visible white frost coating the outside of a pipe, the water inside is already freezing.
- Bulging Pipes: If a plastic PEX or PVC pipe looks swollen or warped in a specific spot, an ice blockage has formed and is expanding.
- Odd Smells: If your drains suddenly smell like raw sewage, the freeze may have reached your sewer lines, blocking the escape of sewer gases.
How to Safely Thaw Frozen Pipes
If you catch the freeze before the pipe bursts, you can thaw it yourself. The key to thawing a pipe is to apply heat slowly and evenly.
- Open the Faucet: Before you do anything, turn the affected faucet to the “on” position. As you begin to melt the ice plug, the trapped water needs somewhere to escape. Opening the faucet relieves the pressure.
- Locate the Freeze: Trace the pipe backward from the faucet. The frozen section will feel incredibly cold to the touch or have condensation/frost on the exterior.
- Apply Gentle Heat: Use a handheld hair dryer set to a medium heat setting. Wave it back and forth along the frozen section of the pipe. You can also wrap the pipe in heavy towels soaked in boiling hot water or place a portable space heater nearby.
- Keep Flammables Away: If you are using a space heater in the crawl space, keep it far away from dry wood, insulation, and the skirting to prevent fires.
- NEVER Use Open Flames: Absolutely never use a propane blowtorch, lighter, or any open flame to thaw a pipe. This is incredibly dangerous. It can melt plastic pipes instantly, boil the water inside, leading to an explosive burst, or set your entire mobile home on fire.
Keep applying gentle heat until the water pressure returns to normal and flows steadily out of the opened faucet.
Dealing with Burst Pipes and When to Call the Pros
Sometimes, the damage is already done. If you inspect the pipe and see a crack, or if water begins gushing out as the ice thaws, you have a burst pipe.
Your immediate first step is to shut off the main water valve. You should always know exactly where this valve is located before winter begins. Usually, it is located near the street water meter or right where the main line enters the mobile home underbelly. Shutting off the main water supply stops the flooding instantly.
Once the water is off, evaluate the situation. If you are highly experienced with plumbing, repairing a section of PEX or PVC pipe might be a quick $50 DIY fix. However, if the burst is severe, located in a hard-to-reach area, or if you cannot thaw a frozen pipe after 24 hours of trying, it is time to call a professional plumber.
While a professional call might cost you upwards of $500, attempting to fix major plumbing issues without experience can result in thousands of dollars in hidden water damage, mold growth, and rotting floorboards.
Long-Term Winter Survival Tips
Surviving one bitter winter is great, but preparing your mobile home for decades of cold weather requires long-term thinking. Moving beyond just wrapping pipes in foam, here is how you elevate your overall home winterization.
Beyond the Pipes: Total Home Winterization
Protecting your plumbing requires protecting the environment around the plumbing. Upgrading your mobile home’s thermal envelope pays off massive dividends.
Consider investing in high-quality, insulated skirting. Instead of thin plastic panels, look into faux-brick or heavy-duty vinyl skirting that features built-in foam insulation backing. Furthermore, check the vapor barrier underneath your mobile home. This is a thick plastic sheet installed against the underside of your floor joists, holding the fiberglass floor insulation in place. If this barrier is torn, cold air and ground moisture will penetrate your floorboards, bringing freezing temperatures right up against your pipes. Patch any holes in your underbelly with specialized belly tape.
Inside the home, consider using a whole-home humidifier during the winter. Humid air feels warmer and retains heat much better than dry winter air, helping to keep the ambient temperature of your home higher without constantly cranking the furnace.
Smart Maintenance Calendar
Do not wait until the first blizzard hits to start thinking about what temperature pipes freeze under a mobile home. Adopt a smart, proactive maintenance calendar:
- October (The Inspection Phase): Before the first frost, crawl under your home. Inspect the skirting for gaps. Check your existing pipe insulation for cracks, and ensure no animals have torn down your vapor barrier.
- November (The Testing Phase): If you have heat tape installed, plug it in and test it. Wait for a chilly evening, touch the tape, and ensure it is gently warming up. You do not want to discover a dead heating cable in the middle of January.
- December through February (The Vigilance Phase): Keep an eye on your indoor/outdoor thermometers. Practice the habit of opening under-sink cabinets and dripping faucets whenever the nightly forecast predicts temperatures dipping below that dreaded 20°F mark.
Eco-Friendly and Budget-Saving Upgrades
Winterizing your mobile home doesn’t just save you from plumbing disasters; it saves you money. By sealing your skirting and upgrading the insulation to a minimum of R-11, you drastically reduce your monthly heating bills. The cold air stays out, and the expensive furnace heat stays in.
If you want to be eco-conscious, look for pipe insulation made from recycled foam or denim materials. When shopping for heat tapes, always prioritize self-regulating models. Because they automatically turn off when the air is warm enough, they draw significantly less electricity over the course of the winter compared to older, continuous-wattage models. Investing a couple of hundred dollars in Premium skirting, heavy-duty insulation, and smart heat tapes today can easily prevent a $1,500 to $3,000 emergency repair bill tomorrow.
Frequently Asked Questions (FAQ)
What temperature do pipes freeze under a mobile home?
Pipes under a mobile home are at serious risk of freezing when the outside temperature drops to 20°F (-6°C) and stays there for several hours. However, if your skirting is damaged or the wind chill is high, pipes can begin to freeze closer to the 32°F mark.
How do I winterize mobile home plumbing?
The most effective way to winterize is to wrap all exposed pipes under the home with self-regulating heat tape, and then cover that tape with high-quality foam or fiberglass pipe insulation. Additionally, sealing gaps in your skirting to block winter winds is crucial.
At what temperature do pipes actually burst?
Pipes do not necessarily burst at a specific temperature; they burst from the pressure caused by sustained freezing. When temperatures hold around 20°F, water freezes into an ice plug, expanding by 9% and pushing immense hydraulic pressure against the closed faucets, which ultimately shatters the pipe.
What is a safe thermostat temperature for winter?
To keep the ambient heat radiating from your floor down into the crawl space, you should never set your home’s thermostat lower than 50°F to 55°F (10°C to 13°C), even if you are out of town.
Is heat tape safe to use under a mobile home?
Yes, modern self-regulating heat tape is exceptionally safe. It contains a built-in sensor that automatically powers down the cable when the pipes are warm enough, minimizing the risk of overheating and electrical fires. Always plug it into a GFCI outlet for maximum safety.