transforming your dusty upstairs loft into a cozy bedroom retreat without breaking the bank. We all have that one space in our house. It is the area where holiday decorations go to hibernate and old boxes gather dust. But what if you could turn that wasted space into a stunning, functional room?
If you are wondering how to turn an upstairs loft into a bedroom, you are in exactly the right place. Lofts make absolutely ideal bedrooms. They offer incredible open space, a quiet sense of privacy away from the main living areas, and a wonderful architectural character.
Of course, tackling this kind of project comes with a few common challenges. You might be dealing with sloped ceilings that bump your head, tricky access issues, or drafty insulation gaps. Do not worry! We are going to tackle all of those hurdles together.
Why Convert Your Upstairs Loft into a Cozy Bedroom?

You might be wondering whether the effort is really worth it. The answer is a resounding yes! There are so many amazing benefits to creating this new space.
First and foremost, you gain an extra sleeping space for guests or growing kids. If you do not need a full-time bedroom, this space easily doubles as a home office hybrid. You even have incredible rental income potential if you decide to list the cozy upstairs bedroom on a vacation rental site.
When you search for loft bedroom ideas, you will quickly see that professional renovations can cost a small fortune. Hiring a contractor can easily set you back $10,000 or more. However, by taking the DIY route, you are looking at a much more manageable price range of $1,000 to $3,000. That is a massive cost savings!
Understanding the pros and cons of an upstairs loft conversion will help you set realistic expectations before you swing your first hammer.
Pros and Cons of a Loft Conversion
Feature The Pros (Why we love it)The Cons (What to watch out for)
Privacy Completely separated from the noise of the main house. You might feel disconnected from the family areas.
Headroom Vaulted ceilings can look incredibly grand and spacious. Sloped edges severely limit where you can stand up straight.
Value Adds high-value livable square footage to your property. Requires upfront investment in time and building materials.
Lighting Skylights and high windows bring in gorgeous natural light. Can get warmer in the summer without proper ventilation.
Reader Poll: Join the Conversation!
What is stopping your loft conversion right now?
- I am intimidated by the building codes.
- I simply do not know where to start.
- I am worried about my budget.
- I need more cozy bedroom design inspiration for the upstairs!
Tools and Materials You’ll Need
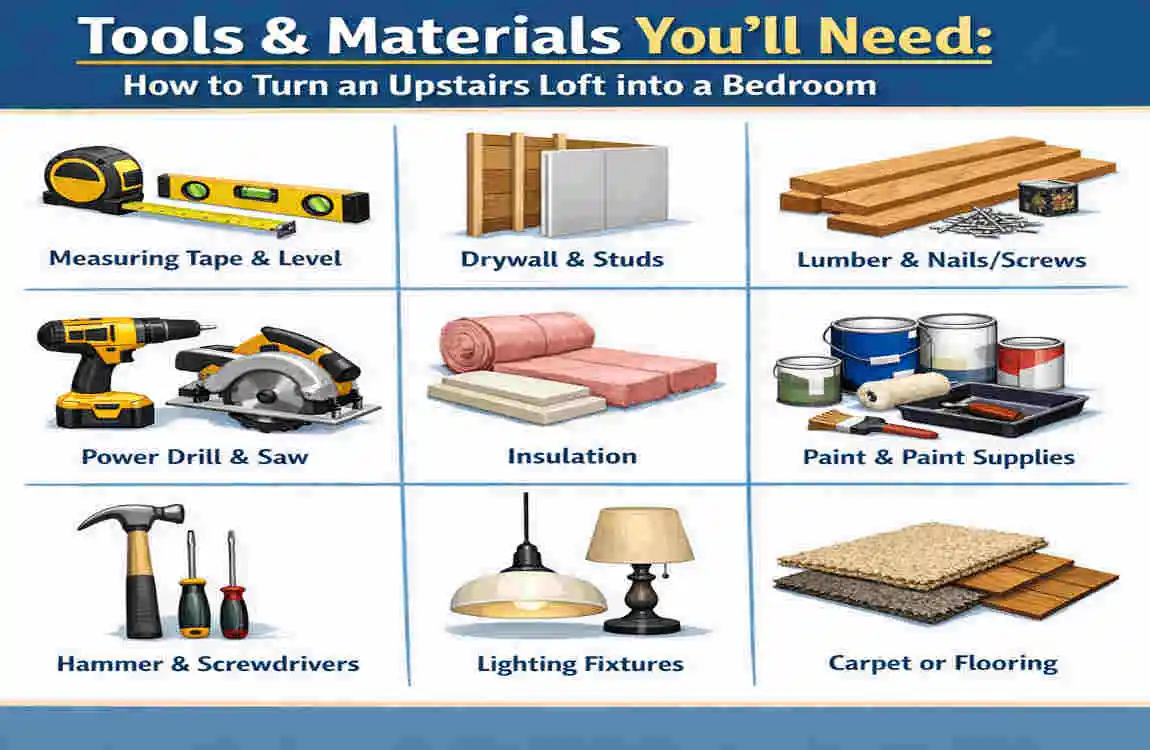
Before you start tearing down walls or buying paint, gather your supplies. Having everything ready to go will save you countless frustrating trips to the hardware store.
You can find all of these items at your local home improvement center. Always prioritize safety and quality when selecting your gear.
Essential Tool Checklist
- A sturdy hammer and a pry bar.
- A reliable power drill with extra battery packs.
- A level and a measuring tape.
- A circular saw or a jigsaw for cutting wood.
- A safe, stable ladder (especially important for sloped lofts).
- Safety gear: Think heavy-duty gloves, protective goggles, and high-quality ventilation masks.
Essential Materials Checklist
- Drywall sheets and drywall screws.
- Insulation (fiberglass batts or spray foam).
- Plywood for your flooring base.
- Paint and primer.
- Lighting fixtures and electrical wire.
Budget Breakdown for a Basic DIY Loft
Here is a quick look at where your money will go. Prices will vary based on your room size, but this gives you a great starting point.
Material Category Estimated Cost
Insulation $200 – $400
Lumber & Plywood $300 – $600
Drywall & Mud $150 – $300
Flooring $200 – $500
Paint & Finishes $100 – $200
Important Safety Tip: Never skip your safety gear. Lofts can be incredibly dusty, and old insulation can irritate your lungs. Always wear a high-quality ventilation mask and make sure your ladder is perfectly secure on flat ground before climbing.
Assess and Plan Your Loft Space
The very first step in planning how to turn an upstairs loft into a bedroom is getting a realistic look at your current space. Grab your measuring tape and a notepad.
Start by measuring the floor’s dimensions. Next, measure the ceiling height at its highest point, and then measure the height where the ceiling slopes down to meet the walls. You need to know exactly how much “walkable” space you truly have.
Next, you must check the structural integrity of the room. Look closely at the wooden beams and floor joists. Are there any cracks? Does the floor sag when you walk on it? You need a solid, sturdy foundation before you add the heavy weight of furniture and drywall.
Sketch Your Dream Layout
Once you have your numbers, sit down and sketch a simple layout. Think about where the bed will fit best. Usually, placing the bed under the lowest point of the sloped ceiling makes the most sense, as you do not need to stand up while sleeping!
Plan to use the awkward areas under the eaves for clever storage, such as built-in bookshelves or low dressers.
Ensure Safety and Building Code Compliance
Nobody likes dealing with red tape, but you absolutely cannot skip this step. Before you start building, you must ensure your project is legal and safe.
First, inspect your floor joists for load-bearing issues. A standard attic floor is built to hold lightweight boxes, not a heavy king-sized bed, two dressers, and a couple of humans. You might need to reinforce the floor, which we will cover in Step 4.
Next, consult your local building codes. Most cities require a bedroom to have at least one egress window. An egress window is simply a window large enough for a person to climb out of in the event of a fire.
Add Necessary Railings
If your loft is currently open to the downstairs living room, you must install strong, secure railings. Building codes usually dictate exactly how high these railings must be and how closely the vertical spindles must be spaced to keep small children safe.
Improve Access with Stairs or Ladder Upgrade
You cannot enjoy a cozy upstairs bedroom if you cannot get to it easily! If you currently access your loft via a wobbly, pull-down attic door, it is time for a serious upgrade.
You have two main choices here: build a permanent staircase or upgrade to a heavy-duty, fixed ladder.
Installing Permanent Stairs
If you have the square footage below, installing a permanent staircase is the best option. It adds the most value to your home. You can buy pre-cut pine stair stringers at the hardware store to make the framing process much easier.
Attach the stringers securely to the loft floor framing, and then screw down thick pine treads. Finish the look with a beautiful wooden banister kit so you always have a handhold.
Upgrading Your Ladder
If space is super tight, a fixed ladder or a spiral staircase is a great alternative. If you choose a ladder, reinforce it by bolting it directly into the wall studs and the floor above. Add non-slip tape to the rungs so you do not lose your footing in the middle of the night.
Seeing the transition from a scary pull-down hatch to beautiful, solid stairs is one of the most satisfying parts of a DIY loft to bedroom conversion.
Level and Strengthen the Floor
As we mentioned earlier, standard attic floors are usually not strong enough for a bedroom. If your floor feels bouncy or squeaks loudly when you walk, you need to fix it right now.
How to Sister Your Joists
The best way to strengthen a bouncy floor is a process called “sistering.” This simply means attaching a new, strong piece of wood directly alongside the old one.
- Measure and Cut: Measure your existing floor joists. Cut new 2×6 or 2×8 boards to the same length.
- Apply Adhesive: Squeeze a thick bead of heavy-duty construction adhesive along the face of the old joist.
- Attach the Wood: Press the new board tightly against the old one.
- Bolt Them Together: Use heavy lag bolts or thick framing screws to securely fasten the two pieces of wood.
Laying the Subfloor
Once your joists are strong and perfectly level, it is time to add your plywood subfloor.
Lay thick sheets of plywood across the joists. Stagger the seams of the plywood so they do not line up perfectly straight. This makes the floor much stronger. Screw the plywood down tightly every eight inches to prevent annoying squeaks in the future.
Insulate for Coziness and Efficiency
An uninsulated loft will be absolutely freezing in the winter and unbearably hot in the summer. Proper insulation is the secret key to creating a truly cozy space.
Choosing Your Insulation
For most DIYers, fiberglass batts are the easiest to work with. You simply cut the fluffy pink material with a utility knife and press it snugly between the wall studs and roof rafters.
If you want maximum energy efficiency, consider renting a spray foam kit. Spray foam expands to fill every tiny crack and crevice, creating an airtight seal that completely blocks out drafts.
By heavily insulating your new bedroom, you can achieve significant energy savings. You can easily cut your home’s heating and cooling bills by up to 15%!
A Great Eco-Friendly Tip
If you hate the itchy feeling of working with fiberglass, look into recycled denim insulation. It is made from old blue jeans! It is completely safe to touch with bare hands, it is fantastic for the environment, and it acts as an amazing sound barrier.
Frame Walls to Maximize Headroom
Sloped ceilings look beautiful, but the low edges of the room are practically useless for walking. This is where knee walls come in to save the day.
A knee wall is a short, vertical wall built roughly three to four feet tall. You build this wall where the sloped ceiling is too low to use comfortably.
Building Your Knee Walls
Building a knee wall is surprisingly simple. You just need standard 2×4 lumber.
First, nail a 2×4 flat against your new plywood floor. This is your “bottom plate.” Next, use a level to mark exactly where the wall will hit the sloped ceiling above. Nail another 2×4 up there for your “top plate.”
Finally, cut 2×4 “studs” to length and nail them securely between the top and bottom plates every 16 inches.
Not only do knee walls make the room look neatly finished, but they also create a brilliant hidden storage space! You can leave small cutouts in the knee wall to push rolling storage bins right under the sloped eaves.
Install Drywall and Finishing Touches
Now it is time for the messy magic! Installing drywall is the exact moment your dusty construction zone suddenly looks like a real room.
The Drywall Process
Start by carefully carrying your drywall sheets up the stairs. You will need a friend to help you hold them in place.
- Hang It Up: Use your power drill and coarse-thread drywall screws to attach the heavy sheets directly to your wall studs and ceiling rafters.
- Tape the Seams: Wherever two pieces of drywall meet, cover the seam with a layer of sticky fiberglass drywall tape.
- Apply the Mud: Use a wide putty knife to smear joint compound (often called “mud”) completely over the tape and the screw holes.
- Sand it Smooth: Once the mud dries completely, use a sanding block to smooth it to a perfectly flat surface. Be warned: this step creates a mountain of fine white dust!
Add a Cozy Texture
If you are worried that your sanding job is not perfectly smooth, you can easily hide small imperfections by adding texture to the walls.
You can buy spray-on orange peel texture at the hardware store. Just spray it on, let it dry, and paint over it. It gives the walls a warm, finished, and incredibly professional vibe.
Add Flooring for Warmth and Style
You have a solid plywood subfloor, but now you need something beautiful to walk on. When selecting flooring for a loft, you want materials that are lightweight and easy to install yourself.
Excellent Budget-Friendly Options
- Laminate Flooring: This is incredibly popular because it looks exactly like expensive hardwood but costs a fraction of the price. The planks just click and lock together. It is very easy to install.
- Carpet Tiles: For the ultimate cozy feel, peel-and-stick carpet tiles are amazing. If you ever spill a cup of coffee, you just peel up the dirty tile and stick down a fresh one!
- Reclaimed Wood: If you want a rustic, cabin-like feel, search local online marketplaces for cheap reclaimed wood.
No matter what material you pick, you can easily find gorgeous budget options for completely under $2 per square foot. Always remember to put down a soft foam underlayment first. It stops the floor from echoing loudly into the living room below.
Lighting, Electrical, and Ventilation
Because lofts are at the top of the house, they have unique needs for air and light. Heat rises naturally, so your new bedroom will get warm very quickly.
Manage Your Ventilation
You must install a high-quality ceiling fan to keep the air moving comfortably. If you have the budget, installing a skylight that actually opens is the best way to vent out hot air in the middle of July.
Brighten Up the Space
Sloped ceilings can cast dark shadows. The best way to combat this is by installing recessed LED lighting. These lights sit completely flush against the ceiling, so you will never bump your head on a dangling light bulb.
A Quick Word on Electrical Work
You will definitely need to run wire for your new lights, light switches, and wall outlets.
DIY Wiring Basics: If you feel confident, you can carefully run the yellow Romex wire through holes drilled in your 2×4 wall studs before installing the drywall. However, you must connect everything safely. Pro Recommendation: Electrical fires are a real danger. We highly recommend doing the physical labor of running the wires yourself, but paying a licensed electrician for 2 hours to make the final connections to your main breaker box.
Decorate for Ultimate Cozy Bedroom Vibes
The hard work is finally over! Now you get to play interior designer and bring your gorgeous new space to life.
Choose the Right Paint Colors
Because loft ceilings can feel a bit heavy and low, stick with bright, neutral paint colors. Crisp whites, soft warm grays, and pale creams will make the room feel twice as large. If you want a pop of color, paint one small accent wall in a deep, moody blue or a soft sage green.
Select Loft-Friendly Furniture
You have to carry everything up the stairs, so avoid massive, heavy furniture! Look for a sleek, low-profile bed frame. A low bed makes your ceiling look much taller.
Use lots of rich textiles to soften the room’s angles. Throw a thick, fluffy rug over the floor, pile the bed high with plush duvet covers, and hang soft curtains over your new windows.
When you look up cozy loft bedroom ideas, you will notice that warm lighting, lots of pillows, and minimalist furniture are the secret ingredients to a perfect room.
Common Mistakes to Avoid in Loft Bedroom Conversions
Even the best DIYers make errors. Here are the biggest pitfalls you need to dodge to keep your project running smoothly.
- Skipping the Permits: We said it before, but we will say it again. If you build without a permit, your city can require you to tear down the entire room. Get the permit!
- Going Cheap on Insulation: Skimping on insulation means you will hear every raindrop hitting the roof and freeze in the winter. Spend the extra $100 for premium insulation.
- Overlooking Storage Hacks: Lofts lack standard closet space. If you do not build storage into your knee walls, your room will quickly become cluttered with clothes and boxes.
- Forgetting About the Stairs: Building a beautiful room is useless if the stairs are dangerously steep. Always calculate the “run and rise” of your stairs carefully so they are comfortable to climb.
By keeping these simple fixes in mind, your project will be virtually stress-free.
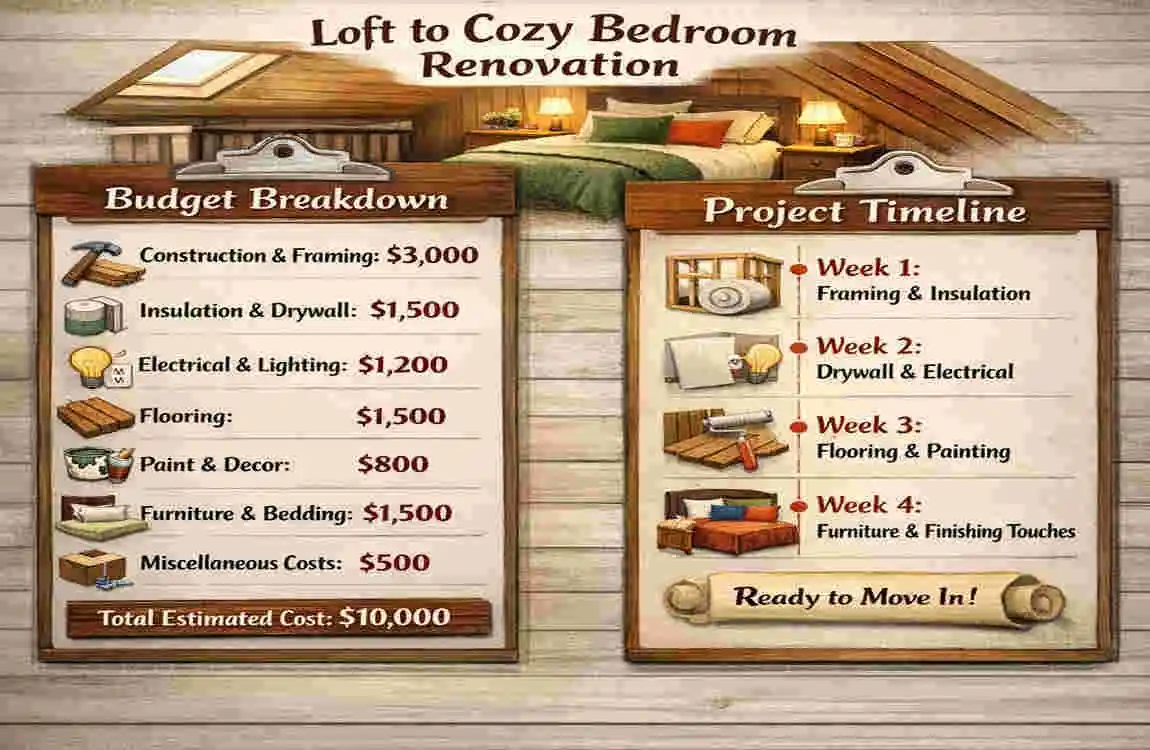
Budget Breakdown and Timeline
Are you wondering how long this will actually take? If you dedicate your weekends to this project, you can get it done surprisingly fast. Here is a realistic look at your investment.
Overall DIY Timeline and Cost
Phase of the Project Estimated Hours Needed Estimated Cost Range
Planning & Framing 3 – 5 Hours $200 – $400
Electrical & Insulation 4 – 6 Hours $300 – $500
Drywall & Flooring 5 – 8 Hours $350 – $800
Painting & Decorating 3 – 4 Hours $150 – $300
Grand Total 15 – 23 Hours $1,000 – $2,000
This means that with a little dedication, you can completely transform your home in roughly two to three weekends for around $1,500.
Before-and-After Transformations
Nothing is more motivating than seeing real results. Here are three incredible transformations to inspire you.
The Wasted Attic Space Mark and Sarah had a dark attic filled with old holiday decorations. By installing two large skylights and laying down cheap laminate flooring, they turned a terrifying, spider-filled room into a stunning, sun-drenched guest suite.
The Teenager’s Retreat The Johnson family needed more space for their growing 15-year-old. They built short knee walls for extra storage for clothing, added brilliant LED lighting, and painted the room a crisp white. Now, their son has his own private sanctuary.
The Work-From-Home Haven Emily needed a quiet place for Zoom calls. She sistered her bouncy floor joists, laid down thick carpet tiles to absorb sound, and set up a low-profile desk under the sloped eaves. She turned an unlivable space into a professional, profitable home office!
Frequently Asked Questions: Transforming Your Loft
Do I absolutely need a building permit for my loft conversion?
Yes, in almost every single case, you will need a permit. You might be tempted to skip this step to save a few dollars, but please do not do it!
When you convert an empty storage space into a livable bedroom, your local city government wants to ensure the space is safe. They look for specific safety features, like proper ventilation, safe electrical wiring, and adequate headroom.
Most importantly, building codes require an egress window. This is simply a window that is large enough for you to escape through in the event of a fire. If you skip the permit process, you could face massive fines, or you might struggle to sell your home in the future. Always call your local building department first.
How much money will a DIY loft bedroom actually cost me?
If you do the heavy lifting yourself, you will save thousands of dollars compared to hiring a general contractor. You can expect a standard DIY loft bedroom conversion to cost anywhere from $1,000 to $3,000.
Of course, your final price tag depends heavily on what you already have in place. If your space already has a strong floor and finished stairs, your costs will be incredibly low. If you need to build a staircase from scratch, your budget will increase.
Here is a quick reference table to help you estimate your potential expenses based on the current state of your loft:
| Loft Starting Condition | Required Upgrades | Estimated DIY Budget |
|---|---|---|
| Mostly Finished (Has stairs and solid floors) | Paint, drywall, basic lighting, and floor coverings. | $500 – $1,200 |
| Unfinished but Accessible (Has stairs, needs structure) | Insulation, subfloor framing, drywall, and electrical. | $1,500 – $2,500 |
| Completely Bare (Pull-down ladder only) | New staircase, sistering floor joists, full insulation, and drywall. | $2,500 – $4,000+ |
What is the best way to control the temperature up there?
Have you ever noticed how hot your attic gets in the middle of July? Because heat naturally rises, temperature control is one of the biggest challenges in an upstairs loft.
You must tackle this problem before you put up your drywall. If you ignore the temperature, your beautiful new bedroom will be incredibly uncomfortable.
Here are the best ways to keep your loft perfectly cozy all year round:
- Install premium insulation: Pack your roof rafters and wall spaces tightly with high-quality fiberglass batts or expanding spray foam. This traps the indoor air and blocks the outdoor weather.
- Invest in a mini-split system: A ductless mini-split is a small, quiet, and highly efficient air conditioning and heating unit that mounts directly to your wall. It allows you to control the loft’s temperature independently from the rest of the house.
- Use ceiling fans: Keep the air moving! A good ceiling fan pushes warm air down in the winter and creates a cooling breeze in the summer.
How do I arrange furniture around awkward, sloped ceilings?
Sloped ceilings give a room amazing character, but they definitely make arranging furniture a bit of a puzzle. You cannot place a tall bookshelf against a wall that leans inward!
The trick is to embrace the angles. Place your lowest pieces of furniture under the lowest parts of the ceiling. For example, slide your bed directly under the sloped eaves. You do not need standing room while you are sleeping, so this makes perfect use of that awkward space.
You can also build knee walls. These are short, vertical walls built where the ceiling gets too low to walk under. You can install custom drawers or rolling storage bins directly into these short walls, giving you a massive amount of hidden storage without taking up precious floor space.
Are my current attic floors strong enough to hold a bed?
Do not just assume your floor is ready for heavy furniture. Standard attic floors are built using wooden support beams called joists. In a storage attic, these joists are usually built to hold lightweight items, like a few cardboard boxes.