Are you feeling cramped in your current home? You are definitely not alone. As we move deeper into 2026, urban growth is exploding, and families are spending more time at home than ever before.
Between remote work setups, growing children, and the desire for hobby spaces, our houses are bursting at the seams. Your only options are to pack up and move or to sacrifice your precious backyard for a ground-level extension.
Understanding how to raise the roof on a house is becoming an incredibly popular solution for homeowners who love their neighbourhoods but need more room to breathe. By lifting your existing roof structure, you can add valuable headroom for an attic conversion or even build an entirely new second story.
This process sounds like magic, but it is actually a precise, step-by-step construction method. When you lift a house roof, you can easily add 20% to 30% more usable square footage to your floor plan. Not to mention, this massive upgrade gives a spectacular boost to your overall property value.
Why Raise Your House Roof?
You might be wondering why someone would choose to lift their roof rather than build an addition on the side of their house. The truth is, raising your roof solves a multitude of common homeowner problems.
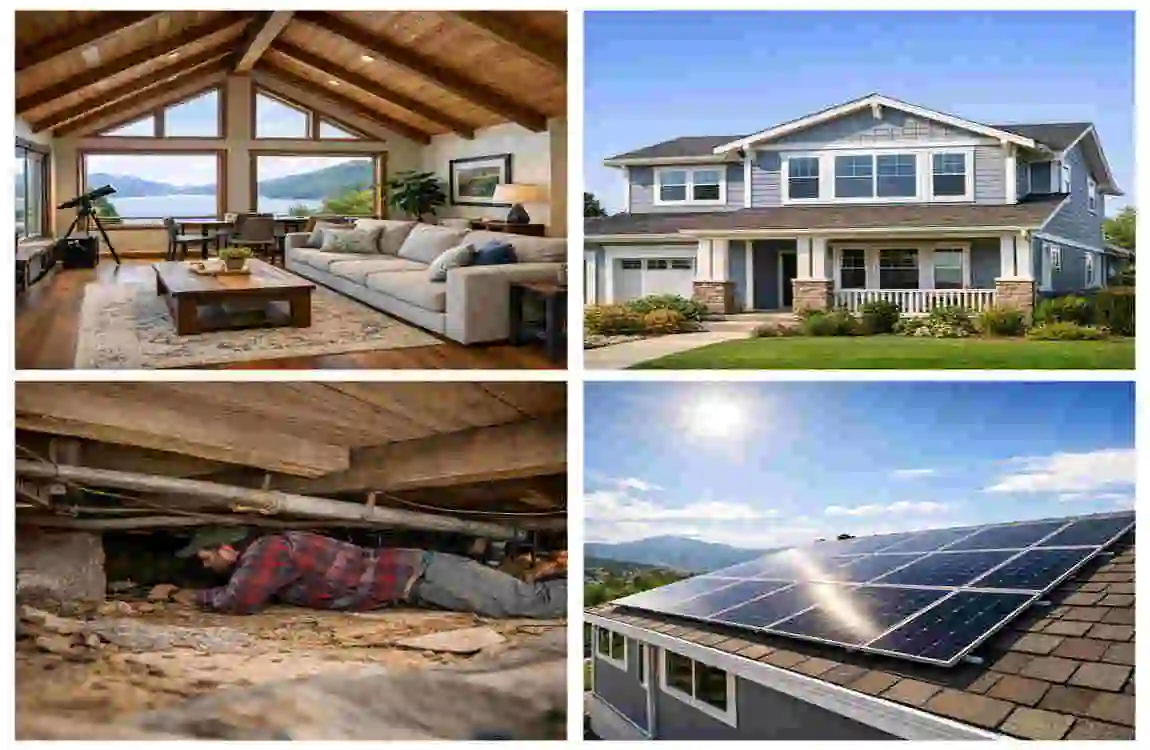
First and foremost, it allows for brilliant attic conversions. If you currently have an attic that requires you to crawl on your hands and knees, raising the roof by just a few feet can turn that dusty storage space into a beautiful main suite, home office, or playroom.
Secondly, it paves the way for multi-story additions. If your lot size is small, building out is impossible. Building up is your only real choice. This is especially true in densely populated areas.
For example, in Lahore’s bustling, historic neighbourhoods, land is incredibly scarce and expensive. Homeowners there frequently use the roof-raising process to add a second or third floor for extended family, keeping their loved ones close without buying a new plot of land.
Another lesser-known reason is flood-proofing. In areas prone to rising waters, lifting the entire top structure of the house and raising the main living areas can save your home from devastating water damage.
Financially, the benefits are huge. Real estate statistics show that adding a functional second story or a finished attic can add $50,000 or more to your resale value.
Let’s look at a simple breakdown of the pros and cons to help you decide if this is right for you.
Pros and Cons of Raising Your Roof
AspectProsCons
Cost Much cheaper than a total rebuild or buying a new house. Still requires an investment of $ 10K–$50 K, depending on the scope.
Time can often be completed in 1 to 4 weeks. The process is highly disruptive to your daily life at home.
ROI (Return) Excellent 70-80% cost recovery upon resale. Strict building permits and inspections are mandatory.
As you can see, while the project demands a solid commitment of time and money, the long-term rewards far outweigh the temporary inconveniences.
Tools & Materials Needed for the Job
Before you even think about lifting thousands of pounds of wood and shingles into the air, you need the right tools. Raising a roof is not a standard weekend DIY project you can tackle with just a hammer and some nails.
If you are a highly experienced semi-pro DIYer or trying to understand what your hired contractors will be using, you need to know about the heavy-duty equipment they will be using.
Having the correct tools ensures the job is done safely, evenly, and without damaging your existing home structure.
Here is an essential list of the tools and materials you will absolutely need:
- Hydraulic Jacks: You cannot use standard car jacks for this. You need heavy-duty hydraulic house jacks, typically rated for 4 to 8 tons each. You will need several of these to lift the roof evenly at multiple points.
- Steel Beams and I-Beams: Wood alone will not support the massive weight of a floating roof. You need heavy steel I-beams to slide under the roof structure to provide temporary, unbending support while the lift happens.
- A Professional Crane: For most full roof lifts, renting a crane is non-negotiable. A crane safely lifts the entire structure in one smooth motion. Crane rentals usually cost around $500 per day, but they save you weeks of dangerous manual jacking.
- Cribbing Blocks: These are heavy, square wooden blocks stacked in a crisscross pattern. They provide a wide, stable base for your hydraulic jacks.
- High-Quality Lumber and Plywood: Once the roof is up, you need to quickly build the new walls underneath it. You need stacks of Premium two-by-fours, two-by-sixes, and exterior-grade plywood, ready to go.
- Sealants and Weatherproofing: Your house will be open to the elements for a short time. You need heavy tarps, roofing sealants, and moisture barriers on hand to protect your home from sudden rain.
If you decide to buy all these specialised tools yourself for a DIY project, expect to spend around $5,000 just on equipment and rentals.
On the other hand, if you hire a professional crew, they bring all this expensive equipment. While a pro hire might cost $20,000 or more, you are paying for their tools, their experience, and their insurance.
Detailed Cost Breakdown
Money is always the biggest question when it comes to home renovations. So, how much does it actually cost to raise the roof on a house?
The answer depends heavily on a few major factors. The most significant factor is the footprint of your house. Lifting a small, simple gable roof on a 1,000-square-foot home is vastly different from lifting a complex, multi-angled roof on a 3,000-square-foot sprawling ranch.
For a standard 1,000-square-foot home, you can expect to pay anywhere from $15,000 to $30,000 for the entire project, including the new walls and finishing the exterior.
Your geographic location also plays a massive role in pricing. Labour rates vary widely around the world. For instance, if you are doing this project in Lahore, the average cost for a full roof lift and second-story addition typically ranges from PKR 3 million to 7 million, depending on the finishing materials you choose.
Let’s break down the typical costs into a clear table so you can see exactly where your money goes. We will compare an experienced DIY approach versus hiring a professional crew.
Estimated Roof Raising Budget
Component DIY Cost Estimate Professional Cost Estimate
Jacks, Beams & Crane Rental $2,000 $10,000 (Included in their labour/overhead)
New Lumber & Materials $3,000 $8,000 (Pros often use Premium or marked-up materials)
Engineering & Permits $500 $1,000 (Pros handle the running around for you)
Total Estimated Cost $5,500 – $8,000 $19,000 – $25,000+
Legal & Safety Requirements You Cannot Ignore
We need to pause here and have a very serious conversation about safety and legality. Lifting a roof is incredibly dangerous if done incorrectly. A collapsing roof can destroy your entire home and cause fatal injuries.
Because of these massive risks, you cannot just wake up one Saturday and start jacking up your rafters.
First, you must obtain the necessary permits. In almost every city in the world, you need specialised building permits to alter the roofline of a home.
More importantly, your local permit office will mandate a structural engineer’s stamp. An engineer must calculate the weight of your roof, the load-bearing capacity of your current walls, and the wind shear risks once the roof is raised higher. Do not skip this step!
Second, you must enforce strict safety protocols on your job site. Think of OSHA-style (Occupational Safety and Health Administration) rules.
You must heavily brace the existing walls before the lift. You must wear hard hats, steel-toed boots, and safety glasses at all times. Most importantly, you must never, ever attempt a roof lift alone. This is a team operation requiring constant communication.
If you live in certain geographic areas, you face additional hurdles. For example, in the Lahore region, you must get strict approvals from the Lahore Development Authority (LDA). Because parts of the region are situated near seismic zones, the LDA requires specific earthquake-resistant framing techniques when adding a second story.
Always check with your local municipal office before you buy a single piece of wood. Doing it right the first time keeps you out of legal trouble and keeps your family safe.
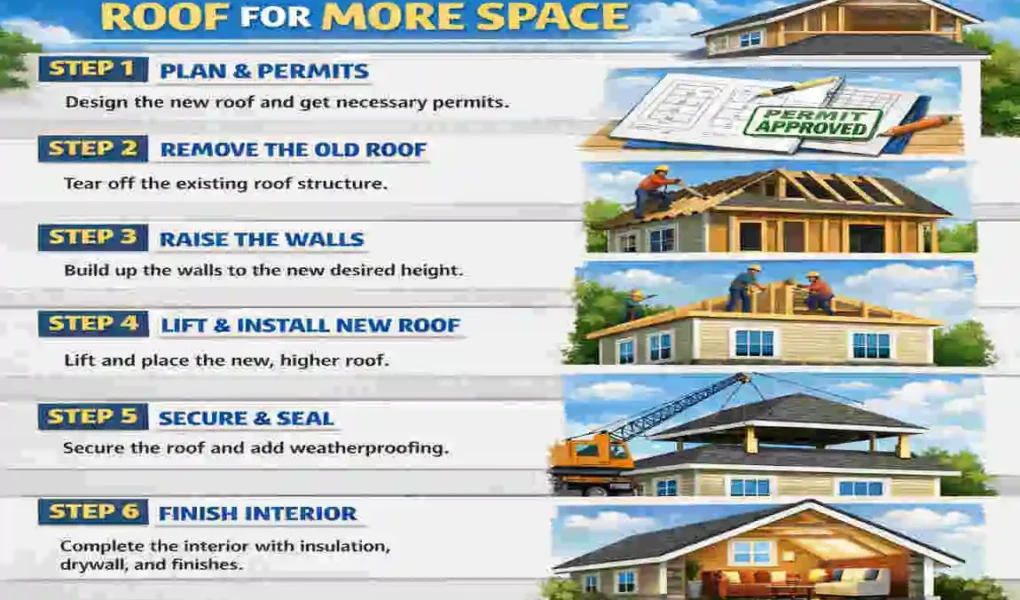
Step-by-Step Guide: How to Raise the Roof on a House
Now we reach the main event. If you want to know the exact mechanics of how to raise the roof on a house, this is your masterclass.
We have broken this massive undertaking down into easy-to-understand segments. Read through these carefully to grasp the project’s flow.
Deep Planning and Structural Assessment
Every successful construction project starts with a clipboard, not a hammer. You first need to assess the bones of your house.
Call in a licensed structural engineer or an experienced general contractor. They need to go down into your basement or crawlspace to inspect your foundation. If your foundation is crumbling, it cannot support the extra weight of new walls and a higher roof.
Next, they will inspect the roof itself. Are the trusses rotted? Are the shingles falling apart? If the roof structure is too weak, it will snap like a twig when the crane tries to lift it.
Once the engineer gives you the green light, you need to decide on your lift height. Are you raising it by 2 feet to give the attic some breathing room? Or are you raising it nine feet to build a complete second floor? Knowing this exact measurement dictates how much material you need to order.
Gather Your Team and Secure Permits
With your blueprints drawn up by the engineer, march straight down to your local building authority. Hand over your plans, pay your fees, and wait for your permits. This approval process typically takes 2 to 4 weeks, so plan your timeline accordingly.
While you wait for the paperwork, assemble your team. If you are doing a semi-DIY approach, you need at least 2 to 4 physically strong, reliable workers.
Assign roles early. You need one person managing the jacks, one person monitoring the roof level, and others ready to slide support beams into place.
This is also the time to schedule your crane rental. Crane operators book up weeks in advance, so lock in your date early. Keep a close eye on the weather forecast; a crane cannot lift a roof in high winds or heavy rain.
Installing the Temporary Supports
Now the physical labour begins. You must detach the roof from the rest of the house.
Your team will enter the house and carefully strip the drywall where the ceiling meets the exterior walls. This exposes the top plates and the ceiling joists.
Using reciprocating saws, carefully cut the metal hurricane ties and the nails holding the roof trusses to the walls.
Next, you build temporary support structures. You will install heavy steel posts and hydraulic jacks directly under the roof’s main load-bearing points. You will build cribbing bases out of heavy wood to give the jacks a wide, stable footprint on the floor.
Everything must be perfectly synchronised. The jacks must be positioned so that when they push up, they push evenly across the entire length of the roof.
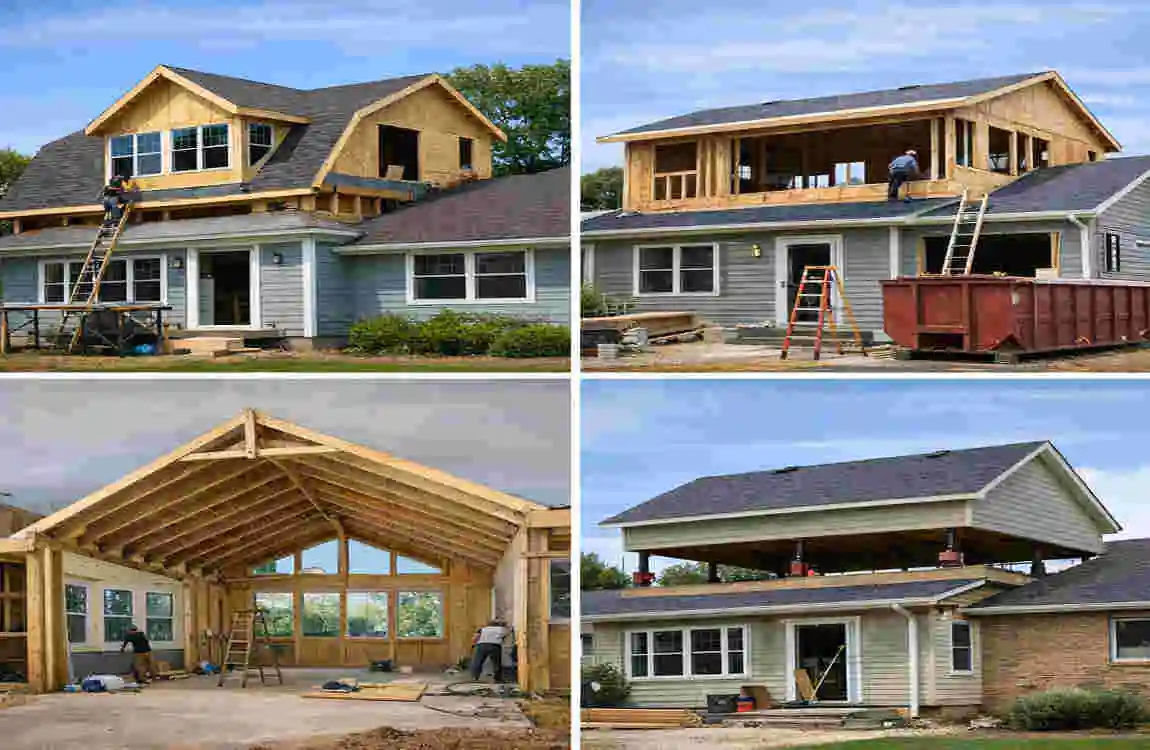
The Main Event – Lifting the Roof
This is the day your home changes forever. The crane arrives and parks securely on the street or in your yard.
The crane operator will lower heavy nylon straps or steel cables through small holes cut into the peak of your roof. These straps are securely wrapped around the strongest, thickest structural beams of the roof framework.
Once everything is rigged, the lifting begins. The keyword here is slowly.
A crane-assisted raise moves at a snail’s pace—sometimes just 1 to 2 inches per hour at the start. As the crane pulls upward, your team inside operates the hydraulic jacks simultaneously to distribute the weight evenly.
Someone must constantly monitor the plumb and level of the roof. If one side lifts faster than the other, the roof will twist, causing severe structural damage and cracking.
You lift, you check the level, you add more cribbing blocks under the jacks, and you lift again. You repeat this slow, tedious process until the roof reaches the desired target height.
Build the New Structure Underneath
Once the roof is securely aloft, supported by the crane and the towering steel jacks, the race against the clock begins.
Your carpentry team leaps into action. They must frame the new walls directly underneath the floating roof.
If you raised the roof a few feet for an attic, you will frame short “knee walls.” If you raised it for a whole new floor, you will frame standard eight or nine-foot walls, complete with window and door openings.
You will also install the new floor joists that will become the floor of your new upper level. The team must work fast but accurately, ensuring every new wall stud is perfectly plumb and securely nailed to the existing bottom structure.
Secure and Finish the Roof
With the new walls standing strong and braced, it is time to set the roof back down.
The crane gently lowers the massive roof structure until it rests perfectly atop the newly built walls. Your team will rush to secure the connection.
You will use heavy-duty steel hurricane straps, massive lag bolts, and framing nails to tie the old roof trusses permanently to the new wall plates.
Once the structure is completely secure, the crane unhooks and drives away. You can finally breathe a sigh of relief!
Now, you must quickly move to weatherproofing. You will wrap the newly exposed wood with a moisture barrier (such as Tyvek house wrap). You will install siding to match the rest of the house, install thick fibreglass insulation, and seal every crack with Premium exterior caulk.
Essential Safety Tips During the Lift
To keep this massive project injury-free, follow this numbered list of critical safety rules during your step-by-step process:
- Never stand directly under a suspended load: If a jack fails, you want to be out of the drop zone.
- Use communication radios: The person watching the level on one side of the house must be able to speak to the jack operator on the other side instantly.
- Check for wind speeds: Stop all lifting operations if wind gusts exceed 15 miles per hour. A floating roof acts like a giant sail.
- Disconnect all utilities: Ensure all electricity, plumbing, and gas lines running to the attic are completely severed and capped before lifting.
- Double-check your cribbing: Ensure the wooden blocks supporting your jacks are perfectly square and resting on a solid, unbreakable surface.
Common Mistakes to Avoid
Even with the best planning, things can go wrong if you lose focus. When you lift house roof structures, minor errors amplify into major disasters.
Here are the most common pitfalls you must aggressively avoid:
- Skipping the Engineering Phase: Some homeowners try to save a thousand dollars by skipping the structural engineer. This is the fastest way to risk a total structural collapse. If your lower walls cannot hold the new weight, your house will fold like a house of cards.
- Uneven Lifting: Impatience is your enemy here. If your team cranks the jacks too fast on the left side, the right side will bind and stick. This causes massive stress cracks in your rafters and can snap your ceiling joists. Always lift in tiny, synchronised increments.
- Ignoring the Weather Forecast: You cannot leave a roof suspended on jacks during a severe thunderstorm. Rain will destroy your exposed drywall below, and high winds will push the roof off its temporary supports. Always have giant tarps ready and plan your lift for a dry week.
- Underestimating the Clean-up: Tearing off the roof connections creates a massive amount of dust, old insulation, and sharp, rusty nails. Failing to lay down protective tarps inside your house will ruin your carpets and hardwood floors.
Keep your focus sharp, communicate clearly with your team, and respect the massive weight you are moving.
Alternatives to Roof Raising
After reading about the intensity of the roof-raising process, you may be hesitant. That is completely okay! It is a major undertaking.
If you want more space but want to avoid the complexities of hydraulic jacks and cranes, you do have alternative options.
Adding Dormers: Instead of lifting the entire roof, you can punch holes in the sides of it. Building dormers means cutting out a section of your sloped roof and installing a small vertical wall with a window. This adds valuable standing room and natural light to an attic without the massive engineering required to lift the whole structure. It is significantly cheaper and less risky.
Altering Attic Trusses: If your current roof is built with “W-trusses” (wood beams that zig-zag across your attic), you have no walking space. A structural engineer can design a plan to remove the centre W-supports and reinforce the outer edges, creating an open, vaulted ceiling.
A Full Rebuild (Tear Down): Sometimes, an old roof is just too rotted to lift safely. In these cases, you literally bring in a demolition crew, rip the entire roof off with an excavator, throw it in a dumpster, build your new walls, and frame a brand-new roof from scratch. While this sounds extreme, it allows you to update all the framing to modern energy codes.
Digging a Basement: If going up is not an option, can you go down? Underpinning your foundation to create a livable basement is an option, though it is incredibly labor-intensive and expensive.
Weigh these alternatives against your budget and your ultimate goals before making your final decision.
FAQs About Raising a Roof
You probably still have a few lingering questions. Here are the most common things homeowners ask when considering this project.
How much does it generally cost to raise the roof on a house? For a standard, mid-sized home, expect to spend between $15,000 and $30,000 for the structural lift and framing. Finishing the interior space will cost extra.
Is a DIY roof raise actually possible? It is possible, but only for highly experienced individuals with deep backgrounds in construction and framing. For the average homeowner, DIY is not recommended due to extreme safety risks.
Do I have to move out during the process? Yes, absolutely. The home’s structural integrity is compromised during the lift. Furthermore, the noise, dust, and lack of utilities make living inside impossible for at least a week or two.
Will raising my roof fix my low ceilings? Yes! This is one of the primary benefits. You can raise a claustrophobic 7-foot ceiling to a luxurious 9-foot ceiling by lifting the roof and extending the top of your existing walls.
Can my existing foundation handle it? You will not know until you ask an expert. A structural engineer must evaluate your footings to ensure they can hold the extra weight of new walls, a higher roof, and new furniture upstairs.