Installing an exterior door is one of those home improvement tasks that can instantly change the look, comfort, and security of your house. At first glance, it may seem like a job only for professionals, but with the right guidance, many homeowners can handle it on their own.
A properly installed exterior door does much more than just open and close. It helps keep your home safe, improves energy efficiency, and protects you from harsh weather conditions. On top of that, it also adds to the overall beauty of your home’s entrance.
However, if the door is not installed correctly, it can lead to problems like air leaks, water seepage, or even security risks. That’s why understanding how to install an exterior door step by step is so important before you begin.
Understanding Exterior Doors
Before jumping into installation, it’s important to understand what you are working with.
An exterior door is the primary entry point to a home, separating the indoor space from the outside environment. Because it faces weather, security threats, and daily use, it must be strong and properly sealed.
Common Door Materials
Different materials offer different benefits:
- Wood: Classic and stylish, but needs maintenance
- Steel: Strong and secure, ideal for safety
- Fiberglass: Durable, weather-resistant, and low maintenance
Types of Exterior Doors
- Pre-hung doors: Come already attached to a frame
- Slab doors: Only the door panel without a frame
If you are learning how to install an exterior door, a pre-hung door is usually the easiest choice because it reduces alignment work.
Main Components of a Door System
- Frame (holds the door in place)
- Threshold (bottom sealing area)
- Weatherstripping (blocks air and water)
- Hinges and hardware (for movement and locking)
Understanding these parts helps you install the door more confidently and correctly.
Tools and Materials Needed
Before starting the installation, gather everything you need. This will save you time and prevent interruptions.
Essential Tools
- Measuring tape
- Level tool
- Hammer
- Drill or driver
- Screwdrivers
- Pry bar
- Utility knife
- Caulking gun
Required Materials
- Exterior pre-hung door
- Wood or composite shims
- Screws and nails
- Expanding foam insulation
- Exterior-grade caulk
- Weatherstripping
Quick Pro Tip
Always choose high-quality materials. A strong door is only as good as the materials used to install it. Cheap foam or weak screws can lead to long-term issues such as gaps or misalignment.
Preparing for Installation
Preparation is one of the most important parts of learning how to install an exterior door. A mistake here can affect the entire project.
Measuring the Door Opening
Start by carefully measuring the rough opening.
Check:
- Width
- Height
- Depth
Also, make sure the opening is square and level. Even a small imbalance can make the door stick or not close properly.
Common mistake: assuming all openings are perfectly square—most are not.
Removing the Old Door (If Replacing)
If you are replacing an old door, remove it step by step:
- Take off the door slab first
- Remove the trim carefully
- Pry out the old frame
Once removed, clean the area properly. Remove nails, dust, and old foam.
Inspecting the Rough Opening
Before installing the new door, inspect the frame area.
Look for:
- Rot or wood damage
- Moisture or mold
- Uneven surfaces
Fix any damage first. A strong installation always starts with a solid base.
Dry Fitting the New Exterior Door
Dry fitting means placing the door in the opening without fully securing it.
Why This Step Matters
It helps you:
- Check alignment
- Adjust positioning
- Identify gaps early
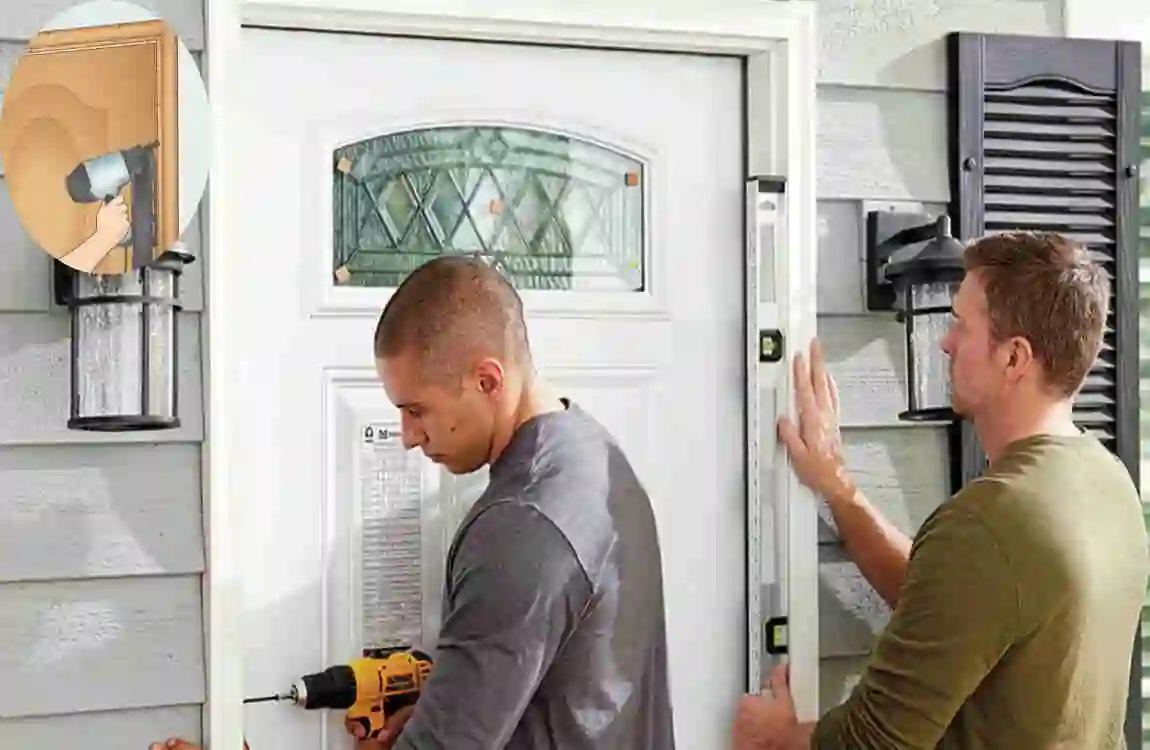
Place the door into the opening and use a level to check:
- Vertical alignment (plumb)
- Horizontal alignment (level)
- Corner squareness
If anything is off, adjust using shims before moving forward.
Patience is key here—rushing this step can cause long-term problems.
Step-by-Step Installation Process
This is the core of learning how to install an exterior door. Follow each step carefully.
Positioning the Door Frame
Place the door in the center of the opening. Make sure there is equal spacing on all sides. This allows room for adjustments.
Securing the Hinged Side First
Start with the hinge side:
- Insert shims behind hinge points
- Screw the frame into place
- Check if the door swings smoothly
This side is your anchor point.
Aligning the Strike Side
Now move to the latch side:
- Add shims evenly
- Ensure the gap between the door and the frame is consistent
- Avoid forcing the frame
If done correctly, the door should open and close without resistance.
Securing the Top Frame
Add shims to the top section of the frame.
This step ensures:
- The frame stays square
- The door doesn’t sag
- Smooth closing motion
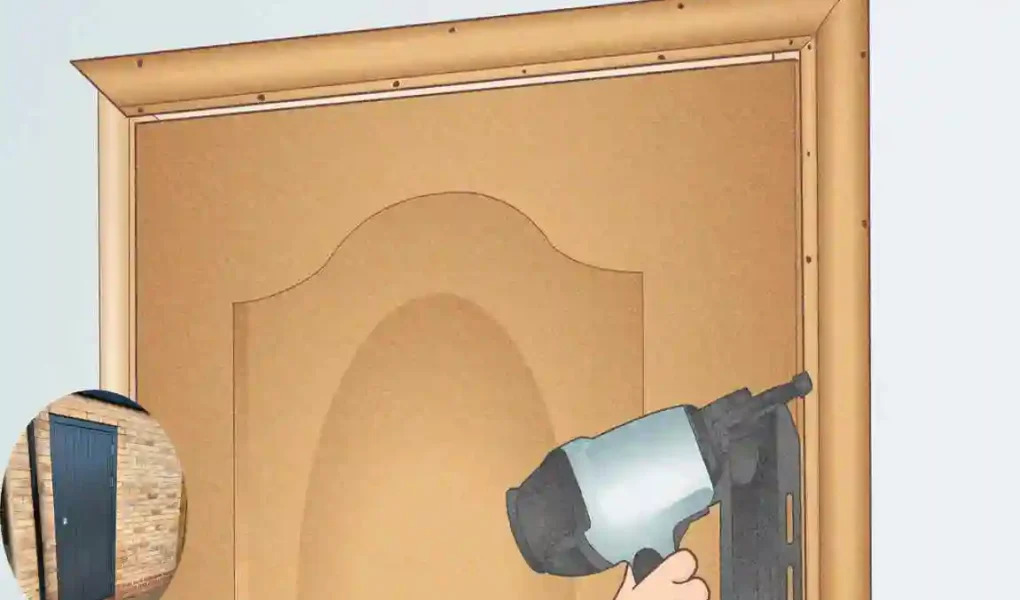
Installing Screws Properly
Use long screws where strength is needed most, especially near hinges.
Avoid over-tightening because it can bend the frame.
Testing Door Operation
Now test the door multiple times:
- Open and close it slowly
- Check locking alignment
- Listen for scraping or sticking
If needed, adjust shims slightly.
Installing Threshold and Sill
The threshold seals the bottom area.
Make sure:
- It sits flat on the floor
- It blocks water entry
- It does not create gaps
This step is important for weather protection.
Insulating and Sealing the Door
A properly installed door must also be well sealed.
Adding Insulation
Use low-expansion foam:
- Fill gaps around the frame
- Do not overfill
- Allow it to expand naturally
Weatherproofing
Apply sealing materials:
- Exterior caulk around edges
- Weatherstripping on moving parts
This helps block wind, dust, and water.
Energy Efficiency Benefits
A well-sealed door helps:
- Reduce energy bills
- Maintain indoor temperature
- Improve comfort
Installing Door Hardware
Now install the functional parts:
- Handle set
- Deadbolt lock
Make sure the strike plate aligns properly. Test the lock several times to ensure smooth operation.
Security depends on proper alignment, so take your time here.
Finishing Touches
At this stage, your door is almost complete.
- Install interior and exterior trim
- Paint or stain the door if needed
- Clean the workspace
Final Checklist
- The door opens smoothly
- The lock works properly
- No visible gaps
- The frame is stable
Common Mistakes to Avoid
When learning how to install an exterior door, avoid these errors:
- Not using a level properly
- Skipping shimming steps
- Overusing spray foam
- Measuring incorrectly
- Misaligning hinges
- Rushing installation
Even small mistakes can lead to big problems later.
Maintenance Tips After Installation
Once installed, your door still needs care.
- Lubricate hinges regularly
- Check seals once a year
- Reapply caulk when needed
- Clean the surface gently
- Adjust seasonally if needed
Good maintenance keeps your door working like new.
FAQ Section
How long does it take to install an exterior door?
It usually takes 3 to 6 hours, depending on experience and the condition of the door.
Can I install an exterior door by myself?
Yes, but having an extra pair of hands makes the process easier.
Do I need a permit to replace a door?
In most cases, no permit is required for a simple replacement.
What is the cost of installing an exterior door?
Costs vary by materials, but DIY installation mainly saves on labor costs.
| Step | What to Do | Why It Matters |
|---|---|---|
| Measure opening | Check height, width, and depth | Ensures correct door fit |
| Remove old door | Take out door, frame, and trim | Prepares a clean workspace |
| Prepare opening | Clean, level, and repair frame | Improves installation accuracy |
| Dry fit door | Place door in opening without fixing | Checks alignment before securing |
| Level and secure frame | Shim and fasten frame in place | Prevents sticking or gaps |
| Insulate gaps | Add foam or insulation material | Improves energy efficiency |
| Install door hardware | Fit hinges, handle, and lock | Ensures proper function |
| Seal edges | Apply weatherstripping and caulk | Blocks air and water leaks |