

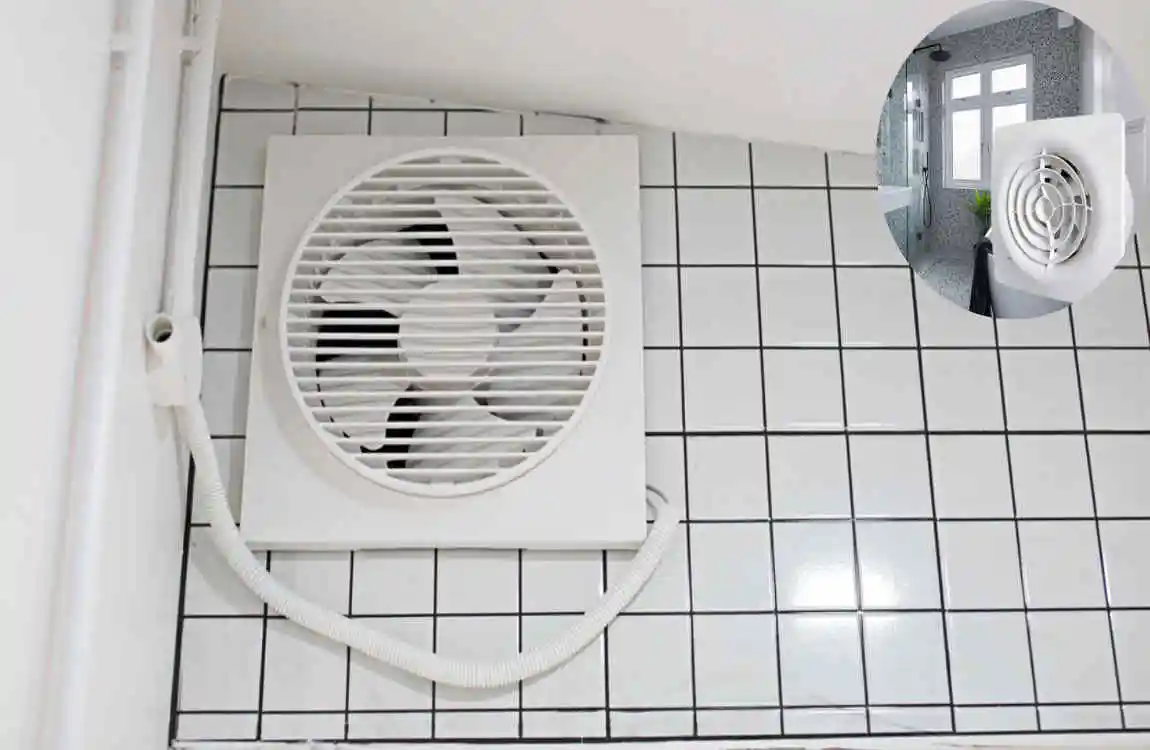
Have you ever stepped out of a shower only to feel a stuffy, humid bathroom? The lingering moisture not only makes your bathroom uncomfortable but can also lead to mold growth and unpleasant odors. It’s a common problem in many homes, and 80% of houses reportedly lack proper bathroom ventilation according to the EPA. That’s where an exhaust fan steps in as a game-changer.
Installing an exhaust fan helps to improve air quality, reduce humidity, and protect your bathroom walls and fixtures from moisture damage. Plus, it can save energy by easing the load on your air conditioner. The good news? You don’t have to hire a costly professional. With the right tools and clear instructions, you can master how to install an exhaust fan in a bathroom window yourself.
Why Install an Exhaust Fan in Your Bathroom Window?
Health and Home Benefits
Bathrooms are naturally humid spaces, especially after showers or baths. Without proper ventilation, this moisture lingers, creating an ideal environment for mold and mildew, which can cause health problems such as allergies and respiratory issues. The CDC and EPA both emphasize that good ventilation is key to maintaining healthy indoor air quality.
An exhaust fan in your bathroom window helps by:
- Removing excess moisture quickly to prevent mold growth.
- Reducing unpleasant odors.
- Improving overall air circulation to make your bathroom more comfortable.
Window vs. Ceiling Installation
Many homeowners worry about installing ceiling fans because they often require attic access, ductwork, and electrical rewiring. Installing an exhaust fan in your bathroom window offers some distinct advantages:
- Easier access for installation and maintenance.
- No need to cut through ceiling joists or attic insulation.
- Ductless options are available that vent directly outside, making it perfect for rental properties or retrofitting older homes.
Cost Savings
Hiring a professional to install a bathroom exhaust fan can cost upwards of $300, depending on complexity and location. Doing it yourself with a window-mounted fan typically costs under $100 for parts, with minimal tool investment.
Moreover, efficient fans help reduce the workload on your air conditioning system, leading to energy savings over time.
When to Choose a Window Installation
Window exhaust fans are ideal in:
- Rental homes where modifications are limited.
- Small bathrooms without attic access.
- Homes where ceiling installation is impractical or too costly.
Tools and Materials Needed for DIY Installation
Getting your tools and materials ready is the first step toward a smooth installation. Here’s what you’ll need:
Essential Tools
- Drill with screwdriver bits
- Screwdriver set
- Measuring tape
- Level
- Wire strippers
- Ladder
- Safety gear: Gloves, goggles, dust mask
Materials Checklist
- Window-mount exhaust fan (aim for 100-150 CFM depending on bathroom size)
- Mounting brackets
- Caulk or sealant
- Electrical wire (14-gauge recommended)
- Outlet tester
- Optional: Inline ducts for ductless models
Budget Breakdown
Item Cost Range
Exhaust fan $40 – $80
Tools (if buying) $20 – $50
Total Under $150
Pro tip: Look for fans with built-in humidity sensors or timers for smarter ventilation.
Safety Precautions Before Starting
Safety first! Before you begin installing your exhaust fan, make sure to:
- Turn off the electricity at the breaker panel to avoid shocks.
- Test wires with a voltage tester to confirm power is off.
- Inspect the window frame for stability to ensure it can hold the fan.
- Avoid glass damage by carefully removing window sashes or panels.
- Ensure proper ventilation during installation by opening other windows or doors.
- Use a stable ladder and watch for sharp edges on metal parts.
- Check local building codes; many bathrooms require GFCI outlets near water sources.
Here’s a quick safety checklist for your reference:
- Power shut off and verified
- Protective gear worn
- Ladder secured
- Window frame inspected
- Local codes reviewed
Step-by-Step Guide: How to Install an Exhaust Fan in a Bathroom Window
Measure and Choose the Right Fan
Measure your bathroom window opening carefully — most standard windows are about 14 x 14 inches. Choose a fan with the right CFM (cubic feet per minute) rating. A good rule of thumb is 1 CFM per square foot of bathroom space. For example, a 50 sq ft bathroom needs a 50 CFM fan.
Choosing the correct fan ensures efficient airflow and prevents overworking the motor.
Prepare the Window and Workspace
Remove the window sash if needed and clean the frame thoroughly. Use painter’s tape to protect surrounding areas from scratches or caulk spills. Set up your ladder securely and cover the floor with a drop cloth to catch debris.
Mount the Fan Housing
Attach the mounting brackets to the window frame with screws. Make sure the fan housing is level to avoid vibration noise later. Seal any gaps with caulk for an airtight fit, which helps maintain energy efficiency.
Wire the Electrical Connection
Run the electrical wire from a nearby switch or outlet. Connect the cables carefully:
- Black wire to black (hot)
- White wire to white (neutral)
- Green or bare copper wire to ground
If your bathroom doesn’t already have a GFCI outlet, install one near the fan for safety. Use an outlet tester to verify your connections.
Install Fan Blades, Grille, and Ducting
Snap the fan blades onto the motor shaft, then attach the grille cover. For ductless models, use inline ducts or install an exterior vent flap on the window’s outside to let air escape easily.
Test and Seal the Installation
Turn the power back on and test your fan with a smoke test or by feeling the airflow. Seal the outside edges with caulk to prevent water ingress and drafts.
Troubleshooting Common Issues
- Noisy fan? Check for loose screws or unbalanced blades. Tighten and lubricate if needed.
- Weak suction? Inspect for blockages in the vent or ducts.
- Won’t Fan turn on? Double-check electrical wiring and breaker status.
Maintenance Tips for Long-Lasting Bathroom Window Exhaust Fan
To keep your fan running smoothly and extending its lifespan:
- Monthly: Remove the grille and vacuum dust off the blades.
- Annually: Lubricate the motor if recommended by the manufacturer, inspect seals for wear, and check electrical connections.
- Upgrade: Consider smart fans with humidity sensors that automatically turn on.
Maintenance Task Frequency
Clean grille/blades Monthly
Lubricate the motor annually
Inspect seals annually
Test electrical annually
With proper care, your exhaust fan will last 10-15 years!
Common Mistakes to Avoid When Installing an Exhaust Fan in a Bathroom Window
Here are some pitfalls to watch out for:
- Skipping electrical safety steps: This risks shocks or worse.
- Poor sealing around the fan: Leads to moisture leaks and drafts.
- Choosing an undersized fan: Ineffective airflow and persistent humidity.
- Ignoring local codes can result in fines or failed inspections.
Real users on forums like Reddit often share stories about noisy fans or improper wiring, so learn from their experiences to avoid similar headaches!
Alternatives to Window Exhaust Fan Installation
If window installation isn’t an option for you, consider:
- Ceiling-mounted fans: More common but require attic access.
- Inline duct systems: Quiet and efficient but complex to install.
- Portable exhaust units: Temporary solution for rentals.
Method Cost Difficulty
Window Fan Low ($40-80) Easy
Ceiling Fan Moderate Moderate
Inline Duct System High Difficult
Portable Unit Low Very Easy
Call a professional if your bathroom wiring is complex or if you have ample space requiring higher CFM.


