There is nothing—and I mean nothing—more annoying than lying in your bunk at night, listening to the rhythmic drip, drip, drip of a leaky bathroom faucet. It’s the kind of sound that echoes through the compact walls of an RV, reminding you that water is wasting away from your precious freshwater tank. If you are reading this, chances are you’re tired of the noise, the waste, or perhaps you’re just sick of looking at that yellowed, plastic faucet that came standard with your rig 10 years ago.
Many campers are intimidated by RV plumbing, assuming it requires a professional certification or expensive tools. But the truth is, learning how to replace an RV bathroom sink faucet is one of the most beginner-friendly DIY projects you can tackle. It usually takes less than an hour, requires only a handful of basic tools, and can instantly upgrade your bathroom’s look.
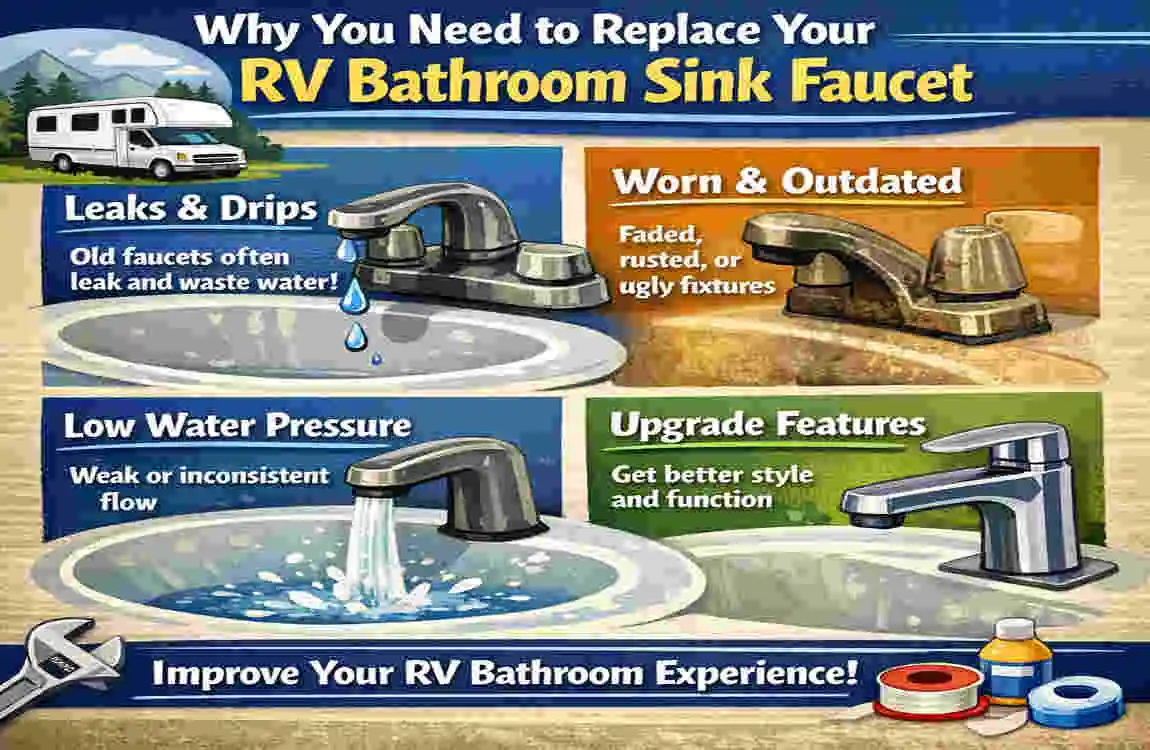
Why You Need to Replace Your RV Bathroom Sink Faucet (And When It’s Time)
You might be tempted just to put a bucket under the leak and ignore it for another season, but delaying this repair can lead to bigger headaches down the road. RVs are essentially houses on wheels, subjecting them to earthquake-like vibrations every time you drive down the highway. This constant movement can wreak havoc on plumbing connections.
Common Signs of Failure
Knowing when to replace your unit is half the battle. Here are the red flags that indicate it is time for a DIY RV bathroom faucet replacement:
- Persistent Drips: If tightening the handle doesn’t stop the flow, the internal cartridges are likely worn out.
- Cracks in the Body: Many stock RV faucets are made of lightweight plastic. Over time, these can develop hairline cracks due to temperature fluctuations (winter freezing is a major culprit).
- Low Water Pressure: If the water flow is sputtering but your pump is fine, sediment may have clogged the internal aerator, or the valves may be beyond repair.
- Corrosion: White or green crusty buildup around the base or handles indicates slow leaks that could be rotting your countertop from the bottom up.
The Cost Savings vs. Pro Service
Let’s talk money. Taking your rig to a dealership for a simple faucet swap can cost you upwards of $150 to $200 in labor alone, not including the part’s markup. By doing this yourself, you are looking at the cost of the faucet (anywhere from $30 to $80) and maybe $5 for some plumber’s tape. You are effectively paying yourself $150 for an hour of work—that is money better spent on gas or campground fees.
Aesthetics and Resale Value
Beyond the mechanics, stock RV faucets are often… well, ugly. They are usually low-arc, plastic models that make it hard even to wash your hands. Upgrading to a high-arc, brushed-nickel, or matte-black faucet not only makes the sink more usable but also modernizes the interior, which is a huge plus if you ever decide to sell your camper.
Tools and Materials for Replacing the RV Bathroom Sink Faucet
Before we start unscrewing anything, we need to gather our supplies. The beauty of this project is that you don’t need a massive workshop. Most of the tools to replace an RV sink faucet are likely already in your travel kit.
Because RV bathrooms are notoriously cramped, having the right-sized tools is critical. You won’t have much elbow room, so compact tools are your best friends here.
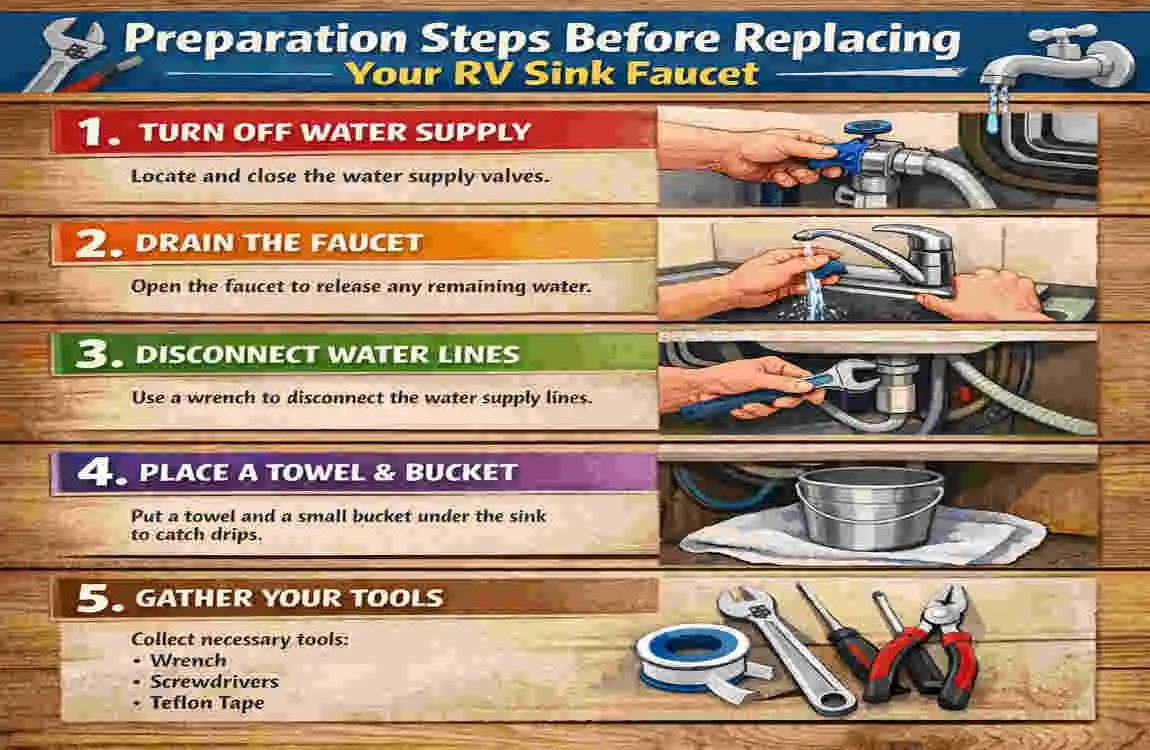
Essential Tools Checklist
- Adjustable Wrench (Crescent Wrench): Ideally, a smaller 6-inch or 8-inch model for tight spaces.
- Basin Wrench: Optional but highly recommended. This specialized tool reaches up behind the sink bowl to loosen nuts that are hard to reach with hands or standard pliers.
- Pliers (Channel Locks): For gripping stubborn PEX fittings.
- Screwdriver Set: Both flathead and Phillips, just in case you need to remove cabinet doors for better access.
- Old Towels and a Small Bucket: To catch the inevitable water remaining in the lines.
- Flashlight or Headlamp: It gets dark inside those vanity cabinets!
Must-Have Materials
- The New Faucet: We will discuss how to pick the best one later, but ensure it matches your sink’s hole configuration (usually a 4-inch spread for RVs).
- Plumber’s Tape (Teflon Tape): Essential for preventing leaks on threaded connections.
- RV-Safe Silicone Sealant: To create a watertight seal between the faucet base and the countertop.
- PEX Fittings (Optional): Have a couple of spare 1/2-inch PEX swivel connectors on hand just in case the old ones crack during removal.
Item Purpose RV-Specific Tip
New Faucet: Core replacement. Look for “hybrid” models (metal body, plastic waterways) for weight savings.
Basin Wrench Loosening mounting nuts. A game-changer for deep sinks with zero clearance.
Teflon Tape Leak-proofing threads Wrap 2-3 times clockwise only.
Silicone Base Sealing: Avoid “plumber’s putty” on plastic RV sinks, as it can stain or degrade the plastic.
Preparation Steps Before Replacing Your RV Sink Faucet
Safety and preparation are what separate a chaotic repair from a smooth one. Since we are dealing with water in a vehicle largely constructed of wood and laminate, we want to minimize spills.
Kill the Water Source
First things first: Stop the flow.
- If you are hooked up to city water at a campground, go outside and turn off the spigot. Disconnect the hose just to be safe.
- If you are boondocking and using your fresh water tank, locate your RV’s 12V water pump switch and turn it OFF.
Relieve the Pressure
Even with the water off, pressurized water remains in your PEX lines. Go to the bathroom sink and open both the hot and cold handles. You will see a brief spurt of water, then it will trickle to a stop. Leave the faucets open for now; this prevents a vacuum lock and helps the lines drain.
Clear the Workspace
RV vanities are tiny. Remove everything from under the sink—toilet paper, cleaning supplies, that random bag of sponges. If your cabinet doors are narrow, consider unscrewing the hinges and taking the doors off completely. It takes two minutes but saves you twenty minutes of frustration trying to squeeze your shoulders into the cabinet.
Safety Check
Ensure your water heater is off, especially if it is electric, so you don’t burn out the element while the tank is depressurized. Also, grab your safety glasses—falling rust or dried putty from under the sink is a magnet for eyeballs.
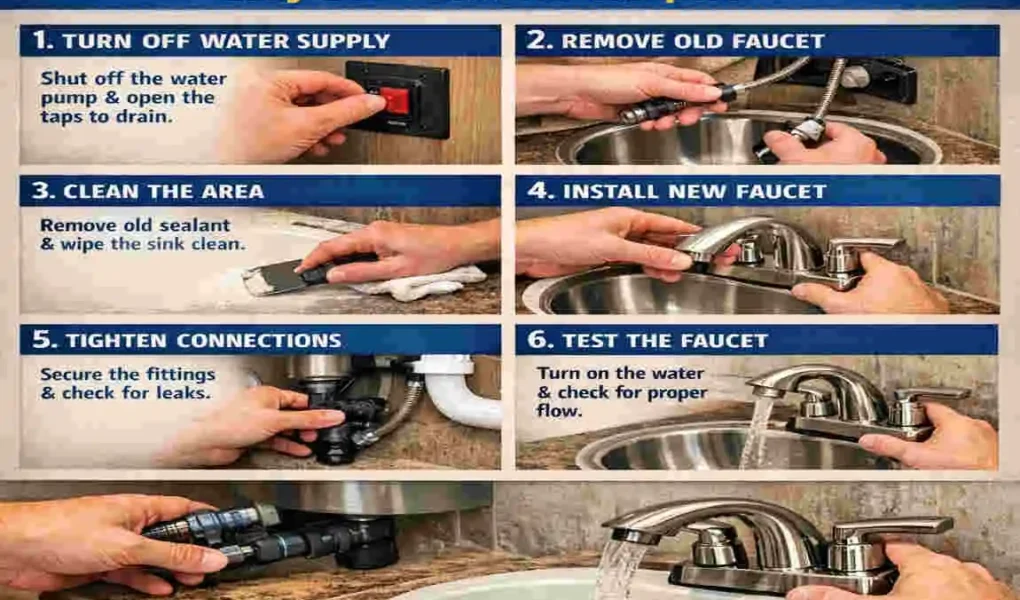
Step-by-Step Guide: How to Replace an RV Bathroom Sink Faucet
Alright, the prep is done. Now we get to the fun part. Follow these steps carefully, and remember: Righty-tighty, lefty-loosey (unless you are upside down, which you will be).
Disconnect Water Supply Lines from Old Faucet
Crawl under the sink with your flashlight. You will see two water lines running up to the bottom of the faucet. In most RVs, these are PEX lines (usually red for hot, blue for cold) connected with plastic swivel nuts.
- Identify the Nuts: Locate the threaded nuts connecting the water lines to the faucet tailpieces.
- Loosen Them: Try to loosen them by hand first. If they are stuck, use your adjustable wrench or pliers.
- The “RV Tip”: Remember, since you are looking up at the nuts from below, turning them “counter-clockwise” might feel backwards.
- Catch the Water: As you disconnect the lines, hold your small bucket or a towel beneath them. There will be roughly a cup of water trapped in the line, which will drain out.
- Inspect the Fittings: Check the rubber washers inside the water line connectors. If they look chewed up or flattened, replace them now.
Remove the Old RV Sink Faucet from the Countertop
With the water lines free, the only thing holding the faucet to the counter is the mounting nuts.
- Locate Mounting Nuts: These are large plastic or metal rings screwed onto the faucet shanks, sandwiching the faucet between the countertop and the shanks.
- Unscrew and Remove: This is where the basin wrench shines. If you don’t have one, reach up with your hand or pliers to spin these nuts down and off.
- Lift the Faucet: Once the nuts are off, stand up and gently lift the faucet away from the sink. It might stick slightly due to old putty or gunk. A gentle wiggle should free it.
- Clean the Area: You will likely see a ring of grime where the old faucet used to sit. Use an RV-safe degreaser or mild soap to scrub this area clean. You want a pristine surface for the new seal.
install the New Faucet Base and Secure It
Now, let’s put the shiny new hardware in.
- Dry Fit: Place the new faucet into the holes to make sure it fits. Most RVs use a standard 4-inch center-set, but it’s good to verify before applying sealant.
- Apply Sealant: Many new faucets come with a plastic gasket (a base plate). If yours has one, you may not need sealant. However, for extra security in a moving vehicle, I recommend applying a thin bead of silicone sealant around the underside of the faucet base.
- Insert and Position: Drop the faucet tailpieces through the holes in the countertop. Ensure the faucet is facing straight forward.
- Tighten from Below: Go back under the sink. Screw the new mounting nuts onto the threaded shanks.
- Pro Tip: Hand-tighten these nuts as much as you can. Then, use your wrench to give them another 1/4 to 1/2 turn. Do not overtighten! You can crack the faucet’s plastic body or the RV countertop.
Reconnect Water Lines to New RV Bathroom Sink Faucet
We are in the home stretch! It is time to reconnect the plumbing.
- Teflon Tape (Crucial): Wrap the threaded tailpieces of the new faucet with Teflon tape. Wrap it 2-3 times in a clockwise direction. This ensures the tape doesn’t unravel when you screw the nut on.
- Connect the Lines: Attach the hot water line (red) to the hot side (usually the left) and the cold line (blue) to the cold side.
- Watch for Cross-Threading: Plastic fittings are easy to cross-thread. If you feel immediate resistance, back off and try again. It should spin freely until it hits the washer.
- Final Tightening: Hand-tighten the supply line nuts firmly, then use pliers to give them a slight snug. Again, avoid brute force.
Test for Leaks and Final Adjustments
The moment of truth.
- Close Faucet Handles: Ensure the new faucet handles are in the “Off” position.
- Restore Power: Turn the water pump back on or open the city water spigot.
- Watch and Listen: Before turning the faucet on, look under the sink. Do you see any drips? Do you hear hissing? If yes, tighten the connections slightly.
- Run the Water: Slowly open the hot and cold sides. Let the air sputter out until you have a solid stream.
- The “Paper Towel Test”: Wipe the connections with a dry paper towel. If the towel comes away with even a speck of moisture, you have a micro-leak that needs tightening.
Best RV Bathroom Sink Faucets for Campers in 2026

If you haven’t bought your replacement yet, you might be overwhelmed by the choices. Should you buy a “residential” faucet or an “RV-specific” one? Generally, you can use a residential faucet as long as it fits the hole spacing and you have the right adapters for the water lines (usually 1/2″ MIP).
Here are a few top recommendations for the best RV sink faucets for campers:
Model Price Range Key Features Why It’s Great for RVs
Furrion Everest $55 – $75 Single-handle, lightweight Modern look, specifically designed to withstand road vibration.
Dometic 362002 $40 – $50 High-arc, acrylic knobs Classic RV look, very lightweight, high clearance for washing hands.
Empire Faucets (Brushed Nickel) $60 – $80 Metal hybrid construction . Feels like a home faucet but sized for RVs. Ceramic disc cartridges last longer.
Valterra RU329VR $30 – $40 Basic, plastic construction . The budget king. Perfect for older campers or quick fixes.
Buying Tip: Look for a high-arc spout. RV sinks are often very shallow. A low faucet combined with a shallow sink makes it impossible to wash your face or fill a cup. A high-arc model gives you valuable vertical space.
Troubleshooting Common Issues After RV Faucet Replacement
Even with a perfect install, gremlins can appear. Here is how to fix the most common “oops” moments.
“It’s leaking from the water line connection!”
This is usually due to one of two things: a lack of Teflon tape or a missing rubber washer. Undo the connection, check that the cone washer inside the PEX line is seated correctly, re-tape the threads, and tighten again.
“The water pressure is terrible!”
Did you forget to remove the aerator? New faucets often come with a small screen (aerator) at the spout tip. Construction debris or factory sawdust can clog this instantly. Unscrew the aerator, rinse it out, and screw it back on. Also, check that your supply lines aren’t kinked under the cabinet.
“The handles work backwards!”
If turning the handle “forward” gives you cold water instead of hot, you likely swapped the supply lines under the sink. Don’t worry, it happens to the best of us. Just swap the red and blue lines under the sink.
Maintenance Tips to Extend Your RV Sink Faucet’s Life
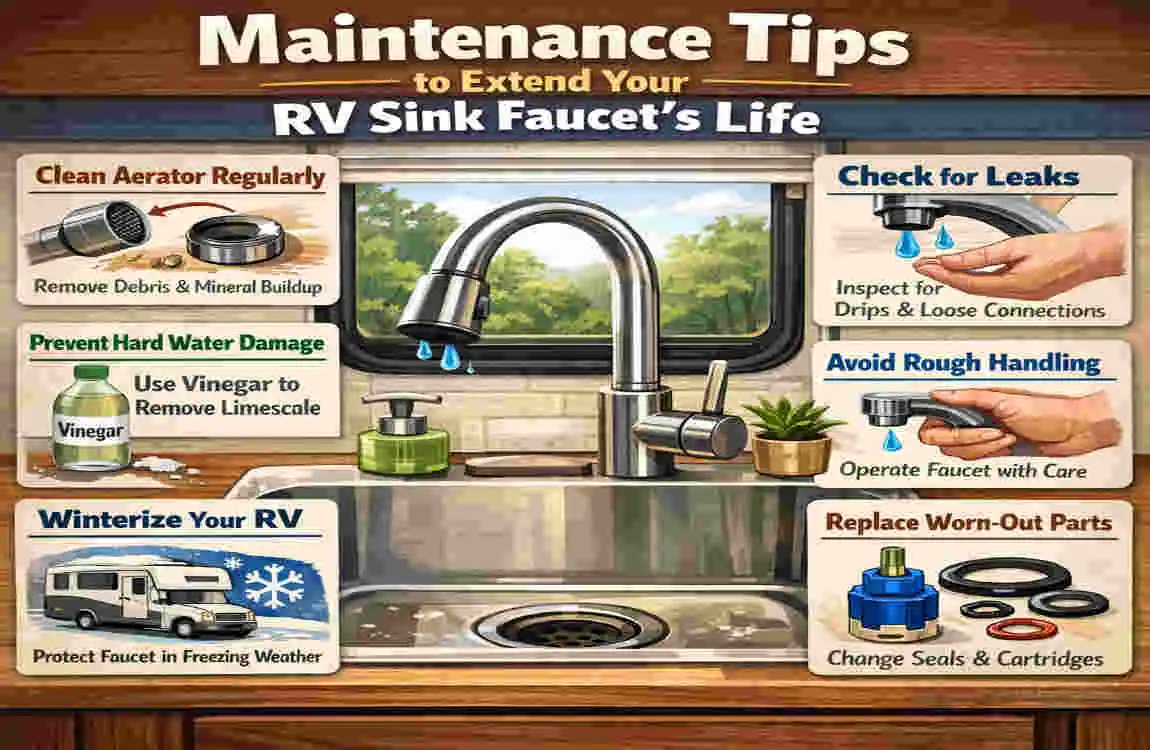
You want this new faucet to last, right? A little maintenance goes a long way.
- Winterize Properly: This is the #1 killer of RV faucets. When winterizing, ensure you pump antifreeze through both the hot and cold faucets until it runs pink. Water trapped in the plastic body will freeze, expand, and crack the unit.
- Clean the Aerator: RV park water is often full of calcium and sediment. Unscrew your aerator every few months to rinse out the grit.
- Travel Lock: If you have a heavy, high-arc metal faucet, consider using a rubber band or velcro strap to secure the handle during transit so it doesn’t bounce open and flood your grey tank.
FAQs: How to Replace an RV Bathroom Sink Faucet
Q: How long does it take to replace an RV sink faucet? A: For a beginner, plan on about 45 minutes to an hour. If you have done it before, it can take as little as 20 minutes.
Q: Can I use a regular home faucet in my RV? A: Yes, in most cases! As long as the hole spacing (usually 4 inches) matches and the shank diameter fits, home faucets work great. You need to ensure your RV water lines (usually 1/2″) fit the faucet’s intake.
Q: Do I need to turn off the water heater? A: Yes. It is best practice to turn off the water heater and relieve pressure from the system to prevent any accidents or hot water spurts.
Q: My RV sink doesn’t have shut-off valves. What do I do? A: Unlike homes, many RVs lack individual shut-off valves under the sink. You must turn off the main water supply (pump or city connection) to do this repair.
Replacing your RV bathroom faucet is one of those high-reward projects that makes you feel like a true master of your rig. Not only do you get rid of that annoying drip, but you also get to enjoy a bathroom that looks and functions better.