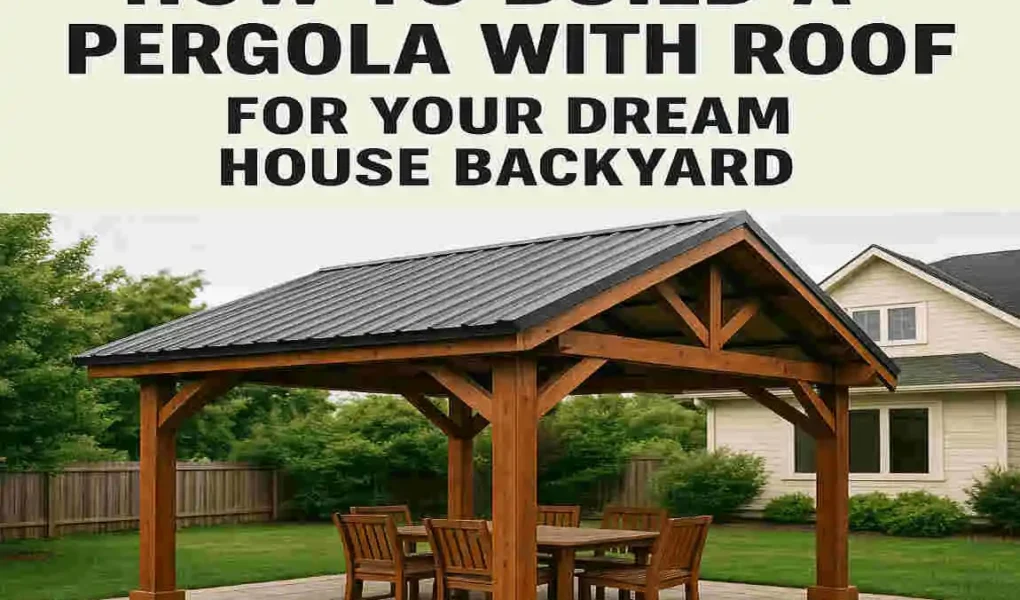
Picture this: it’s a warm summer afternoon, and you step outside into your backyard. Instead of squinting under the blazing sun or rushing indoors because of a surprise drizzle, you settle comfortably under your brand-new pergola, shaded by a stylish, weatherproof roof. Sounds fantastic, right?
Many homeowners face common challenges, such as limited outdoor shade, high professional installation costs, or a lack of inviting spaces to host friends and family. The good news? Building your own pergola with a roof is a budget-friendly project, typically costing less than $1000 for a standard 12×12 ft structure. Plus, it boosts your home’s value by 10-15%, according to Zillow.
What is a Pergola with Roof and Why Build One?
Before diving into construction, let’s clarify exactly what a pergola with a roof is. A pergola is traditionally an open-sided outdoor structure with vertical posts supporting a slatted roof that lets in sunlight and air. When you add a roof covering—like durable polycarbonate panels, fabric canopies, or solid wood or metal roofing—you get a pergola with a roof that provides extra protection from the sun and rain.
Benefits of Adding a Roof to Your Pergola
- Sun and Rain Protection: A good pergola roof can block up to 80% of UV rays, making your outdoor time safer and more comfortable.
- Aesthetic Appeal: A roof adds a polished, elegant look to your backyard, enhancing curb appeal.
- Increased Property Value: A well-built pergola can raise your home’s value and make it more attractive to buyers.
- Versatility: Use it for outdoor dining, relaxing, or as a space for plants and decor. It’s fully customizable to fit your lifestyle.
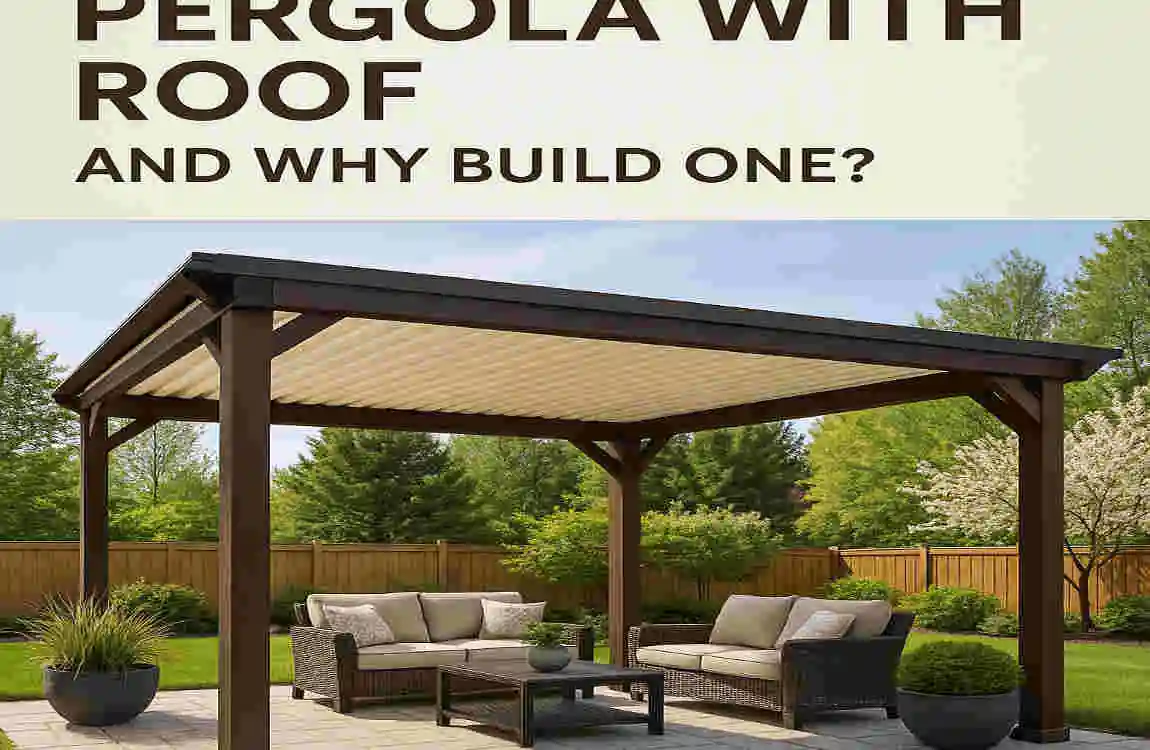
Types of Pergolas with Roofs
- Attached Pergolas: Fixed to your house, perfect for patios or decks.
- Freestanding Pergolas: Standalone structures ideal for open yards.
- Roof Styles: Choose from slatted roofs for partial shade, retractable fabric roofs for flexibility, or solid roofs for full protection.
DIY vs. Hiring a Pro
Building your own pergola can save you 50-70% in costs compared to hiring a contractor. If you’re handy, patient, and willing to learn, this project is ideal for you! Ready to explore how to build a pergola with a roof for your dream backyard? Let’s get planning.
Planning Your Pergola: Design and Measurements
Planning is crucial. A well-thought-out pergola fits your space perfectly and meets your needs. Here’s how to get started:
Assess Your Space
- Measure your backyard carefully. Typical pergola sizes range from 10×10 to 16×16 feet.
- Check local building codes and permits. Some cities require permits for structures over a certain size.
- Ensure your site is free of underground utilities by calling 811 before digging.
Design Ideas
- Use free design software like SketchUp to create a visual plan.
- Choose a style that matches your home: rustic wooden beams for a classic look or sleek metal frames for a modern vibe.
- Think about extras like built-in seating, lighting, or hanging plants.
Site Preparation
- Test the soil to ensure it drains well.
- Level the ground where the pergola will stand.
- Mark the foundation spots carefully to keep everything square.
Customization Options
- Add string lights or solar lighting.
- Plan for vines or climbing plants on the sides.
- Consider swings or hanging chairs for comfort.
Pergola Size Comparison Table
Size Coverage Cost Estimate Best For
10×10 ft Small family $500 – $800 Intimate seating
12×12 ft Medium $700 – $1200 Dining area
16×16 ft Large $1200 – $2000 Parties and events
Planning well sets you up for success. Now, let’s gather the materials and tools.
Materials and Tools Needed
Knowing exactly what you need saves time and money. Below is a detailed list for building a 12×12 ft pergola with a roof.
Materials List
- Pressure-Treated Lumber:
- Posts (4x4x10 ft): ~$20 each (6 posts recommended)
- Beams and rafters (2×8 lumber)
- Roof Materials:
- Corrugated polycarbonate sheets: $5/sq ft (durable and transparent)
- Asphalt shingles (alternative solid roof)
- Hardware:
- Lag screws, joist hangers, nails
- Concrete mix for post foundations (~$100 total)
- Finishing:
- Wood stain or paint to protect and beautify
Total Budget: $600-$ 1,500, depending on material choices.
Tools List
- Must-Have:
- Circular saw
- Power drill
- Level (laser level preferred)
- Post hole digger or auger
- Nice-to-Have:
- Miter saw
- Ladder
- Safety gear (gloves, goggles)
Eco-Friendly Tips
- Use cedar lumber for natural rot resistance.
- Consider recycled metal roofing for a sustainable roof option.
Step-by-Step Guide: How to Build a Pergola with a Roof
Ready for the hands-on part? Follow these detailed steps carefully, and you’ll have a beautiful pergola in no time.
Mark and Prep Foundation
Use stakes and string to outline your pergola’s footprint. Measure to ensure a perfect square by checking diagonals for equal length.
Next, dig 3-foot-deep holes for your posts—6 holes for a 12×12 ft pergola, spaced evenly about 12 feet on centre.
Set Posts in Concrete
Place your posts into the holes, making sure they are perfectly vertical with a level. Pour concrete mix around each post and brace them with supports.
Allow concrete to cure for 24-48 hours before proceeding.
Install Beams and Rafters
Attach double 2×8 beams horizontally at the top of posts using lag screws. Space rafters 12-16 inches apart across the beams.
Make sure everything is level and square for stability.
Build and Attach Roof
You have options here:
- Slatted wood roof: Classic look, partial shade.
- Polycarbonate sheets: Screw panels onto rafters for a waterproof, UV-protected roof.
- Shingle plywood sheathing: Solid roof with asphalt shingles for full weather protection.
Seal all edges with waterproof caulk or flashing to prevent leaks.
Add Finishing Touches
Sand all surfaces smooth. Apply stain or paint to protect wood from the elements.
Install lattice panels or train vines to climb for added privacy and greenery.
Safety Throughout
Wear gloves, goggles, and stable footwear at all times.
Double-check all levels and ensure bolts are tightened securely to avoid structural issues.
Cost Breakdown and Budget Tips
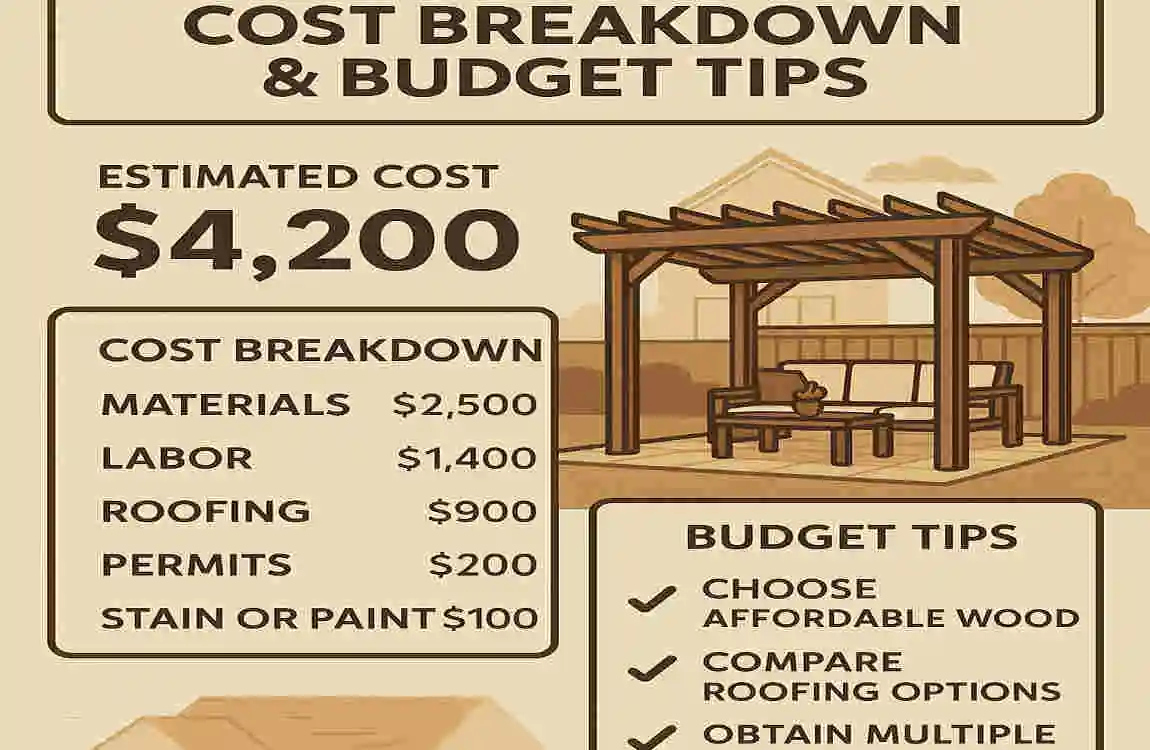
Here’s a clear budget to help you plan your expenses:
Item Quantity Unit Cost Total
Posts 6 $25 $150
Roof Panels 150 sq ft $5 $750
Hardware Lot – $100
Grand Total – – $1000
Budget Tips:
- Shop during sales or at discount lumber yards.
- Repurpose leftover wood or materials from other projects.
- Investing in quality materials means less maintenance later.
- Expect ROI in about 2 years from increased home value.
Maintenance and Enhancements for Longevity
Keep your pergola looking fresh and sturdy with a few simple steps:
- Annual Maintenance:
- Clean surfaces and remove debris.
- Reseal or restain wood every 2-3 years.
- Check and tighten hardware.
- Upgrades:
- Add a retractable roof for flexibility (~$300).
- Install solar-powered lights or string lights.
- Incorporate planters or hanging baskets.
- Weatherproofing:
- Choose UV-resistant roofing materials to last 10+ years.
- Use waterproof sealants on all roof edges.