Have you ever struggled to squeeze through a narrow bathroom doorway, especially when carrying bulky items like laundry baskets or when using a walker? Narrow doorways can be a real pain, limiting accessibility and making daily life more difficult. If you’ve been wondering how to widen a bathroom doorway without doing a full home remodel, you’re in the right place!
Widening your bathroom doorway is a smart home renovation that can give you more space, better mobility, and even boost your home’s value. Whether you’re making your home more accessible for aging family members, upgrading for a modern style, or simply making it easier to move furniture, widening the doorway is a practical project you can tackle yourself.
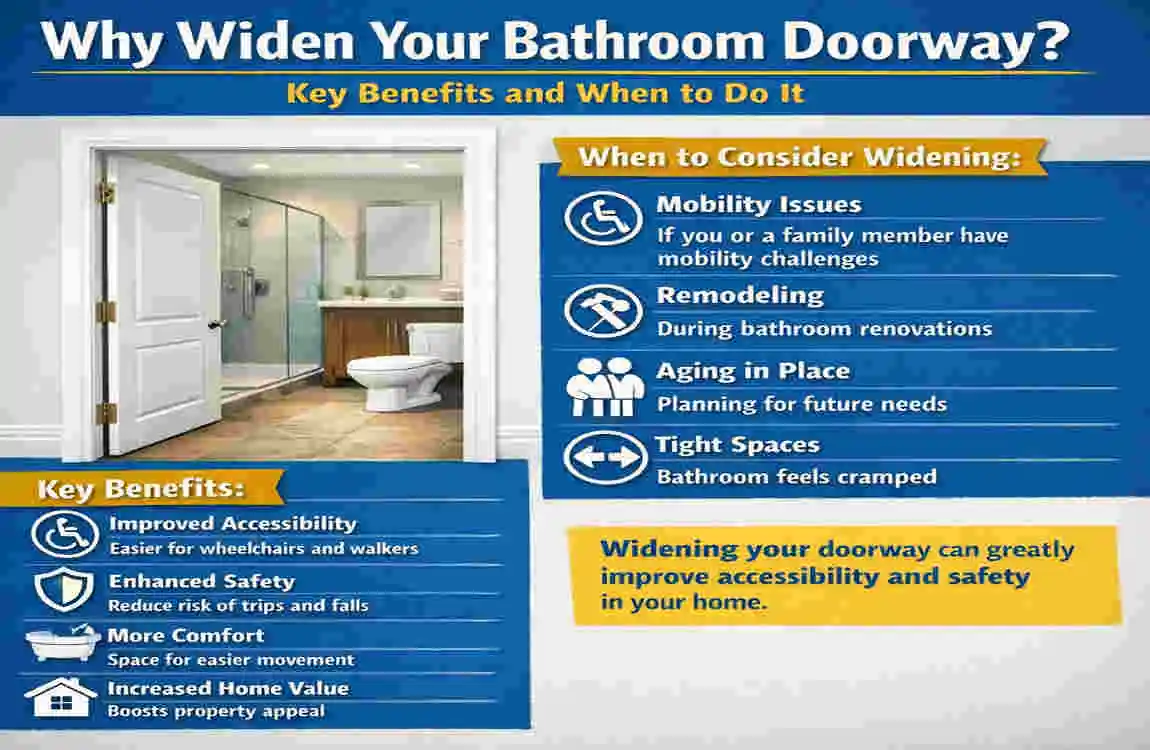
Why Widen Your Bathroom Doorway? Key Benefits and When to Do It
Benefits of Widening Bathroom Doorways
Widening a bathroom doorway can be a game-changer for your home. Here’s why:
- Enhanced Accessibility: Wider doorways (32-36 inches) comply with ADA guidelines, making it easier for wheelchairs, walkers, or anyone with mobility challenges to enter and exit comfortably.
- Easier Moves and Installations: Whether bringing in a new bathtub, moving furniture, or installing bathroom fixtures, wider doors prevent frustrating tight squeezes.
- Boost in Home Value and Style: Wider doorways modernize your home’s look and can increase resale value by 2-5% per minor renovation, according to Zillow.
Signs You Need to Widen a Bathroom Doorway
Does your bathroom doorway really need widening? Watch for these signs:
- Door widths are less than 30 inches, making access tricky.
- Family members with mobility aids or elderly parents moving in.
- Frequent bumps, scrapes, or furniture that won’t fit through easily.
Tools and Materials Needed to Widen a Bathroom Doorway
Before you begin, gather the right tools and materials. Here’s a quick overview:
Category Items Est. Cost Where to Buy
Power Tools: Circular saw, reciprocating saw, drill/driver $150–300 Home Depot, Amazon.
Hand Tools : Pry bar, hammer, level, tape measure, utility knife $50 Local hardware store
Materials : New door jamb kit, shims, 2×4 lumber, drywall patches, paint, caulk $100–200 Lumber yard, hardware
Safety Gear : Dust mask, goggles, gloves, ear protection $30 Hardware store
Preparation: Planning How to Widen a Bathroom Doorway Safely
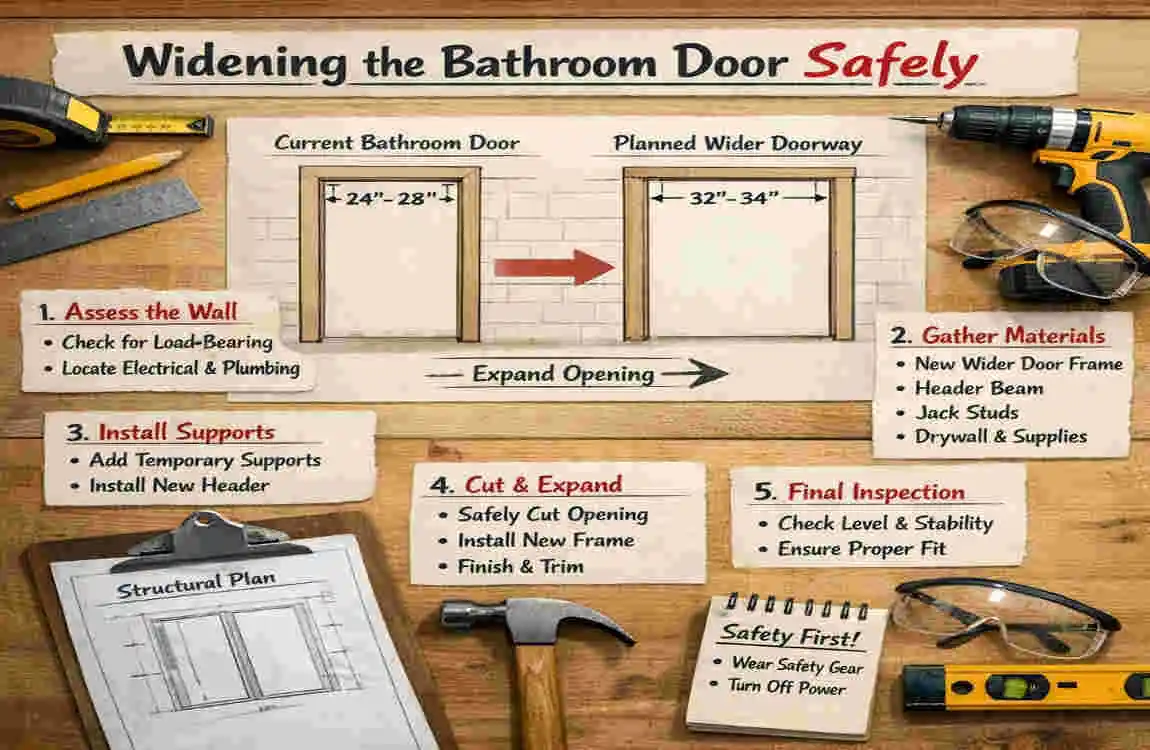
Proper planning is key to a smooth renovation. Here’s what to do before you start cutting:
Assess Your Space
- Measure Carefully: Use a tape measure to note the current doorway width, height, and wall thickness.
- Check Wall Type: Is the wall load-bearing? This is critical. If you’re unsure, consult a structural engineer or a professional. Removing studs in a load-bearing wall without support can cause serious structural issues.
- Set Your Budget and Timeline: Widening a bathroom doorway usually takes 1-2 weekends for DIYers.
Permits and Codes
- Most areas require doorways to have a minimum clear width of 32 inches for safety and accessibility.
- If you’re modifying structural framing or electrical/plumbing systems, check local building codes and obtain the necessary permits.
Safety Checklist
- Shut off power and water supplies to the bathroom to prevent accidents.
- Protect floors and nearby furniture with drop cloths.
- Work with a partner to help with heavy lifting and ensure safety.
Step-by-Step Guide: How to Widen a Bathroom Doorway
Now, let’s get to the heart of the project with a detailed step-by-step guide. Follow these carefully to successfully widen your bathroom doorway.
Remove the Existing Door and Trim
Start by unscrewing the door hinges from the frame, then carefully remove the door. Then use a pry bar to remove the casing (trim) around the door gently. To avoid damaging paint or drywall, score along the edges with a utility knife before prying.
This step clears the way to work on the jamb and wall framing.
Cut Out the Old Jamb and Drywall
Next, mark the new, wider doorway dimensions on the wall. Using a reciprocating saw, carefully cut through the drywall and studs to open up space.
Safety Tip: Secure any loose drywall before cutting to avoid falls or damage. Wear your safety goggles and dust mask!
Modify or install New Framing
With the opening cleared, add new framing to support the wider doorway. You can “sister” (attach) new 2×4 studs alongside existing ones to reinforce the wall. Use a level to ensure everything is straight and plumb.
If the wall is not load-bearing, you can temporarily support the structure with temporary braces during framing.
install the Widened Jamb and New Door
Fit the new door jamb kit into the widened opening. Use shims to adjust and make sure the jamb is square and level. Then, hang the new door by attaching hinges and adjusting as needed to ensure smooth operation.
Patch Drywall, Mud, and Finish
Cut drywall patches to fill gaps around the new jamb. Secure them in place with drywall screws. Then, apply joint compound (mud), tape seams, sand smooth, and prime/paint to match the existing wall.
Reinstall Trim and Hardware
Finally, nail the trim casing back in place around the door. Paint or stain the trim to match your decor. Reinstall door hardware such as handles, locks, and door stops.
Common Mistakes to Avoid When Widening Bathroom Doorways
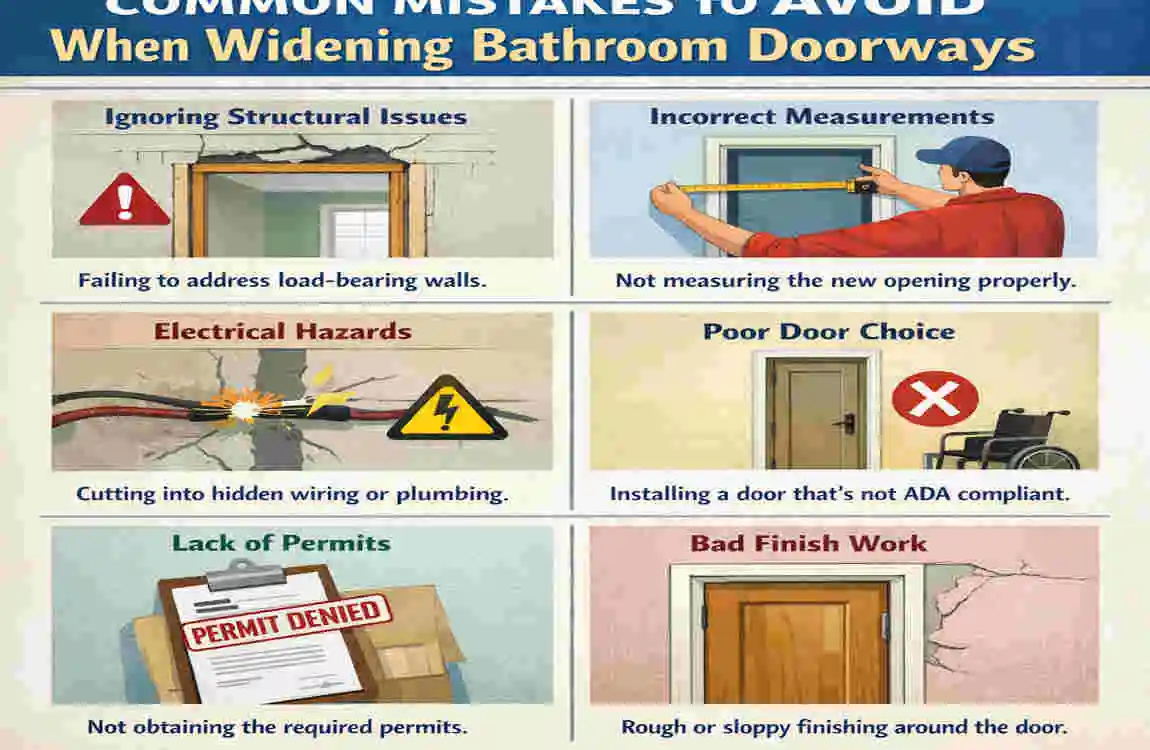
Avoid these pitfalls to save time, money, and frustration:
- Ignoring whether the wall is load-bearing — always get professional advice if unsure.
- Rushing measurements, leading to uneven doors or gaps.
- Skipping proper dust control and safety gear.
- Hastily framing, which can cause sagging or misalignment.
- Forgetting moisture barriers, especially important in bathrooms, can lead to mold.
Real Example: One DIYer saved $500 but accidentally cracked a water pipe because they forgot to shut off the water. Don’t let that be you!
Cost Breakdown: Widening a Bathroom Doorway on a Budget
Here’s a quick summary of typical costs for widening bathroom doorways:
DIY Level Total Cost Pro Cost
Basic (no framing changes) $200–400 $800–1500
Full (framing + new door) $400–800 $1500–3000
Savings Tips:
- Shop for tools and materials during sales.
- Reuse existing trim or doors if possible.
- Rent power tools instead of buying.
Pro Tips and Alternatives to Widening a Bathroom Doorway
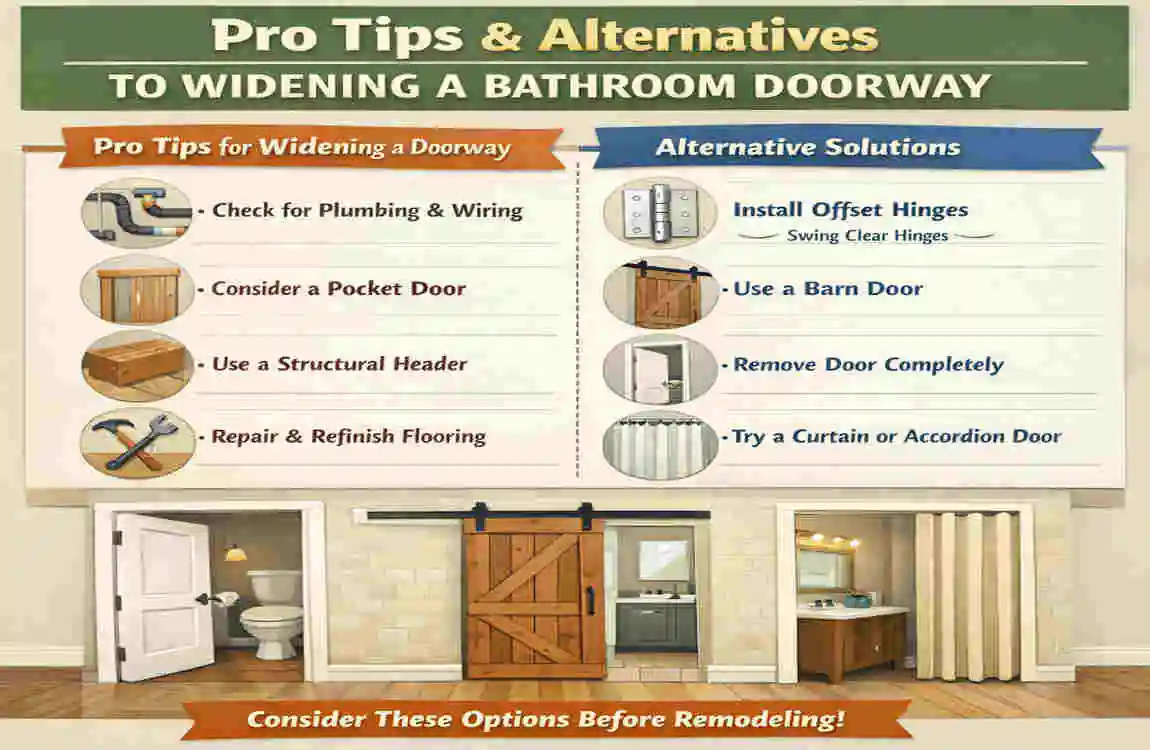
- Offset Hinges: These special hinges can add up to 1.5 inches of width without cutting the wall.
- Pocket or Barn Doors: If demo is a concern, consider installing sliding doors that don’t require a wider jamb.
- When to Call a Pro: If your doorway is on a load-bearing wall or involves plumbing/electrical, hiring a professional is safer and often required by code.
FAQs: How to Widen a Bathroom Doorway
Q: How much does it cost to widen a bathroom doorway?
A: DIY costs range from $200 to $800, depending on the scope. Professional jobs can cost $800 to $3000.
Q: Can I widen a bathroom doorway without removing the frame?
A: Yes! Using offset hinges or trimming techniques can add some width without full removal.
Q: Is widening a bathroom doorway load-bearing?
A: It depends on your wall. Check with a professional before removing studs.
Q: How long does the project take?
A: Typically 1–2 weekends for DIYers.
Q: Do I need permits?
A: Usually yes, especially if structural changes are involved.