Building a new home is one of the most exciting journeys you will ever take. Recently, there has been a massive rising demand for spacious, celebratory properties, especially following the incredible post-2025 Jubilee events. Families are looking for homes that do more than provide shelter. They want spaces designed for major milestones, grand weddings, and unforgettable anniversaries.
If you are stepping into this world, you might hear the term Jubilee home. What exactly does this mean? A Jubilee home is a luxurious, multi-room residence built specifically to host and celebrate life’s biggest moments. Often, builders will complete the core structure, plumbing, and electrical work. However, they intentionally leave the final finishing touches for you to complete.
You might wonder why builders leave these tasks to you. The answer is simple. Taking on DIY projects allows you to enjoy massive cost savings. It also gives you the ultimate freedom to personalize your space. Semi-custom builds offer the perfect balance. You get the safety and reliability of professional construction, paired with the fun and creativity of adding your own personal flair.
Why Customers Love DIY in Jubilee Home Builds

Taking a hands-on approach to finishing your Jubilee home comes with incredible benefits. When you roll up your sleeves, you instantly save a significant amount of money. In most cases, you can save 20 to 30 percent on labor costs simply by doing the finishing work yourself. You can put those savings directly toward buying better materials or beautiful furniture.
Furthermore, DIY allows you to customize your home to fit your cultural and aesthetic preferences. For example, you can incorporate intricate jali work, traditional patterns, and warm colors that reflect Pakistani aesthetics. Every brushstroke and every nail you drive helps build equity in your property. You are literally adding value to your home with your own two hands.
You do not need to be a master carpenter to get started. You need a beginner-friendly list of tools. A basic power drill, a set of quality paint rollers, a measuring tape, and some reliable sealants will take you a very long way.
Of course, safety always comes first. You should always wear protective eyewear and gloves when handling tools. While painting and building shelves are perfect DIY tasks, you must know when to step back. Always hire professional contractors for complex electrical wiring or major plumbing adjustments.
Kitchen & Dining: Core Jubilee Entertaining Spaces
The kitchen is the beating heart of any home. In a Jubilee home, the kitchen and dining areas become the core spaces for grand entertaining. Let’s look at how you can elevate these rooms.
Custom Open Shelving for Spice Jars and Dinnerware
When you host grand iftar dinners or festive mehndi gatherings, you want your beautiful serveware on full display. Custom open shelving fits perfectly into Jubilee homes because it combines practicality with a highly visual appeal. Instead of hiding your stunning dishes behind closed cabinet doors, you can let them shine.
Why It Fits Jubilee Homes: Open shelves create a welcoming, abundant atmosphere. Your guests will immediately feel at home when they see your colorful spice jars and intricate dinnerware beautifully arranged. It is a fantastic DIY Jubilee kitchen upgrade.
Materials You Will Need: You can tackle this project with a very reasonable budget of around $50. You will need reclaimed wood planks, heavy-duty metal brackets, wall anchors, and wood stain.
Step-by-Step Instructions: First, grab your measuring tape and mark exactly where you want your shelves to sit. Make sure to use a level so your dishes do not slide off! Next, drill holes into the wall and insert your wall anchors. Secure the metal brackets tightly to the wall.
Once your brackets are up, it is time to prepare the wood. Sand down your reclaimed wood to remove any rough splinters. Apply a rich, dark stain to give the wood a luxurious, antique finish. Finally, place the wood on the brackets and secure them with screws.
These DIY kitchen shelves for Jubilee home owners will instantly make your cooking space feel warm, open, and ready for a celebration.
Painted Backsplash with Metallic Accents
If you want a high-end look without the massive price tag of custom masonry, a painted backsplash with metallic accents is your best friend. This trendy upgrade serves as a highly affordable alternative to traditional ceramic or marble tiles.
Why It Fits Jubilee Homes: Jubilee homes are all about luxury and celebration. Adding a touch of gold or silver to your kitchen walls catches the light beautifully. It creates a rich, marble-effect aesthetic that looks incredibly expensive.
Materials You Will Need: You will need high-quality peel-and-stick backsplash tiles, a small detail brush, metallic gold or copper paint, and a clear waterproof sealant.
Step-by-Step Instructions: Start by thoroughly cleaning your kitchen walls. Any grease or dust will prevent the tiles from sticking. Next, carefully peel the backing off your tiles and press them firmly against the wall. Take your time to align the edges perfectly.
Once the tiles are on the wall, take your small detail brush and carefully paint the grout lines or specific tile patterns with your metallic paint. This little touch of gold transforms standard tiles into a luxury feature.
Pro Tip: Always apply a clear, moisture-resistant sealant over your finished work. Kitchens get hot and steamy, and the sealant will protect your beautiful metallic accents from peeling.
When you look at a before-after gallery of this project, you will be amazed at the transformation!
DIY Herb Garden Window Boxes
Nothing elevates a home-cooked feast quite like fresh, aromatic herbs. Building your own herb garden window boxes adds a vibrant, natural element to your kitchen while providing you with delicious ingredients for your meals.
Why It Fits Jubilee Homes: Hosting massive dinners requires a lot of cooking. Having fresh herbs right at your fingertips is the ultimate Jubilee twist. It brings life into the kitchen and shows your guests that you care about the finest details of their meal.
Materials You Will Need: You will need thick PVC pipes (or wooden planter boxes if you prefer), strong mounting brackets, potting soil, and seeds for local plants like basil, mint, and coriander.
Step-by-Step Instructions: If you use PVC pipes, cut them to the width of your kitchen window. Cut a wide slit down the top of the pipe to create an opening for the plants. Drill small drainage holes at the bottom so your plants do not drown.
Next, install your mounting brackets securely right outside your kitchen window. Place the PVC pipes or wooden boxes onto the brackets. Fill the boxes with rich, nutrient-dense potting soil.
Finally, plant your fresh local basil and mint. Water them gently. Within a few weeks, you will have a lush, green window box that smells absolutely divine and makes your Jubilee cooking experiences even better!
Living & Family Rooms: Heart of Jubilee Celebrations
Your living room is where your family gathers, laughs, and creates memories. It is the absolute heart of all Jubilee celebrations. These next DIY projects will help you create a cozy yet majestic space.
Wall-Mounted Floating TV Console
Bulky entertainment centers can make a room feel cramped and cluttered. Building a wall-mounted floating TV console opens up your floor space and gives your living room a sleek, modern look.
Why It Fits Jubilee Homes: A floating console looks incredibly elegant. You can easily personalize it by adding smart lighting to match the mood of your gatherings. You can add warm LED strips underneath the console to create amazing Diwali vibes or festive Eid lighting.
Materials You Will Need: You will need thick plywood, heavy-duty L-brackets, wood screws, wood paint or stain, and smart LED light strips.
Step-by-Step Instructions: Start by measuring the area under your wall-mounted TV. Cut your plywood into long, rectangular pieces to form the top, bottom, and sides of your console box. Use wood glue and screws to assemble the box securely.
Next, paint or stain the console to match your living room decor. Once the paint dries, find the wall studs. This is crucial because the console will be heavy. Attach your heavy-duty L-brackets to the studs, and then mount your wooden console onto the brackets.
Finally, stick your LED strips to the back and bottom edges of the console. This floating shelves DIY for Jubilee living rooms project will completely modernize your entertainment space!
No-Sew Curtain Panels with Tassels
High ceilings are a signature feature in Jubilee homes, but custom long curtains can cost an absolute fortune. You can achieve that luxurious, towering look by making your own no-sew curtain panels.
Why It Fits Jubilee Homes: Grand windows deserve grand treatments. By selecting fabrics with rich boho-Pakistani prints, you can elevate your high ceilings and bring a massive pop of culture and color into the room. It is a very quick win for your interior design.
Materials You Will Need: You will need yards of your favorite patterned fabric, iron-on hemming tape, an iron, fabric glue, and decorative tassels.
Step-by-Step Instructions: First, measure the height from your curtain rod all the way to the floor. Add a few extra inches so the fabric can elegantly pool at the bottom. Cut your fabric to this length.
Instead of sewing the edges, fold the fabric over and place a strip of iron-on hemming tape inside the fold. Run a hot iron over the edge. The heat melts the tape and creates a perfect, crisp hem without a single stitch!
To add that festive Jubilee touch, use strong fabric glue to attach vibrant decorative tassels along the inner edges of the curtains. When you hang them up, they will look like expensive, custom-made drapery.
Upcycled Coffee Table with Resin Top
Your coffee table sits right in the middle of your seating area, making it a natural focal point. Upcycling an old table and adding a poured resin top will give you a breathtaking, one-of-a-kind piece of furniture.
Why It Fits Jubilee Homes: A resin table offers a highly luxe look. The best part about resin is that you can embed personal items into it. You can incorporate Jubilee mementos, vintage coins, or beautiful crushed glass to tell a story through your furniture.
Materials You Will Need: An old wooden coffee table, sandpaper, wood paint, a two-part clear epoxy resin kit, a mixing bucket, and your chosen decorative mementos.
Step-by-Step Instructions: Begin by taking your old coffee table and sanding it down completely. You want a smooth, clean surface. Paint the legs and the base of the table in a rich color, like deep navy or gold.
Once the base is dry, arrange your coins or mementos flat on the tabletop. Now, carefully mix your two-part epoxy resin according to the package directions. Pour the liquid resin slowly over the top of the table, ensuring it covers all your mementos evenly.
Use a heat gun or a lighter to pop any air bubbles that rise to the surface quickly. Let the table cure undisturbed for at least 48 hours. The result is a glass-like, indestructible surface that your guests will not stop talking about!
Bedrooms & Guest Suites: Restful Jubilee Retreats
After days of celebrating, your family and guests need a peaceful place to rest. Your bedrooms and guest suites should feel like private, luxurious retreats. Here is how you can customize them.
Headboard from Wooden Pallets
A headboard anchors the bedroom and gives the bed a finished, intentional look. Building a headboard out of wooden pallets adds wonderful rustic charm and incredible coziness to your master suites.
Why It Fits Jubilee Homes: Jubilee homes balance grand luxury with comfortable, lived-in warmth. A wooden headboard grounds the room. Plus, you can stencil intricate motifs, like traditional paisley or floral patterns, onto the wood to match your bedding.
Materials You Will Need: Wooden pallets, a crowbar, a heavy-duty sander, wood screws, wood stain, and decorative painting stencils.
Step-by-Step Instructions: Finding materials is easy and highly budget-friendly. You can often find free or very cheap wooden pallets from local Lahore markets or hardware stores. Use a crowbar to dismantle the pallets into individual planks carefully.
You must sand these planks very thoroughly. You do not want any splinters near your bed! Once the wood is smooth, stain it to your desired shade.
Line the planks up side-by-side and secure them together by screwing two vertical planks across the back. Before mounting the headboard to the wall, place your stencil over the wood and dab white or gold paint over the cutouts. This creates a beautifully customized paisley design that looks incredibly chic.
Built-In Closet Dividers with Fabric Bins
Jubilee celebrations usually mean massive wardrobes. You will likely have heavy, heavily embroidered wedding attire that needs careful storage. Standard closets do not cut it. You need built-in closet dividers to keep everything organized.
Why It Fits Jubilee Homes: Protecting your expensive, festive clothing is essential. This organizer project ensures that your guest suites and master bedrooms remain tidy and your beautiful clothes stay wrinkle-free.
Materials You Will Need: Plywood or MDF boards, shelf brackets, wire baskets, and soft fabric covers.
Step-by-Step Instructions: Measure the inside of your closet. Cut your plywood boards to act as vertical and horizontal dividers. Install the brackets into the walls of the closet and slide your wooden dividers into place. This instantly creates multiple cubbies inside a previously empty space.
To store delicate items, slide wire baskets into the cubbies. To ensure your embroidered wedding attire does not snag on the wire, line the inside of the baskets with soft, customized fabric covers. This creates a high-end boutique feel right inside your bedroom closet.
Outdoor & Patio: Jubilee Home Exteriors
The exterior of your Jubilee home is the first thing your guests will see. Creating an inviting outdoor space sets the tone for the celebrations that happen inside.
Vertical Garden Trellis for Entryway
Curb appeal matters deeply. A vertical garden trellis frames your front door with lush, beautiful greenery, making your home look like a paradise from the moment guests arrive.
Why It Fits Jubilee Homes: A welcoming facade is crucial for a celebratory home. Growing climbing jasmine on your trellis is a brilliant idea for Pakistani gardens. The sweet, rich scent of jasmine will greet your guests and instantly put them in a festive mood.
Materials You Will Need: A welded metal frame or wooden lattice, wall hooks, climbing plant pots, and a simple drip irrigation hose.
Step-by-Step Instructions: If you are handy with tools, you can build a wooden frame using thin timber strips arranged in a diamond pattern. Alternatively, you can purchase a pre-welded metal frame. Securely mount the frame to the exterior wall next to your entryway using strong wall hooks.
Plant your climbing jasmine in large, decorative pots at the base of the trellis. Gently weave the vines through the bottom holes of the frame.
Pro Tip: To keep your plants thriving during hot summers, install a drip irrigation hack. Run a thin, perforated hose along the top of the pots and connect it to your outdoor tap. When you turn the water on slightly, it will slowly drip and keep your jasmine perfectly hydrated without any daily effort from you!
Pallet Patio Furniture Set
When you host Jubilee events, you need plenty of seating. Buying outdoor furniture for large crowds is incredibly expensive. However, you can build a massive, comfortable patio set using pallets for a fraction of the cost.
Why It Fits Jubilee Homes: You need seating for 10 or more guests during outdoor barbecues or evening tea sessions. A pallet patio set provides ample, sturdy seating that you can configure in any shape you want.
Materials You Will Need: Several sturdy wooden pallets, an electric sander, exterior deck paint, outdoor screws, thick foam, and local textile fabric for cushions.
Step-by-Step Instructions: Gather your pallets and sand them down aggressively so they are smooth to the touch. Paint them with a weather-resistant exterior deck paint to protect them from rain and sun.
Stack two pallets on top of each other and screw them together to create the base of the seat. Take a third pallet and attach it to the back at a slight angle to create a comfortable backrest. Repeat this process until you have a massive L-shaped sectional sofa.
To make it comfortable, cut thick foam blocks to fit the seats. Wrap the foam in vibrant, beautiful local textiles to create custom cushions. Throw some extra pillows on top, and you have a massive, luxury outdoor seating area!
Utility & Finishing Touches
We often overlook the utility spaces, but these final touches are what truly make a house feel like a functioning, well-designed home.
Custom Pegboard Wall in Laundry Nook
Doing laundry doesn’t have to be a miserable chore. By installing a custom pegboard wall in your laundry nook, you can keep the space highly organized and visually pleasing.
Why It Fits Jubilee Homes: A Jubilee home requires constant upkeep, especially after hosting events. A pegboard is highly practical. It allows you to hang your tools, ironing boards, and linens neatly, keeping the floor completely clear.
Materials You Will Need: A large wooden pegboard panel, wooden spacer blocks, wall screws, and assorted peg hooks.
Step-by-Step Instructions: First, measure the blank wall in your laundry area and cut your pegboard to fit. You cannot screw a pegboard directly flat against the wall, because the hooks need space to slide in behind the board.
To solve this, drill small wooden spacer blocks into the wall studs first. Then, place the pegboard over the blocks and screw it securely into place.
Paint the pegboard a bright, cheerful color like mint green or sky blue. Insert your hooks and start hanging up your dustpans, brushes, and linen bags. These laundry DIY projects for new Jubilee homes make your chores so much easier to manage.
Hand-Painted Tile Floor Rugs
Entryways see a lot of foot traffic. If your builder left you with basic, boring tiles in the foyer, you do not need to rip them up. You can create a stunning visual statement by hand-painting a faux floor rug directly onto the tiles.
Why It Fits Jubilee Homes: An entryway statement piece sets the mood for your home. Real rugs can get dirty quickly when dozens of guests walk in. A painted floor rug offers the beautiful aesthetic of a traditional carpet but is infinitely easier to mop and clean.
Materials You Will Need: Heavy-duty floor paint, a large geometric or floral floor stencil, painter’s tape, a foam roller, and a polyurethane floor sealer.
Step-by-Step Instructions: Clean your tile floor thoroughly. Use painter’s tape to outline a large rectangle on the floor—this will be the “edge” of your faux rug.
Paint the inside of the rectangle with a solid base color and let it dry. Next, tape your large stencil onto the dried base coat. Use your foam roller to apply a contrasting paint color over the stencil gently. Carefully lift the stencil, line it up with the next section, and repeat until the entire rectangle is covered in the pattern.
Once the paint is completely dry, apply two coats of clear polyurethane floor sealer. This locks the design in place and prevents foot traffic from scratching your beautiful new entryway statement piece!
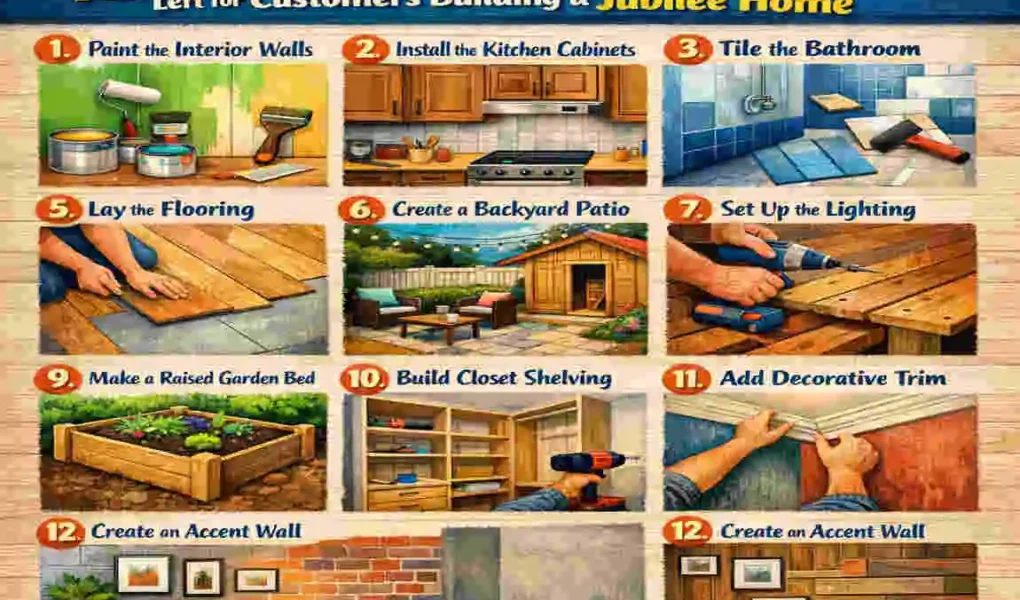
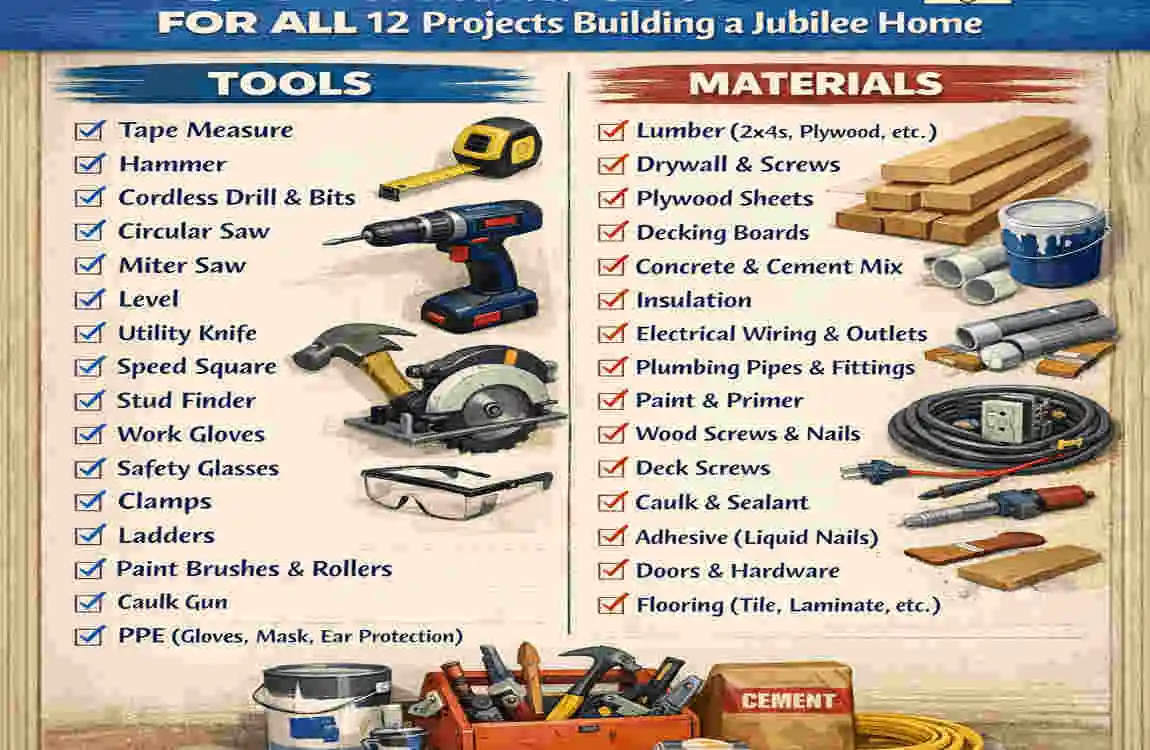
Tools & Materials Shopping List for All 12 Projects
To make your DIY journey as smooth as possible, we have compiled a quick shopping list. You do not need to break the bank. In fact, if you source smartly from local hardware stores or places like the famous Anarkali Bazaar in Lahore, your total materials cost can easily stay under your budget.
Here is a handy table breaking down the essential tools and where to find them:
Item / Material Primary Use Local Sourcing / Cost Estimate
Power Drill & Screws Hanging shelves, building consoles Local hardware store (One-time investment)
Reclaimed Wood / Pallets Headboards, outdoor furniture, shelves Timber markets, builder scraps (Often free or <PKR 2000)
Peel-and-Stick Tiles Kitchen backsplash upgrades Home decor shops, online vendors (Varies by size)
Epoxy Resin Kit Upcycled coffee table top Craft and hardware supply stores (Moderate cost)
Fabric & Tassels Curtains, closet bins, cushions Anarkali Bazaar, local textile shops (Highly budget-friendly)
Paints, Stains & Sealants Wood finishes, painted floor rugs Paint supply shops (Buy in bulk for <PKR 5000 total)
Eco-Tip: Before you go shopping, walk around your Jubilee home construction site. You can easily reuse builder scraps! Leftover plywood can become your closet dividers, and extra PVC pipes make perfect herb planters.
Common Mistakes to Avoid in Jubilee Home DIYs
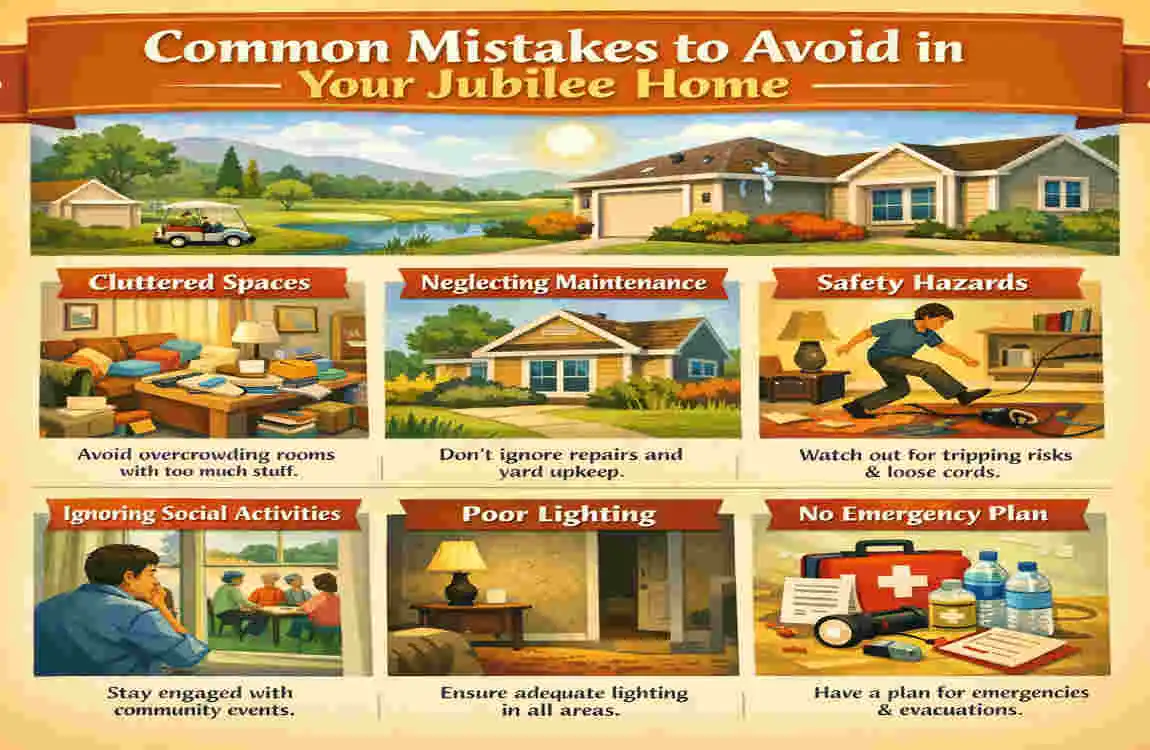
While DIY projects are fun, they can easily go wrong if you are not careful. Avoid these common pitfalls to ensure your projects look professional:
- Overlooking Measurements: The old saying “measure twice, cut once” exists for a reason. Never guess the width of your windows or the height of your shelves. Always use a tape measure and a level.
- Ignoring the Climate: If you live in the humid Punjab climate, moisture is your enemy. Poor sealing on your kitchen backsplash or outdoor furniture will cause peeling and rotting. Always use high-quality waterproof sealants on wood and painted surfaces.
- Rushing the Prep Work: Sanding wood and cleaning walls before painting might feel boring, but it is the most important step. Paint will not stick to a dusty wall, and you cannot sleep comfortably near a splintered pallet headboard.
- Taking on Danger: Never attempt to do your own major electrical wiring or plumbing if you are not certified. Always leave the hazardous work to the professionals.
Frequently Asked Questions (FAQs)
What DIY projects are left for Jubilee home customers? Customers usually take on aesthetic finishing touches like building custom shelving, painting backsplashes, assembling outdoor pallet furniture, and installing decorative curtains.
Are Jubilee home DIY projects actually cost-effective? Yes! By doing the finishing work yourself, you can easily save 20% to 30% on labor costs, allowing you to invest in better quality materials.
Do I need professional tools to complete these projects? No, most of the projects listed here only require basic hand tools, a power drill, measuring tape, and paintbrushes.
How do I protect my outdoor DIY furniture in extreme weather? Always sand your wood thoroughly and apply multiple coats of weather-resistant exterior deck paint and a high-quality waterproof sealant.
Can I use leftover construction materials for my DIYs? Absolutely. Reusing builder scraps like PVC pipes for planters or leftover plywood for closet dividers is an excellent, eco-friendly way to save money.