If you have a sloped yard or a basement entry that doesn’t quite sit flush with your landscaping, you know the struggle of clunky, ill-fitting basement doors. These bulky doors often cause issues like water pooling, difficulty accessing the basement, and even safety hazards. But what if you could custom-build sloped basement doors that perfectly match your yard’s angle and improve both functionality and curb appeal?
Did you know that over 40% of U.S. homes have basements? According to FEMA, properly designed sloped basement doors can help prevent flooding by diverting water away from the entry. Plus, building your own doors can save you $500 to $1500 compared to hiring a contractor.
Why Build Sloped Basement Doors? Benefits for Your Home

If you’ve ever struggled with a basement door that feels like it was made for flat ground, you’ll appreciate why building sloped basement doors is a smart move—especially if your yard slopes between 15 and 45 degrees.
What Makes Sloped Basement Doors Ideal?
- Improved Drainage and Flood Protection
- Sloped basement doors direct rainwater and melting snow away from your basement entry. This reduces the risk of water pooling and flooding, a common problem with flat bulkhead doors.
- Seamless Yard Integration
- These doors sit flush with your sloped terrain, eliminating tripping hazards and creating a cleaner look that blends into your yard’s natural shape.
- Energy Efficiency
- Many DIY sloped doors incorporate insulation, helping reduce heat loss in basements. This can save 10-15% on your utility bills during cold seasons.
- Cost-Effective DIY Solution
- Building your own sloped basement doors typically costs between $200 and $600—much less than the $2000+ you might pay a pro.
Quick Comparison: DIY Sloped Doors vs. Standard Bulkheads
Feature DIY Sloped Doors Standard Bulkhead Doors
Cost $200 – $600 $1000+
Slope Fit Perfect (custom) Poor fit for slopes
Durability High (with quality materials) Moderate
Tools and Materials: Everything You Need to Build Sloped Basement Doors
Before diving into construction, let’s get you set up with the right tools and materials. Having everything ready will make your project smoother and faster.
Category Items Why Needed Est. Cost
Tools: Circular saw, drill, level, jigsaw, clamps, tape measure. Precision cuts and assembly ~$100 (basic set)
Materials: Pressure-treated 2×6 lumber (8 sheets), 3/4″ exterior plywood, galvanized hinges, weatherstripping, exterior screws, and gravel/sand. Weatherproof, durable, slope match $300 – $500
Optional Polyurethane sealant, insulation foam, and hydraulic assist hinges. Longevity, ease of use ~$100
Safety tip: Always wear gloves and eye protection when cutting or drilling.
If you’re new to DIY projects, expect to spend about 10-15 hours total for this build.
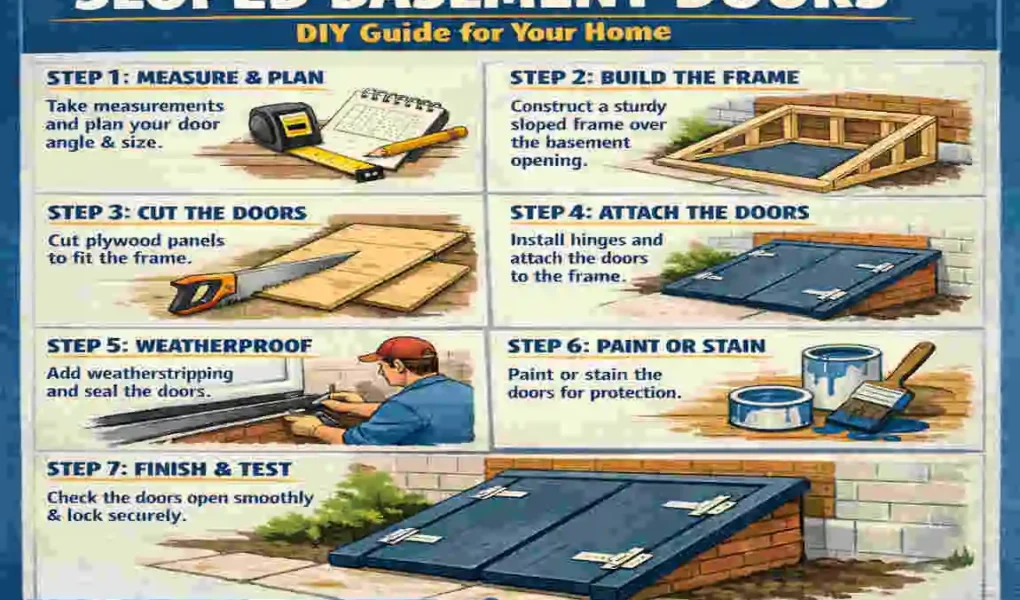
Step-by-Step Guide: How to Build Sloped Basement Doors
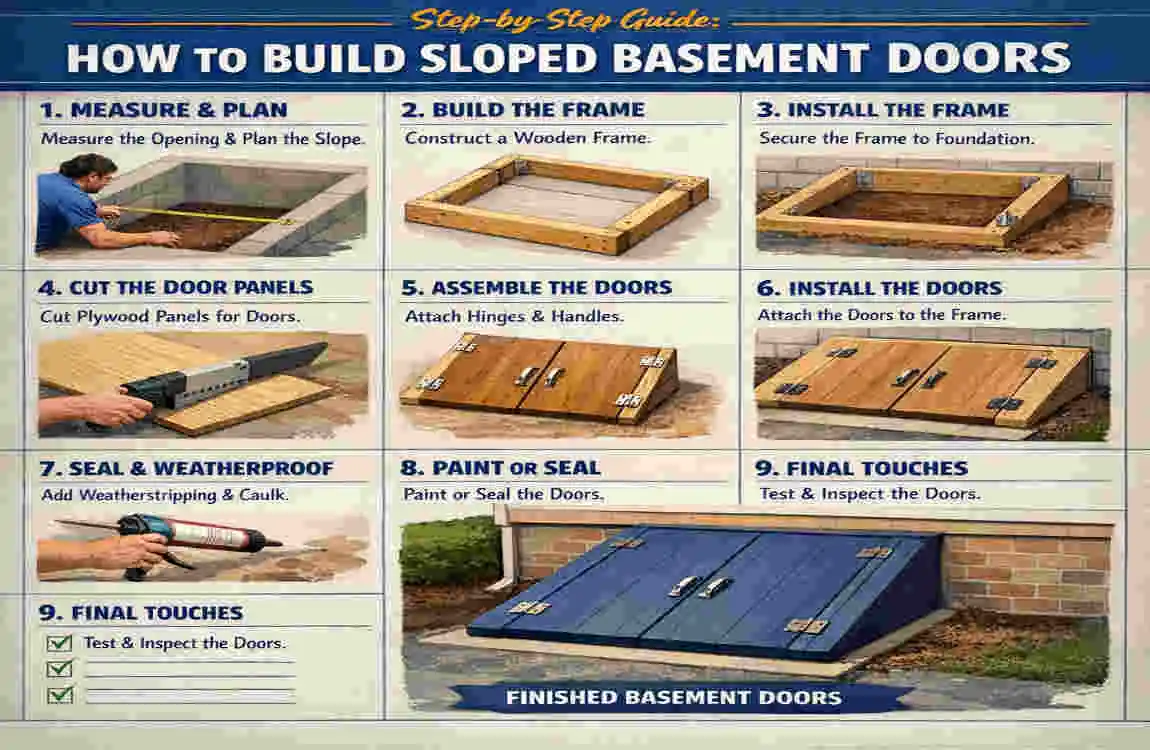
This is the heart of your DIY project. Follow these steps carefully for a solid, custom-fit sloped basement door.
Measure and plan Your Sloped Basement Door Project
Accurate measurement is the foundation of success.
- Measure the width and height of your basement door opening.
- Use a digital inclinometer or smartphone app to find the exact slope angle of your yard. Typically, basement doors fit slopes between 15° and 45°.
- Sketch the door frame on paper, clearly marking the slope angle.
The angle (\theta) can be calculated using this formula: [ \theta = \tan^{-1}\left(\frac{\text{rise}}{\text{run}}\right) ]
Where “rise” is the vertical height difference and “run” is the horizontal distance.
Build the Frame for Sloped Basement Doors
Your frame is the skeleton of the door—strong and precise cuts are crucial.
- Cut two 6-foot side pieces from pressure-treated 2×6 lumber.
- Calculate the angle (\theta) and cut cross beams at this miter on a miter saw.
- Assemble the frame by screwing the pieces together with 3-inch lag screws.
Visual Aid: Imagine the frame as a rectangle with the top edge cut at your slope angle, ensuring the door sits flush with the ground.
Construct the Door Panels
Now, let’s create the actual door panels.
- Cut two plywood panels to fit each half of the frame.
- Attach plywood to the frame using exterior screws spaced about 6 inches apart.
- Add diagonal braces from corner to corner inside each panel to strengthen the door, especially important if you expect snow loads over 100 lbs.
- Apply weather stripping around edges to seal out moisture and drafts.
install Hinges and Hardware
Your doors should swing open and close smoothly.
- Attach heavy-duty galvanized hinges—three per door panel is standard.
- Test the swing and alignment frequently as you install.
- For easier handling, consider hydraulic assist hinges to reduce effort when opening heavy doors.
Common error: Misaligned hinges can cause the doors to bind or sag. Use shims to precisely adjust hinge placement.
Mount Doors and Finish Your Sloped Basement Build
This is the final assembly.
- Secure the door frame to the concrete foundation using expansion bolts.
- Seal all joints and edges with polyurethane sealant to prevent water infiltration.
- Create a gravel ramp leading up to the doors to ensure proper drainage away from the basement.
Test your doors for levelness and watertightness by spraying water around the edges.
Common Mistakes to Avoid When Building Sloped Basement Doors
DIY projects are rewarding, but even pros slip up. Here are pitfalls to watch out for:
- Ignoring slope measurements — This leads to gaps and a poor fit.
- Using cheap or untreated wood — Expect rotting within 2 years.
- Skipping insulation or weatherstripping — Causes cold drafts and mold risk.
- Poor drainage planning — Flooding under the door is common without gravel ramps.
Maintenance and Upgrades for Long-Lasting Sloped Basement Doors
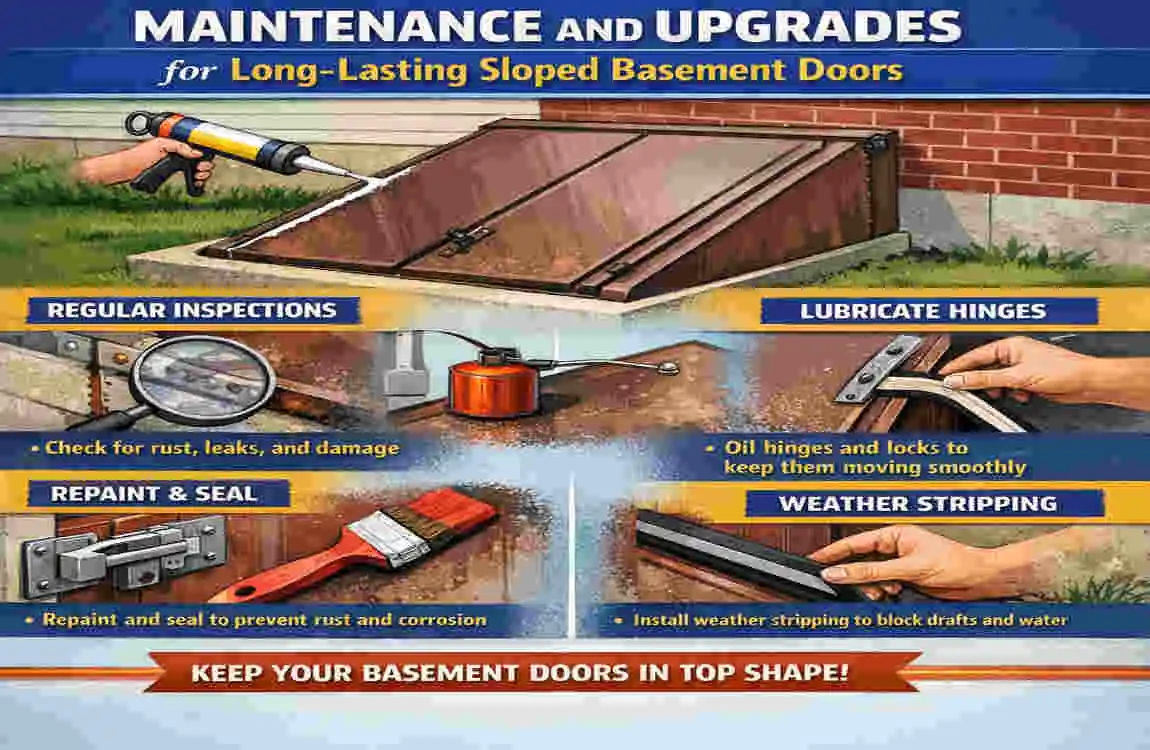
Keep your doors in top shape with regular care.
- Annually reapply polyurethane sealant to protect wood.
- Lubricate hinges with silicone spray for smooth operation.
- Upgrade with LED lighting for better nighttime access.
- Consider smart locks for added security and convenience.
With proper maintenance, your doors can last 15-20 years or more.
Cost Breakdown: Budget to Build Sloped Basement Doors DIY
Here’s an overview of typical costs for your DIY project:
Item Low-End Cost High-End Cost Average Cost
Materials $200 $400 $300
Tools (rent/buy) $50 $200 $100
Grand Total $250 $600 $400
Compared to professional installs costing $2000+, this DIY approach is budget-friendly.
FAQ: How to Build Sloped Basement Doors
How long does it take to build sloped basement doors?
Typically 1-2 weekends, depending on experience.
What wood is best for sloped basement doors?
Pressure-treated cedar is recommended for durability and decay resistance.
Can beginners build sloped basement doors?
Absolutely! This guide breaks down each step clearly.
How do I build sloped basement doors for very steep slopes?
Use steel reinforcements and stronger braces for extra support.
Are hydraulic hinges necessary?
Not required, but highly recommended for ease of use with heavy doors.