Tired of waking up and staring at the exact same, outdated bedroom furniture every single morning? We have all been there. You walk into your room, and instead of feeling relaxed, you feel bored. The dressers look tired, the headboard is completely out of style, and the whole space feels flat.
You might think the only solution is to throw everything out and buy brand-new pieces. But let us be honest, rising furniture costs can make a room makeover feel completely out of reach. Spending thousands of dollars on a new bedroom set is not an option for everyone. That is exactly where the magic of a little do-it-yourself energy comes in! Learning how to update bedroom furniture on a budget can completely transform your space without breaking the bank.
By using a few clever tricks, you can give your old, worn-out items a stunning house refresh. You do not need to be a professional carpenter or have a garage full of expensive power tools. The best DIY bedroom furniture hacks are simple, beginner-friendly, and incredibly affordable.
Why Update Your Bedroom Furniture on a Budget?
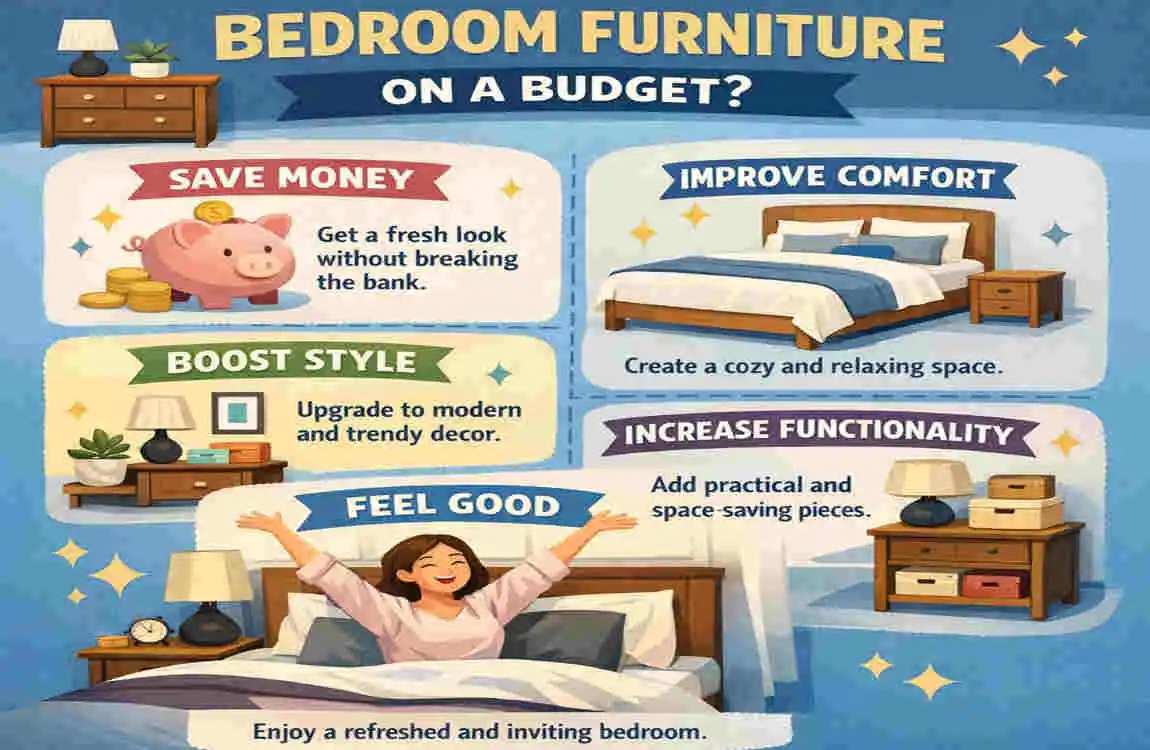
You might be wondering why you should spend your Saturday painting a dresser instead of just dealing with the old one. The truth is, your bedroom is your ultimate sanctuary. When you refresh bedroom decor, you are doing much more than just making things look pretty.
First, improving your bedroom environment directly boosts your sleep quality. When your room feels calm, stylish, and put-together, your brain can actually relax. Waking up in a beautiful space gives your mood a massive lift right at the start of the day.
Second, there is a real financial benefit. If you live in a booming real estate market—whether you are in a modern apartment in New York or looking to boost the resale value of Lahore homes—updated, stylish interiors make a huge difference. A well-staged bedroom shows potential buyers that the house is cared for.
Finally, a recent 2025 home design survey showed that a massive 68% of homeowners prioritize bedroom updates that cost under $200. People are realizing that affordable ways to update bedroom furniture yield the highest satisfaction for the lowest cost.
Here is a quick breakdown of what you can expect from different budget-friendly bedroom upgrades:
Update Method, Estimated Cost Range, Time Needed, Visual Impact Level
DIY Paint Job $10 – $30 1 to 2 hours Very High
Hardware Swap $5 – $20 30 minutes Medium
Reupholstery $20 – $50 2 to 3 hours High
Adding New Legs $15 – $40 1 hour Medium to High
Drawer Decoupage $5 – $15 1 hour Medium
As you can see, you do not need to spend a fortune or take a week off work to make a massive change!
Materials You Will Need for All Hacks
Before we jump into the specific hacks, let us gather our supplies. Having everything ready before you start makes the whole process smooth and entirely stress-free. You will not need all of these for every single project, but this is a great master list for a complete bedroom furniture makeover.
Your Essential Shopping List:
- Medium-grit and fine-grit sandpaper
- A good quality primer (this helps the paint stick)
- Your chosen paint colors
- A few different sizes of paintbrushes and a small foam roller
- New decorative knobs or handles
- A piece of beautiful fabric and some foam padding
- Basic hand tools (a screwdriver, a hammer, and maybe a drill)
- Craft glue or Mod Podge
- A heavy-duty staple gun
Budget Shopping Tips: You can find these items almost anywhere! If you want to keep costs super low, check out local hardware stores instead of big-name craft shops. If you are reading this from Pakistan, local markets like Anarkali Bazaar are fantastic for cheap fabrics, while online platforms like Daraz are perfect for finding hardware and tools delivered right to your door. You can easily build a total starter kit for under PKR 5,000 (or about $20).
Safety First: Always remember to work in a space with lots of fresh air, especially when painting. Wear a simple dust mask when sanding, and put down some old newspapers to protect your floors.
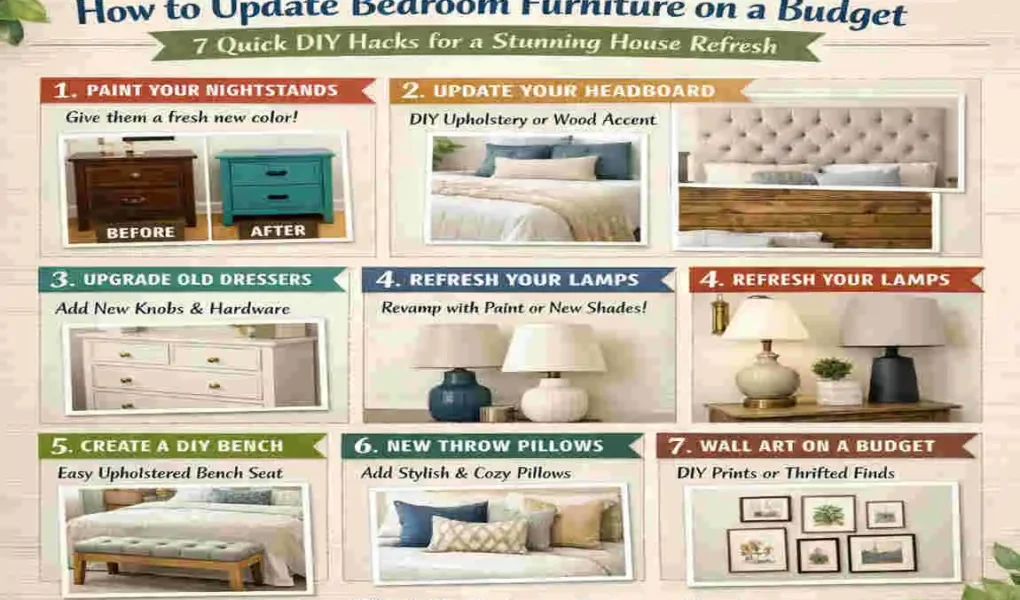
7 Quick DIY Hacks to Update Bedroom Furniture
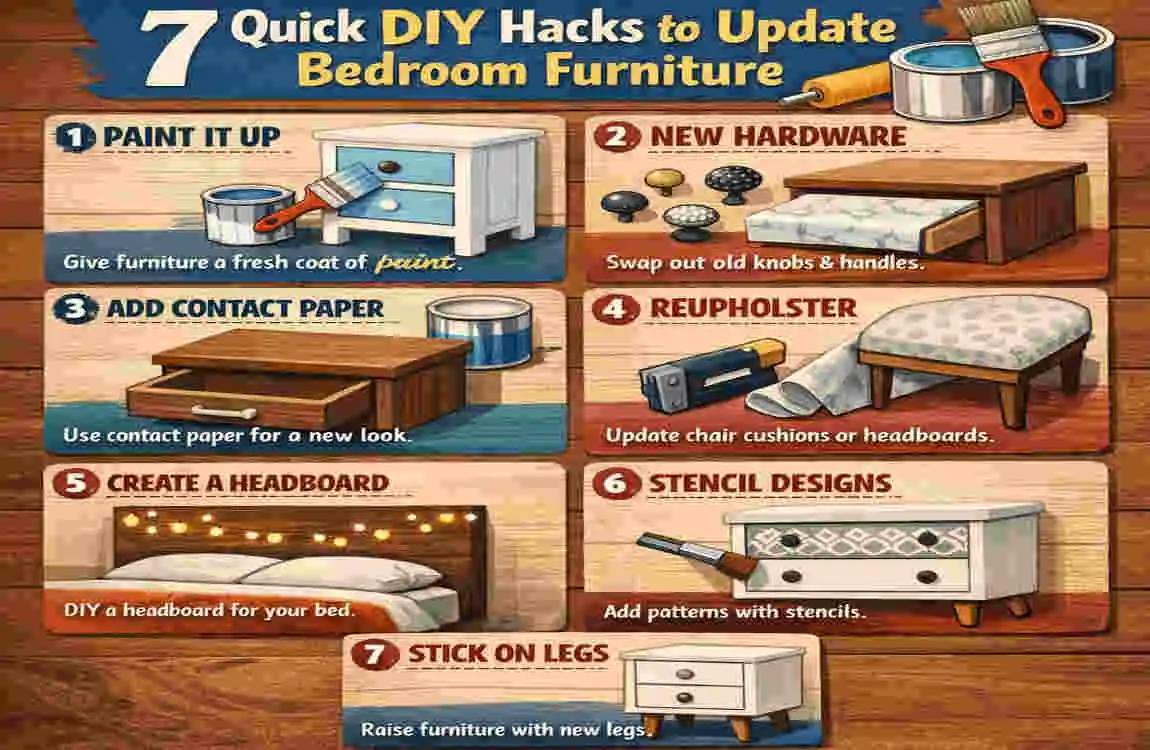
Are you ready to get your hands a little bit dirty? Here is the core of our guide on how to update a bedroom furniture piece. These seven hacks are completely beginner-friendly. Pick just one to try this weekend, or combine a few for a total room transformation!
Hack 1: Paint Your Dresser or Nightstand for an Instant Glow-Up
If you ask any home designer how to update a bedroom furniture piece quickly, they will all tell you the same thing: use paint. A fresh coat of paint is one of the easiest ways to completely erase years of wear, tear, and outdated wood stains.
Whether you have an old, scratched wooden dresser or a basic, boring nightstand, painting it changes its entire personality. You can go for a moody navy blue, a soft sage green, or a crisp, modern white.
How to Do It Step-by-Step:
- Remove the hardware: Take off all the old knobs and handles. Pull the drawers completely out of the frame.
- Sand the surface: Grab your medium-grit sandpaper and gently rub the entire piece. You do not need to strip it to bare wood; scuff up the shiny top coat so the new paint has something to grab onto.
- Wipe it down: Use a damp cloth to wipe away all the dust. Let it dry completely.
- Apply a primer: Paint a thin layer of primer over the furniture. This stops dark wood colors from bleeding through your new paint.
- Paint your color: Once the primer is dry, apply two thin coats of your chosen paint. Using a small foam roller gives you a beautifully smooth finish without brush strokes.
- Seal the deal: If your piece gets a lot of use (like the top of a nightstand), brush on a clear protective topcoat.
- Let it cure: Give it at least 24 hours to dry before putting anything heavy on top.
Variations to Try: If you love a vintage, farmhouse look, try using chalk paint. It requires very little sanding and dries to a beautiful matte finish. If you want something ultra-modern, look for a high-gloss enamel paint.
Swap Out Knobs and Handles for a Custom Look
Sometimes, you do not need to paint a piece of furniture at all. You need a quick hardware update to refresh bedroom furniture. Think of knobs and handles as the jewelry of your furniture. If your dresser is wearing old, tarnished brass handles from the 1990s, the whole piece looks dated.
Swapping out the hardware is incredibly fast. It is perfect if you live in a rental, or if you want a project that takes less than thirty minutes.
How to Do It Step-by-Step:
- Examine the current setup: Look at your drawers. Do you have single knobs with one screw, or handles with two screws?
- Measure carefully: If you have handles with two screws, use a ruler to measure the distance from the center of the first hole to the center of the second hole. This “center-to-center” measurement is crucial so you buy handles that fit the existing holes perfectly!
- Remove the old hardware: Grab your trusty screwdriver and unscrew the old knobs from the inside of the drawer.
- Go shopping: Find budget-friendly pulls. You can find amazing modern matte black bars, elegant crystal knobs, or brushed brass rings online or at your local hardware store.
- Install the new jewelry: Push the new screws through the existing holes from the inside, attach the new knob, and tighten it up.
- Style your piece: Step back and admire how such a tiny change makes the whole dresser look brand new.
Reupholster Your Headboard with Fabric Scraps
The bed is always the main focal point of any bedroom. If your headboard is scratched wood or peeling fake leather, it drags the whole room down. You can completely transform how to update bedroom furniture by giving your headboard a plush, soft makeover.
Reupholstering sounds like a job for a professional, but it is actually just folding and stapling! Adding fabric instantly makes a room feel cozier, warmer, and much more expensive.
How to Do It Step-by-Step:
- Gather your materials: You will need a staple gun, a piece of foam padding (cut to the size of your headboard), batting (a fluffy white material), and your chosen fabric.
- Attach the foam: Lay your headboard flat on the floor. Place the foam over the front. Use a little craft glue to hold it in place.
- Wrap the batting: Lay the fluffy batting over the foam and wrap it tightly around the back of the headboard. Staple it securely to the wood on the back, pulling it taut as you go.
- Place the fabric: Lay your beautiful new fabric face down on the floor. Place the headboard (foam side down) on top of the fabric.
- Staple it tight: Starting in the middle of the top edge, pull the fabric over to the back and staple it. Do the bottom next, then the sides. Think of it exactly like wrapping a tight Christmas present.
- Fold the corners: Neatly fold the corners of the fabric so they lie flat, and staple them down firmly.
- Reattach to the bed: Stand it up and attach it back to your bed frame!
Fabric Ideas: Choose dark velvet for a luxurious, hotel-like feel. If you prefer a clean, minimalist, and airy vibe, choose a light-colored linen or cotton fabric.
Add Decorative Legs to Flat Pieces
Here is a designer secret: furniture that sits completely flat on the floor makes a room look heavy and crowded. Furniture that is lifted off the floor on legs makes a room look spacious, airy, and custom-built.
If you have a chunky, flat-bottomed nightstand, a basic bookshelf, or a boring storage bench, you can turn it into chic furniture just by adding some cool legs. This simple trick elevates (literally and figuratively) basic, cheap furniture into something that looks high-end.
How to Do It Step-by-Step:
- Flip it over: Empty your piece of furniture and carefully lay it upside down on a soft rug or blanket.
- Choose your legs: You can buy pre-made furniture legs online. Hairpin metal legs give a great industrial look, while angled wooden legs give a beautiful Mid-Century Modern vibe.
- Mark your spots: Place the metal mounting plates (that come with the legs) on the four bottom corners of your furniture. Use a pencil to mark where the screws will go.
- Pre-drill holes: Use a drill with a small bit to make shallow holes where your pencil marks are. This stops the wood from splitting when you put the screws in.
- Attach the plates: Screw the mounting plates firmly into the bottom of the furniture.
- Twist on the legs: Screw the new legs into the mounting brackets until they are tight.
- Flip and admire: Turn your furniture right-side up. Make sure it doesn’t wobble, and enjoy the new, elevated look!
Decoupage Drawers with Wallpaper or Maps
If you want a totally unique look but do not want to mess with paint, this budget decoupage hack to update bedroom furniture drawers is perfect for you. Decoupage is basically the art of gluing paper to a surface and sealing it.
You can use leftover wallpaper, wrapping paper, or even vintage maps to line the front of your dresser drawers or the flat top of a small side table. It adds a wonderful pop of pattern and color that you cannot get from a paint can.
How to Do It Step-by-Step:
- Prep the surface: Take the drawers out and remove the knobs. Make sure the front of the drawer is completely clean and dry.
- Measure and cut: Lay your chosen paper over the drawer front. Press along the edges to make a crease, and carefully cut the paper so it perfectly matches the size of the drawer.
- Apply the magic glue: Brush a generous, even layer of Mod Podge (or watered-down white craft glue) all over the wood surface of the drawer.
- Place the paper: Carefully lay your cut paper over the wet glue.
- Smooth the bubbles: Starting from the center and pushing outward to the edges, use an old credit card to gently smooth out any air bubbles or wrinkles in the paper.
- Seal the top: Once the bottom glue is dry, brush another layer of Mod Podge directly over the top of the paper. This seals it, makes it durable, and gives it a nice finish.
- Reattach hardware: Poke the screws back through the paper to reattach your knobs!
Stencil Patterns for Artistic Flair
Do you love the look of expensive, hand-painted bone inlay furniture, but hate the massive price tag? You can recreate that exact look in your own bedroom using simple stencils.
Adding geometric shapes, intricate floral designs, or simple stripes gives your bedroom furniture an incredible artistic flair. It is a fantastic way to tie your room’s color palette together without spending much money at all.
How to Do It Step-by-Step:
- Prep your piece: Make sure your furniture is clean. If it is already painted a base color you like, you are ready to go!
- Secure the stencil: Buy a plastic furniture stencil (or make your own out of thick cardboard). Tape it securely to the flat surface of your furniture using blue painter’s tape so it cannot move.
- Load your brush: Dip a small foam brush or a flat stenciling brush into your contrasting paint color.
- The dry brush trick: Wipe almost all of the paint off your brush onto a paper towel. Your brush should feel almost dry! This is the most important step to prevent paint from bleeding under the stencil.
- Dab, do not swipe: Gently dab the brush up and down over the holes in the stencil. Never swipe side to side.
- Reveal the design: While the paint is still slightly wet, carefully peel up the tape and lift the stencil straight up.
- Repeat: Wait for that section to dry, then line up the stencil on the next section and repeat the process until your pattern is complete.
Create a Gallery Wall Behind Furniture
Sometimes, learning how to update a bedroom furniture piece is not actually about changing the furniture itself! Instead, it is about changing what is happening around it.
If you have a plain, low dresser that feels boring, you can completely frame your update by styling the furniture with wall art. Creating a mini gallery wall directly above and behind a piece of furniture anchors it to the room and draws the eye upward, making the whole setup look incredibly intentional and stylish.
How to Do It Step-by-Step:
- Clear the space: Remove all the clutter from the top of your dresser or nightstand.
- Gather your art: Find budget-friendly art. You can print free digital art from the internet, frame postcards, or frame pages from old botanical books.
- Buy cheap frames: Pick up a few inexpensive frames of different sizes. To make them look cohesive, you can spray paint all the frames the same color (like all gold or all black).
- Plan your layout: Lay all your frames out on the floor. Play around with the arrangement until you find a grouping that looks balanced.
- Hang them up: Hang the art directly over the furniture. Keep the lowest frame about 4 to 6 inches above the top of the dresser to connect the art to the furniture visually.
- Style the top: Add a tall plant on one side of the dresser and a small stack of books on the other.
- Add some glow: For an amazing modern touch, stick affordable LED light strips to the back edge of the dresser to create a soft, glowing backlight against the wall.
Common Mistakes to Avoid When Updating Bedroom Furniture
DIY projects are incredibly fun, but it is easy to get caught up in the excitement and make simple errors. If you want your stunning house refresh to look professional, keep an eye out for these common pitfalls:
- Over-sanding: You do not need to sand furniture down to bare, raw wood unless you are going to use a wood stain. If you are painting, just a light scuffing is enough. Sanding too hard can actually damage wood veneer.
- Skipping the primer: This is the number one mistake beginners make! Primer is the glue that holds your paint to the wood. If you skip it, your beautiful new paint job will chip off the first time you bump it with a vacuum cleaner.
- Ignoring room lighting: A paint color looks totally different in a hardware store than it does in your bedroom. Always test a small patch of color in your room and look at it in morning light and evening light before painting the whole dresser.
- Rushing the drying process: Patience is absolutely key. If a paint can says “dry in 2 hours,” wait 4 hours. If you put heavy items on newly painted furniture too soon, they will stick to the paint and ruin your hard work.
Quick Troubleshooting Fixes:
The Mistake: The Immediate Fix
Paint is dripping or running. Catch it while wet with a light brush stroke. If it is dry, lightly sand the drip away and touch up the paint.
Drawer knobs will not fit. If the screw is too long, add a small metal washer to the back of the screw to tighten the gap.
Fabric looks wrinkled. Pull the staples out of that section with a flathead screwdriver, stretch the fabric much tighter, and re-staple.
Budget Comparison: DIY vs. Buying New

Let us look at the real numbers. The savings you get from doing a little manual labor are truly massive. By choosing to tackle a DIY affordable furniture makeover, you are keeping hundreds, if not thousands, of dollars in your pocket.
Here is a quick look at how much you save by doing it yourself versus going to a retail store to buy basic, entry-level furniture:
Furniture Piece Buying New (Average Retail)DIY Makeover Cost Your Total Savings
Standard Dresser $300 – $500 $30 (Paint + Knobs) $270 to $470
Fabric Headboard $250 – $400 $40 (Fabric + Foam) $210 to $360
Nightstand Set $150 – $250 $20 (Paint + Legs) $130 to $230
By spending just one weekend working on these hacks, you can easily save over $700. You can use that leftover money to buy new bedding, a gorgeous rug, or save it for a rainy day!
FAQs
How much does it cost to update bedroom furniture? The cost is entirely up to you, but it is very affordable! Most basic updates, like painting a nightstand or changing the drawer handles, will cost between $10 and $30. Larger projects, like completely reupholstering a king-sized headboard, might cost between $40 and $60 for the fabric and foam. Overall, you can easily revamp an entire bedroom set for under $100.
What paint is best for DIY furniture updates? For beginners, chalk paint is highly recommended because it requires very little sanding or prep work, and it leaves a beautiful matte finish. If you want something highly durable and easy to wipe clean (like for a makeup vanity), choose an interior water-based enamel or a high-quality acrylic paint with a satin finish.
Can absolute beginners try these hacks? Yes, absolutely! Every single hack on this list was chosen because it does not require prior carpentry experience. If you know how to hold a paintbrush or turn a screwdriver, you can successfully complete these projects. Remember to take your time and follow the step-by-step instructions.
How to update bedroom furniture without any tools? If you do not own tools and do not want to buy any, you can still transform your space! Try Hack 5 (Decoupage) using just paper and craft glue. You can also use temporary peel-and-stick wallpaper on the flat fronts of your dressers. Finally, simply placing a beautiful runner cloth over a scratched dresser top hides the damage instantly without a single tool.
Are these hacks renter-friendly? Many of them are! If you rent a furnished apartment and cannot paint the landlord’s furniture, stick to reversible hacks. You can easily unscrew the existing drawer knobs, store them safely in a bag, and put your own stylish knobs on. When you move out, swap the old ones back in! Creating a gallery wall with adhesive command strips (Hack 7) is also a perfect, damage-free way to upgrade your rented space.