

The importance of adequately trimming around windows
Proper window trim is like the finishing touch on a masterpiece painting – it completes the look and ties everything together seamlessly. Without well-executed trim, windows can appear unfinished and lackluster. Trim serves both aesthetic and functional purposes, enhancing the visual appeal of your space while also concealing gaps and providing a clean transition between the window frame and wall.
Tools and materials needed for the job
When it comes to trimming around a window, having the right tools and materials is essential to achieving a professional-looking finish.
Measuring tape:
Accurate measurements are crucial in ensuring the trim fits appropriately around the window.
Miter saw:
This tool will help you make precise cuts at the angles needed for clean corners.
Trim pieces:
Choose trim that complements your décor and fits the style of your home.
Hammer and nails:
Secure the trim in place with these essential tools.
Caulk and wood filler:
Fill any gaps or holes for a seamless appearance once painted.
Sandpaper:
Smooth out rough edges before painting or staining for a polished look.
Having these tools on hand will make the process of cutting trim around your windows much smoother and more efficient, resulting in a top-notch end result!
Process to cutting trim around a window
Trimming around windows can instantly elevate a room’s look, adding a touch of elegance and sophistication. To achieve this professional finish, it’s essential to master the process of cutting trim around a window.
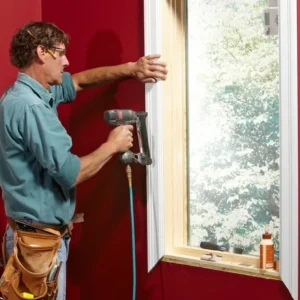
Start by measuring the length needed for each piece of trim accurately. Remember the old carpenter’s adage – measure twice, cut once! Next, use a miter saw to make precise 45-degree cuts at each corner for seamless joints.
Before attaching the trim with finishing nails, ensure that it fits snugly against the window frame. A bead of caulk along the edges will not only secure it in place but also provide a clean seal.
Once all pieces are securely attached, fill any gaps or nail holes with wood filler for a seamless appearance. Sand down any rough edges before painting or staining to match your interior decor.
Mastering the process of cutting trim around windows takes practice and attention to detail, but the end result is well worth it!
Tips for achieving a professional-looking finish
Attention to detail is key to achieving a professional-looking finish when cutting trim around a window. Start by measuring twice and cutting once—accuracy is crucial in creating clean lines and seamless corners.
Consider using a miter saw for precise angle cuts, ensuring that your trim fits together seamlessly for a polished look. Sand down any rough edges or imperfections before painting or staining to achieve a smooth surface.
To enhance the final appearance, caulk any gaps between the trim and the wall to create a seamless transition. Additionally, painting or staining the trim after installation can help achieve a cohesive look that ties the entire room together.
Don’t rush the process – take your time to ensure each cut is perfect and every detail is attended to. With patience and precision, you can transform your windows with beautifully trimmed frames that elevate the overall aesthetic of your space.
Conclusion
In wrapping up, properly trimming around a window is essential for enhancing the overall look of your space. By following the outlined process and utilizing the right tools and materials, you can achieve a professional finish that adds charm to your home. Remember to take your time, measure accurately, and use precision when cutting trim for a seamless result. With these tips in mind, you’ll be well on your way to creating beautifully trimmed windows that elevate the aesthetic appeal of any room.


