Removing screens from crank-out windows can be straightforward when approached with the right tools and techniques. With proper handling tips in mind, you’ll find that removing screens doesn’t have to be cumbersome. Regular cleaning and maintenance of your screens and windows will enhance their longevity and maintain the beauty of your home. The benefits of removing screens extend beyond aesthetics; they improve airflow during warmer months while allowing you to inspect and clean your window frames more easily. By taking this simple step, you’re enhancing both functionality and appearance. Taking time to familiarize yourself with the structure of your crankout windows will empower you as a homeowner. Whether for seasonal changes or routine upkeep, knowing how to manage screen removal is an invaluable skill that pays off over time.
Understanding Crank-Out Windows

Crank-out or casement windows are hinged on one side and open outward with a simple crank mechanism. A great deal of ventilation is provided by this design, and the view is unobstructed. They can be found in various styles, enhancing modern and traditional homes.
One of the main advantages of these windows is their ability to capture breezes from different angles. When cranked open fully, they create a flow of air that can cool your space effectively. Crank-out windows often feature tighter seals compared to traditional sliding ones when closed. This means better energy efficiency throughout the year.
Tools Needed for Screen Removal
You’ll need a few essential tools to remove screens from crank-out windows.
First on the list is a flathead screwdriver. This handy tool helps pry off any clips or fasteners holding the screen in place. A pair of pliers can be useful, too, for gripping stubborn parts.
Make sure you have a soft cloth or sponge on hand. After removing the screens, you’ll want to clean up any debris left behind without scratching your window frames.
A small vacuum with an attachment can also come in handy for clearing away dust and dirt around the window area before and after removal.
Wear gloves to protect your hands while handling screens with sharp edges or buildup from weather exposure. With these tools, you’re set to tackle screen removal effectively.
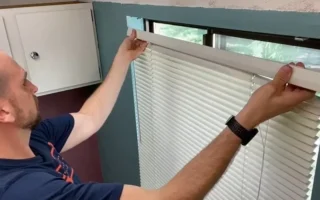
Step-by-Step Guide to Removing Screens

Start by identifying the type of screen on your crank-out window. Some screens have clips, while others may slide or hinge. Knowing this will make removal easier.
Ensure that the window is fully opened to provide clear access to the screen. If there are any obstructions in your way, make sure they are removed.
If you have a clip-style screen, gently pull back on the clips and lift the screen away from its frame. Be careful not to use excessive force; it should come off with minimal effort.
For sliding screens, push them sideways until they disengage from their track. If hinges are involved, locate any screws or fasteners holding them in place and remove those first before lifting away.
Tips for Handling Screens
When handling screens, it’s essential to be gentle. Screens can bend or warp easily if mishandled. Always support the frame with both hands when removing or reinstalling.
Keep a clean workspace. Dust and debris can scratch the screen surface during removal. Lay down a soft cloth to protect your screens while you work.
Avoid using excessive force. If a screen feels stuck, check for any clips or fasteners that may need loosening first.
If possible, wear gloves. This prevents fingerprints from being on the mesh and keeps oils from your skin off the material.
Label each screen if you’re removing multiple at once. This will help ensure they return to their correct frames without confusion later.
Cleaning and Maintenance of Screens

Cleaning screens is essential for maintaining their functionality and appearance. Dust, pollen, and grime can accumulate quickly. Regular cleaning ensures that your windows remain unobstructed.
Start by removing the screen carefully to avoid bending or damaging it. A gentle rinse with water often does wonders. For tougher stains, a mild soap solution works well without causing harm to the screen material.
Use a soft brush or cloth to scrub away dirt gently. You should avoid using abrasive materials as they may scratch the surface. Rinse thoroughly afterward; any soap residue can attract more dirt.
Inspect your screens while cleaning for any signs of wear or damage. Catching issues early can save you time and expenses later on.
Once cleaned, allow them to dry completely before reinstalling them in your windows. In this way, moisture buildup is prevented, which could eventually lead to mold growth.
Benefits of Removing Screens from Crank-Out Windows
Removing screens from crank-out windows can significantly enhance your views. Without those barriers, you can fully appreciate the beauty of your surroundings. Natural light floods in more freely, brightening up your space.
An advantage is improved airflow. Screens can restrict the flow of fresh air, especially if they’re dirty or damaged. Removing them allows for better ventilation and a refreshing breeze throughout your home.
It also simplifies cleaning tasks. Windows without screens are easier to wipe down and maintain. You won’t have to deal with dust or debris caught in the screen mesh. Removing screens reduces wear on window mechanisms over time. This means fewer repairs and potentially longer-lasting windows.