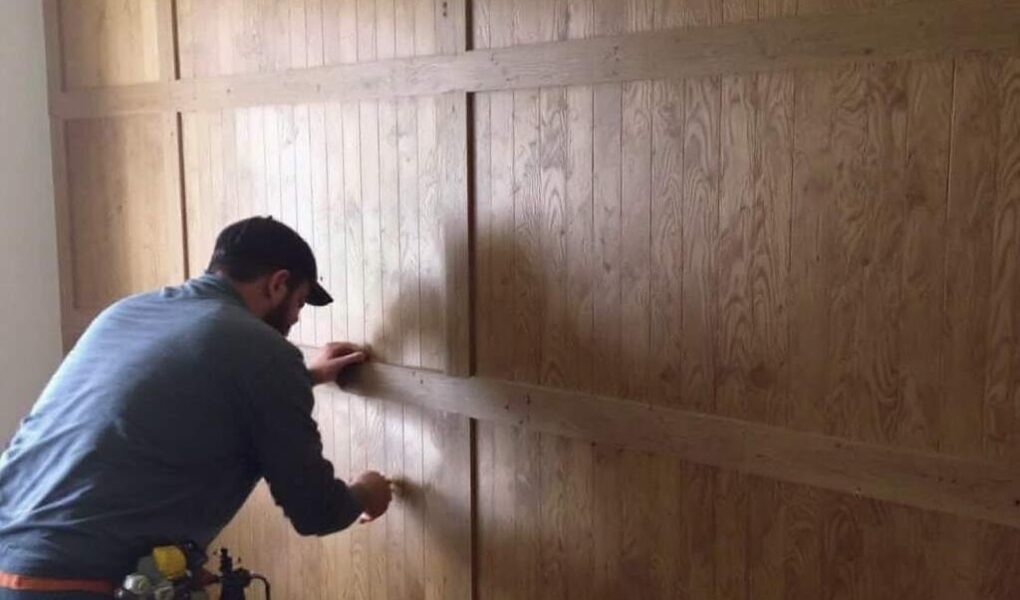
Looking to add a touch of style to your interiors without a major renovation? Wall panelling could be just what you need. This timeless design choice has made a serious comeback, offering a way to transform bare walls into a standout feature. Whether you’re aiming for a rustic vibe, sleek modernity, or something classically elegant, wall panelling is versatile enough to match your vision. Even better, you don’t have to call in the professionals—this is a project you can tackle yourself with a bit of preparation and patience.
Why Choose Wall Panelling?
A Stylish Upgrade
Wall panelling is a game-changer when it comes to interior design. It takes flat, uninspired walls and gives them depth, texture, and personality. Whether you’re going for a cosy, traditional feel or something clean and contemporary, there’s a panelling style to suit every taste.
Practical Benefits
Beyond the aesthetics, wall panelling brings a host of practical advantages. It protects your walls from knocks and scratches, adds a layer of insulation to help keep your home warm, and even helps dampen noise. For busy households or those looking to create a tranquil retreat, it’s a smart choice.
A Style for Every Room
From the crisp lines of board and batten to the relaxed charm of shiplap, wall panelling offers endless design possibilities. Whether you want a bold feature wall or a subtle backdrop, it’s an incredibly adaptable option that can complement any interior scheme.
Exploring the Different Styles of Wall Panelling
- Wainscoting: A classic choice, wainscoting adds a refined touch to any room. Typically covering the lower portion of walls, it’s ideal for dining rooms, hallways, or spaces where elegance is key.
- Shiplap: With its horizontal planks, shiplap creates a relaxed, rustic feel. It’s perfect for bedrooms, living rooms, or any space that needs a bit of warmth and charm.
- Board and Batten: This vertically structured design is great for creating a sense of height, making it a popular choice for smaller rooms or those with low ceilings.
- Raised Panels and Beadboard: Raised panels offer a traditional, formal look, while beadboard is more relaxed and cottage-like, often used in kitchens and bathrooms.
Choosing the Right Materials
- MDF (Medium Density Fibreboard): Affordable, easy to work with, and beginner-friendly, MDF is a popular choice for many DIY enthusiasts.
- Real Wood: If you’re looking for something authentic and high-quality, natural wood adds warmth and depth. It’s pricier but makes a stunning feature.
- PVC or Vinyl: These moisture-resistant materials are ideal for bathrooms or kitchens, offering durability and easy maintenance.
- Gypsum: Lightweight and decorative, gypsum panels are a great option for intricate or creative designs.
Essential Tools and Materials
Before you dive into your project, make sure you have everything you’ll need:
Tools:
- Measuring tape
- Level
- Fine-toothed saw
- Drill
- Safety goggles and gloves
Materials:
- Wall panels
- Adhesive
- Nails or screws
- Caulk
- Primer and paint (if the panels aren’t pre-finished)
Double-checking your tools and materials beforehand will save you a lot of frustration later on.
Step-by-Step Guide to Installing Wall Panelling
1. Plan and Measure
Start by measuring your walls carefully, taking note of any doorways, windows, or trims. Use masking tape or a laser level to outline where the panels will go. This initial planning step is crucial for a seamless finish.
2. Prepare the Walls
Clean the walls thoroughly and fill any cracks or holes with spackle. Once dry, sand the surface for a smooth finish. Apply a coat of primer to help the adhesive stick better. If the walls are uneven, consider attaching furring strips for added stability.
3. Cut the Panels
“Measure twice, cut once” is the golden rule here. Use a fine-toothed saw to ensure smooth edges, and take your time—precision is key.
4. Attach the Panels
Apply adhesive to the back of each panel in a zigzag pattern, then press it firmly against the wall. For extra security, use nails or screws to fasten the panel into the wall studs.
5. Cut Around Fixtures
For outlets, light switches, or any other fixtures, use a jigsaw to make precise cutouts. This part can be fiddly, so don’t rush. If in doubt, seek advice or assistance.
6. Add Trim and Finish
Once all the panels are in place, add trim or moulding to the edges for a polished look. Use caulk to fill any gaps, then sand and paint as needed for a professional finish.
Styling and Maintenance Tips
- Accent Walls: Create a striking focal point by painting your panels a bold colour or choosing a textured design.
- Tailored Looks: Different rooms call for different styles. Opt for beadboard in bathrooms for a fresh, classic feel or use shiplap in a cosy living room.
- Care and Maintenance: Keep your panelling looking its best with regular cleaning using a soft cloth and mild detergent. For scratches or scuffs, touch up with matching paint or stain.
Expert Tips for a Flawless Finish
- Leave Expansion Gaps: If you’re using natural wood, leave tiny gaps to accommodate natural expansion and contraction over time.
- Pre-Paint Panels: Painting or staining the panels before installation ensures an even finish and simplifies touch-ups.
- Invest in a Laser Level: This tool will make your life much easier by helping you achieve perfectly straight lines.
Final Thoughts
Wall panelling is one of the most effective ways to elevate your home’s interiors, combining style and functionality in equal measure. Whether you love the clean lines of board and batten, the timeless elegance of wainscoting, or the relaxed feel of shiplap, there’s a style for everyone. With careful planning and a little patience, you can achieve a professional look that transforms your space. And if DIY isn’t for you, there’s no shame in calling in an expert to bring your vision to life.


