Are you sick of staring out of a drab, outdated window? Perhaps it’s time for an update! Although it may seem like a difficult task, removing a window is manageable with the right equipment and expertise. Knowing how to remove a window correctly is crucial, whether you’re planning a renovation project or just trying to freshen up your house. Let’s explore the detailed procedure and pointers to assist you in beginning this thrilling journey towards more airy and brighter spaces!
The importance of properly removing a window
Removing a window may seem like a simple task, but doing it properly is crucial for a successful outcome. Ensuring that the window is removed correctly helps prevent damage to the surrounding wall and frame. It also allows for a smooth transition when installing a new window or making repairs.
Proper removal of a window can also help maintain the structural integrity of your home. By taking the time to follow the correct steps, you can avoid potential issues such as water leakage or drafts in the future.
Tools and materials needed for window removal

Are you ready to tackle the task of removing your window? Before you dive in, it’s crucial to gather all the necessary tools and materials. Here’s what you’ll need:
First up, grab a utility knife to cut through any caulking or sealant holding the window in place. A pry bar will come in handy for gently loosening the window frame from the wall without causing damage.
Next, ensure you have a screwdriver on hand to remove any screws securing the window frame. A hammer can help with tapping out stubborn nails or frames that are stuck.
Don’t forget about protective gear! Safety goggles and gloves are essential to keep yourself safe during the removal process. Additionally, a dust mask can protect your lungs from inhaling debris.
Step-by-step guide to removing a window
Removing a window may seem like a daunting task, but with the right tools and know-how, it can be done efficiently. Here is a step-by-step guide to help you through the process.
Remove any blinds or curtains from the windows. This will give you easy access to the window and prevent anything from getting in your way.
Next, carefully remove the trim around the window using a pry bar. Avoid damaging the surrounding wall by being gentle.
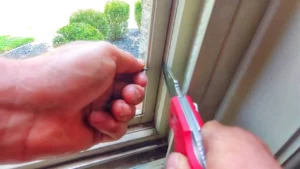
Once the trim is off, use a utility knife to cut through any caulk or paint sealing the window frame to the wall. This will make it easier to detach the window later on.
Now, depending on your type of window, you may need to unscrew or unlock it from its frame before gently pushing it outwards. Have someone assist you if needed for larger windows.
Lift out the old window and set it aside for disposal while making sure not to damage your flooring or walls in the process.
By following these steps diligently, you’ll have successfully removed your old window and prepared yourself for installing a new one effortlessly!
Tips for safely disposing of old windows
When it comes to safely disposing of old windows, there are a few key tips to keep in mind. First and foremost, make sure to remove any remaining hardware or glass from the window frame before disposal. This will help prevent accidents during handling and transportation.
Next, consider recycling your old window if possible. Many municipalities have programs in place for recycling windows and other construction materials. Not only is this environmentally friendly, but it can also save you money on disposal fees.
If recycling isn’t an option, be sure to handle the window with care when moving it to avoid breakage or injury. Consider using gloves and protective eyewear to protect yourself during the process.
Check with your local waste management facility for guidelines on how to properly dispose of windows. Some areas may require special arrangements for large items like windows, so it’s important to follow their recommendations for safe and responsible disposal.
Conclusion
Removing a window may seem like a daunting task, but with the right tools and knowledge, it can be done efficiently and safely. By following the step-by-step guide outlined above and ensuring you have the necessary materials on hand, you can successfully remove your window without any hassle.
By taking the time to remove your window correctly, you not only enhance the aesthetics of your home but also ensure that the job is done right the first time. So roll up your sleeves, gather your tools, and get ready to give your space a fresh new look by removing that old window!


